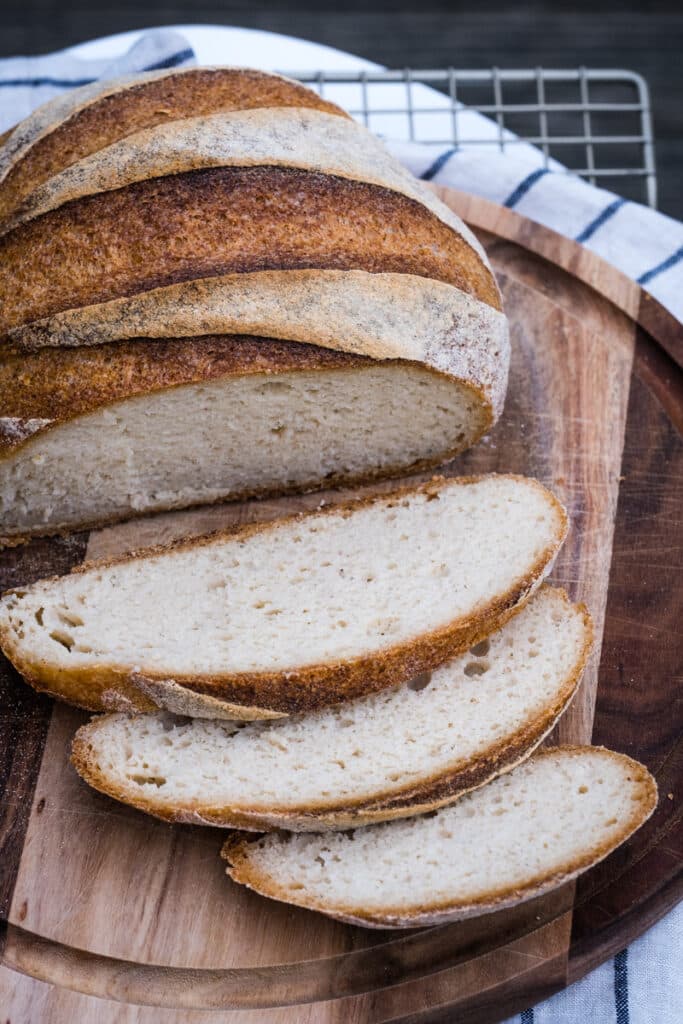
In this post, you will learn how to make a lectin-free and gluten-free sourdough starter with a mix of millet, teff, sorghum flour, and homemade yeast water made of fruits. After you make this starter, you will be able to use it to make lectin-free and gluten-free sourdough bread loaves, pizza, flatbread, focaccia, and more.
Introduction to Gluten-Free and Lectin-Free Sourdough Starter
At its heart, a sourdough culture is a fascinating ecosystem of bacteria and wild yeast, born from the combination of water and flour.
This method has been the backbone of bread making for centuries, celebrated for its natural way of enhancing the digestibility and nutritional value of grains.
Richard Bourdon, an expert in the sourdough world, emphasizes how this process not only makes grains healthier by breaking down hard-to-digest elements like carbohydrates, gluten, and lectins, but also unlocks essential minerals and makes them more bio-available.
Diving into sourdough making might seem a bit overwhelming at first, but it’s really quite doable and incredibly rewarding. It’s a slow art that melds patience with a dash of home-cooking passion, perfect for those who love to explore the depths of artisan bread making.
Michael Pollan, in his eye-opening documentary “Cooked,” specifically in the episode titled “AIR,” sheds light on the beauty of sourdough, reminding us that while bread making takes effort, it’s something anyone can master with a bit of practice and intuition.
If you are new to making lectin-free and gluten-free sourdough, I recommend you also check The Beginner’s Guide to Baking Gluten-Free Sourdough for an overview of the entire process.
Gluten-Free Sourdough Ebook
If you’d like to master gluten-free sourdough with clarity and confidence, my ebook Raising a Gluten-Free Sourdough Loaf brings the entire method together in one structured, cohesive guide.
While many of the elements are shared across my website, this book organizes everything into a clear progression — from building a strong, resilient starter to mastering the core method you can apply to artisan loaves, sandwich bread, bagels, pizza, and more. No searching between posts — just one complete roadmap supported by original visuals and 15 thoughtfully sequenced recipes across 130+ pages.

Choosing Your Flours
When it comes to baking lectin-free and gluten-free sourdough bread, picking the right flour is crucial.
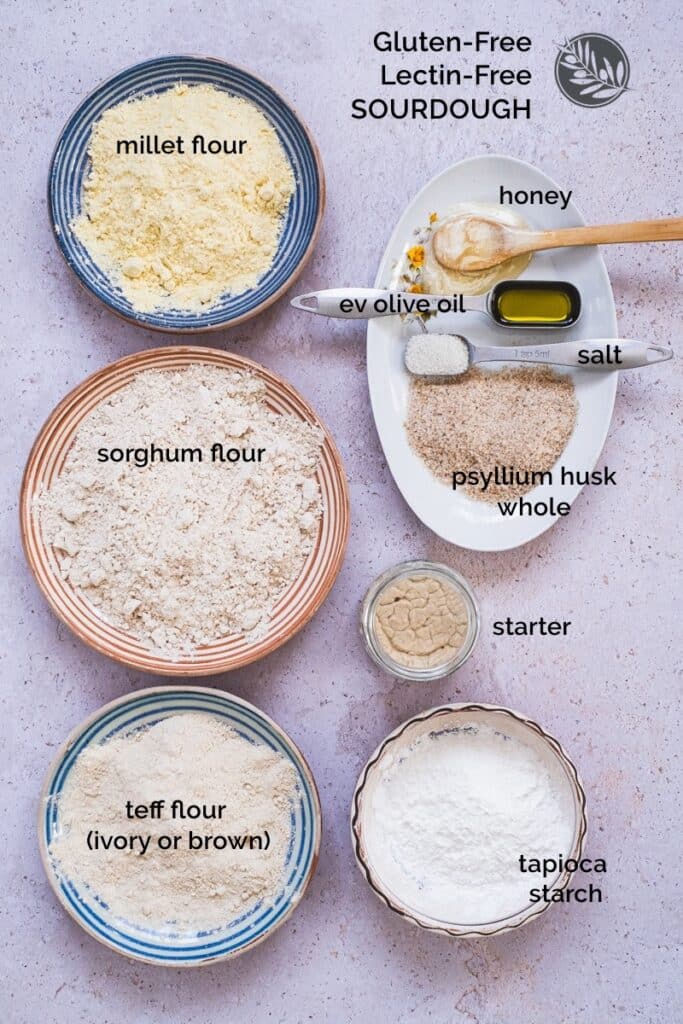
For our starter, we’re going with a trio of favorite gluten-free grains: millet, teff, and sorghum. These flours are not just free from gluten and lectins; they also bring a variety of flavors and textures to your bread, making your sourdough adventures even more exciting.
Unlike many gluten-free recipes that rely heavily on rice, corn, or buckwheat flour, we’re focusing on millet, sorghum, and teff for a more balanced and health-conscious approach.
While a mix of these three flours will be used as a feeding flour for your starter, they can be used individually or mixed in bread making, setting the stage for truly delicious lectin-free sourdough bread and infinite possibilities for creating recipes.
Instead of using plain water to create our starter, we’ll be incorporating homemade wild yeast water or fermented fruit water into our flour mix, adding an extra layer of flavor and fermentation magic to our starter.
Based on what I can find on Amazon, which many of you have access to, I can recommend the below brands of flour, but I haven’t worked with them. You can, of course, source them locally if you find them. These are some of the organic ones I found on Amazon:
- Arrowhead Mills Flour Millet Organic, 23 oz, 1.43 Pound (Pack of 1)
- Bob’s Red Mill Teff Flour, 20 Oz (Pack of 1)
- Naturevibe Botanicals Organic Sorghum Flour, 2lbs | Used for cooking (32 ounces)
I also found this option for organic dark teff flour (the one above is a lighter teff):
So, let’s get started and bring the tradition of sourdough baking into our gluten-free and lectin-free kitchens!
Check out our Ultimate Gluten-Free Sourdough Tools Guide for a complete list of ingredients and tools we use in our lectin-free and gluten-free sourdough method.
Ingredients and Tools to Make a Lectin-Free and Gluten-Free Sourdough Starter
STEP 1: CREATE THE YEAST WATER
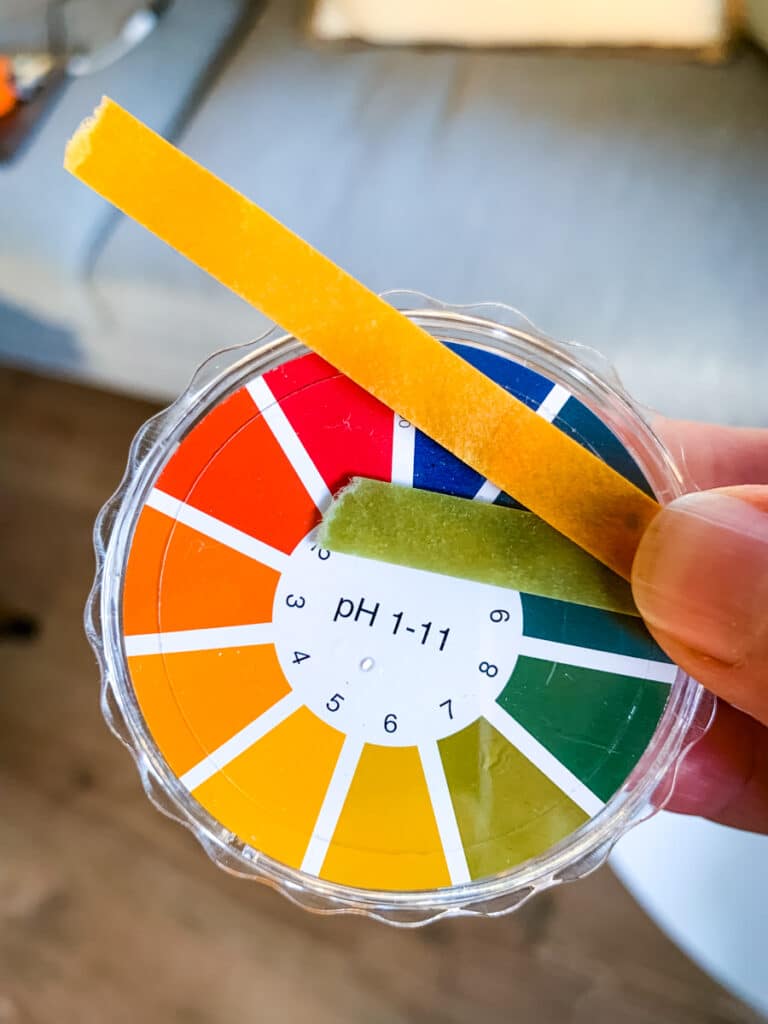
Tools needed: 34oz mason jar with a tight lid, wooden or glass spoon/stick to stir, PH strips, patience
- 1/2 cup organic blueberries
- 1 small organic apple
- 1-2 tablespoons organic, sugar-free dried fruits (dates or dried aronia berries are perfect; in my starter, I used the aronia berries).
- Filtered, spring, or bottled water (avoid chlorine, fluoride, reverse osmosis, or tap water)
STEP 2: PRIMARY SOURDOUGH MIX
Tools needed: a glass jar with a plastic or glass lid that can hold about 400g of content, a wooden or silicon spoon, and a weighing scale.
- 100 grams flour mix (33g teff, 33g millet, 34g sorghum)
- 100g yeast water (measured in grams)
STEP 3: SOURDOUGH STARTER
Tools needed: a small jar with a glass lid that can hold about 200-250g of content, a spoon or a spatula to mix with; a normal stainless steel spoon can be used.
- 10g of the Primary Mix (after 24 hours)
- 30g water, up to 35g is needed (filtered, chlorine-free; avoid reverse osmosis water)
- 35g flour mix (equal parts teff, sorghum, and millet)

Step By Step Instructions for Making Gluten-Free Sourdough Starter with Wild Yeast Water
STEP 1: CREATE THE YEAST WATER
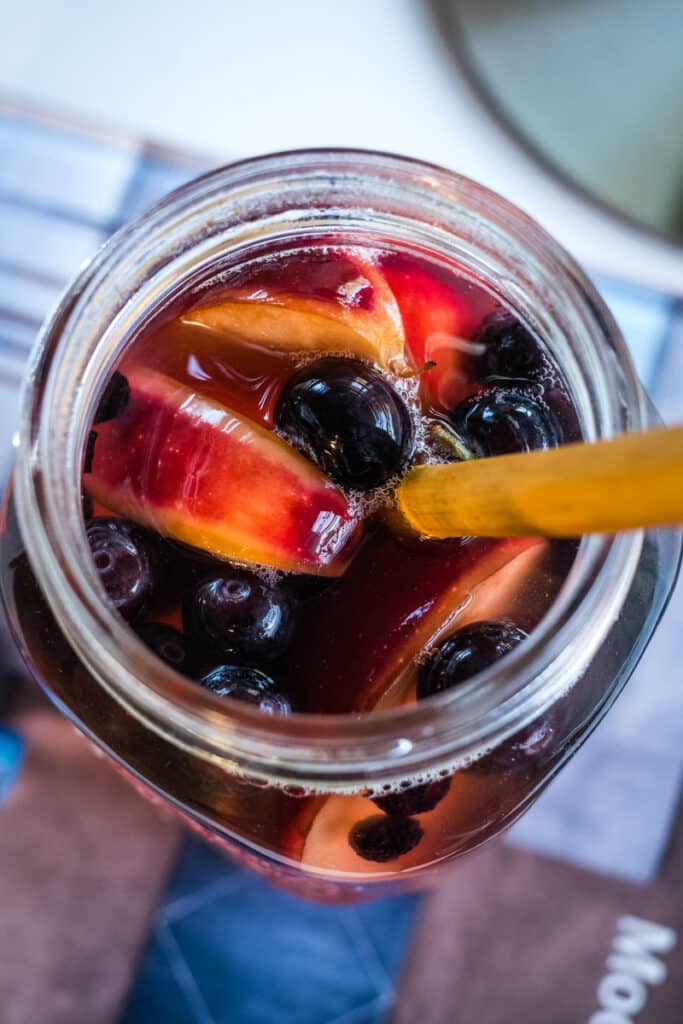
Prepare the Fruits: Gently rinse the blueberries and apple with filtered water, to preserve the wild yeast on the fruits. Cut the apple into wedges without removing the skin or core. Make sure the dry fruits are organic, with no other ingredients added, and from a freshly opened pack or bag. It’s also very important to check the fruits for mold spots.
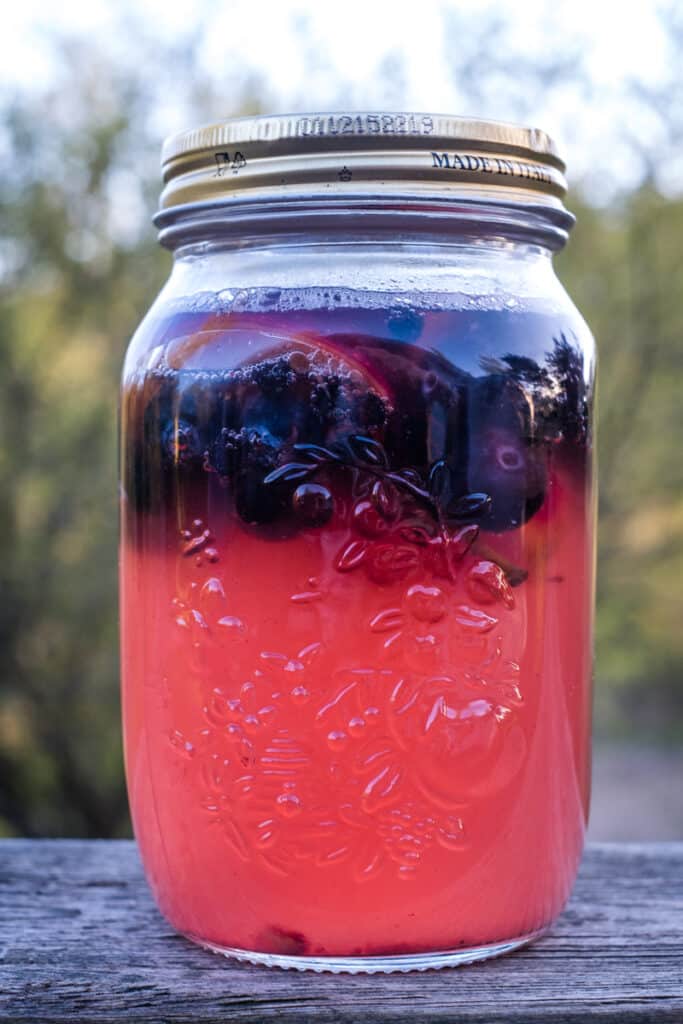
Ferment: Place the fruits in a jar and cover with water, leaving an inch of space at the top. Seal tightly and keep at room temperature (but in a slightly warm place) for 24 hours, then stir twice daily for up to 5 days. On the 5th or 6th day, measure the PH. When bubbles form, and the pH is below 6, the yeast water is ready. Strain and store in the fridge until use.
STEP 2: CREATE THE PRIMARY SOURDOUGH MIX
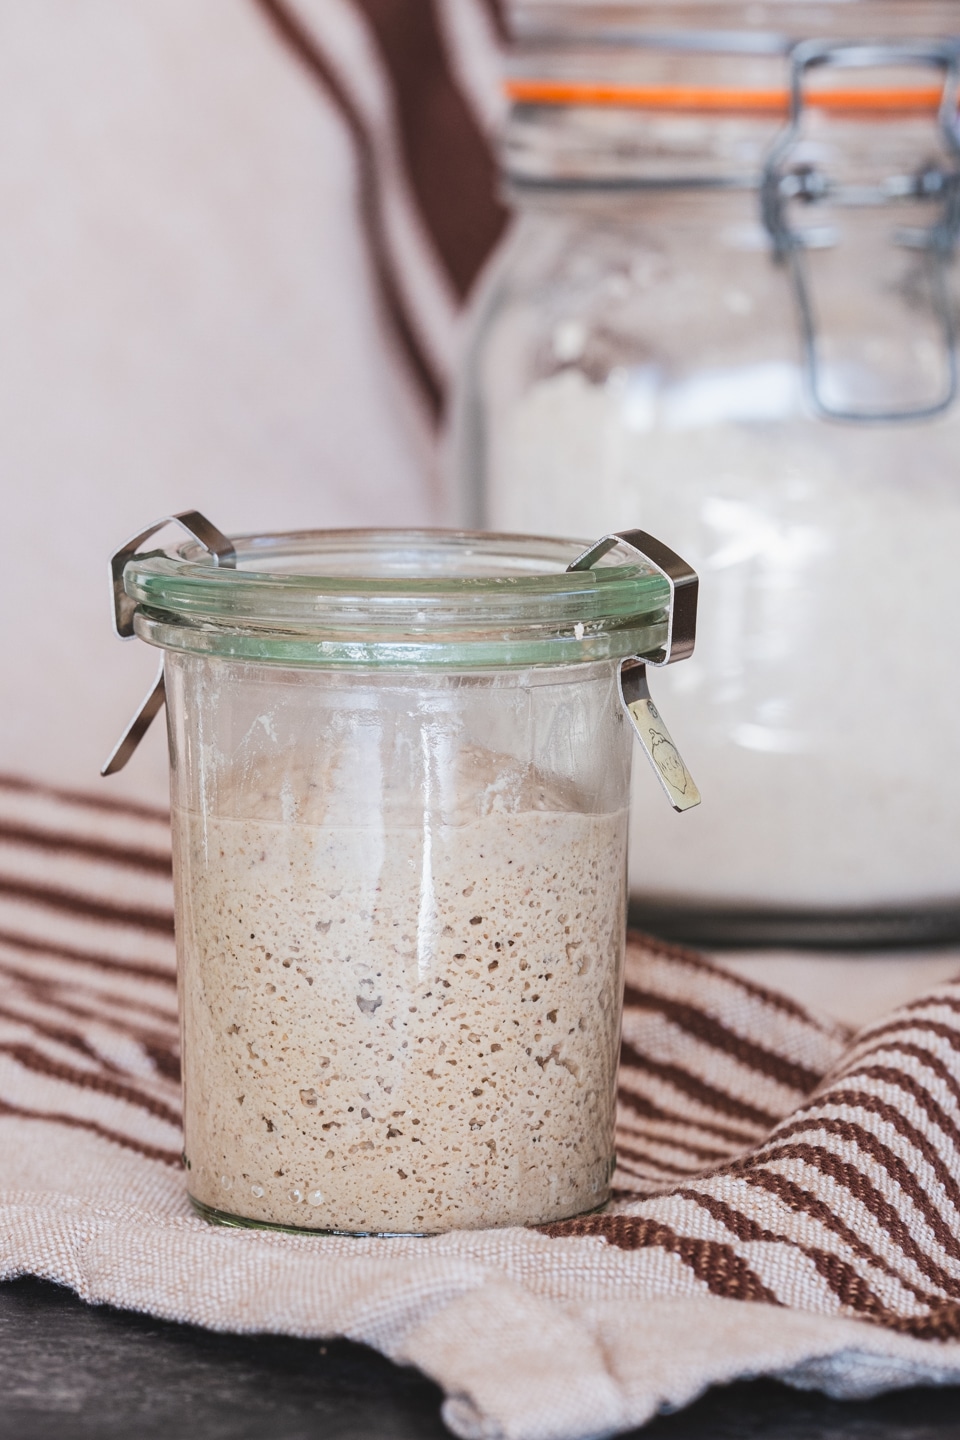
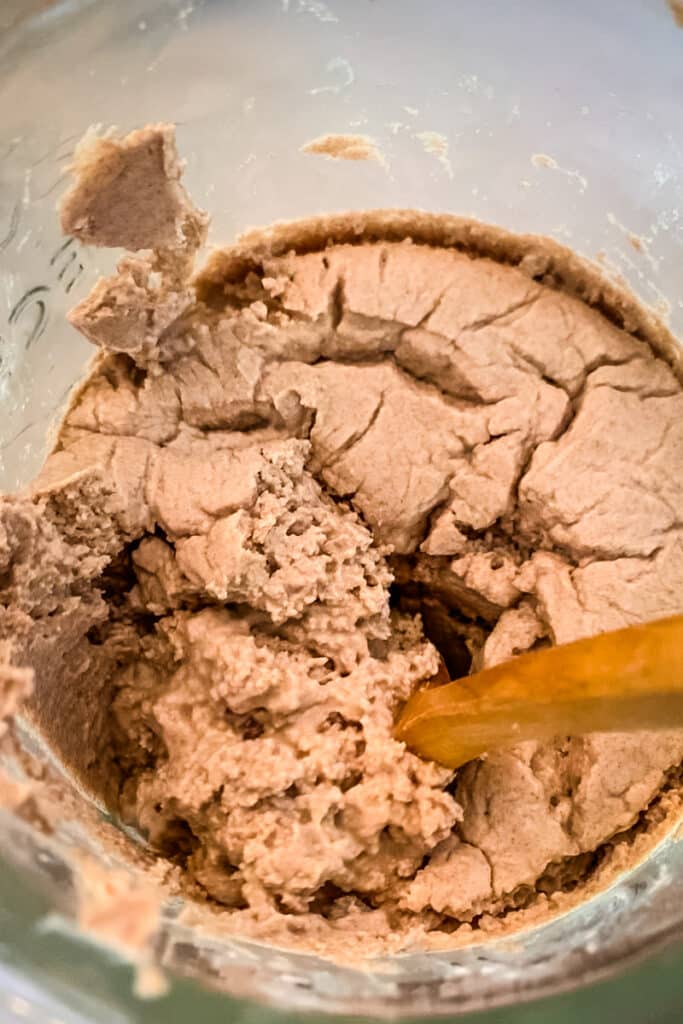
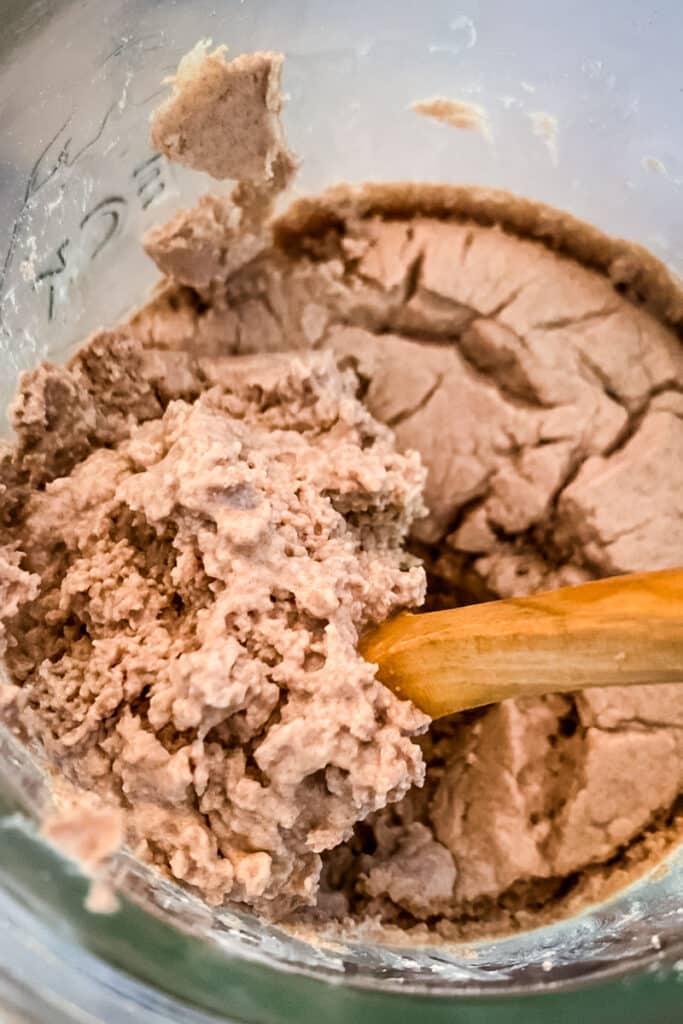
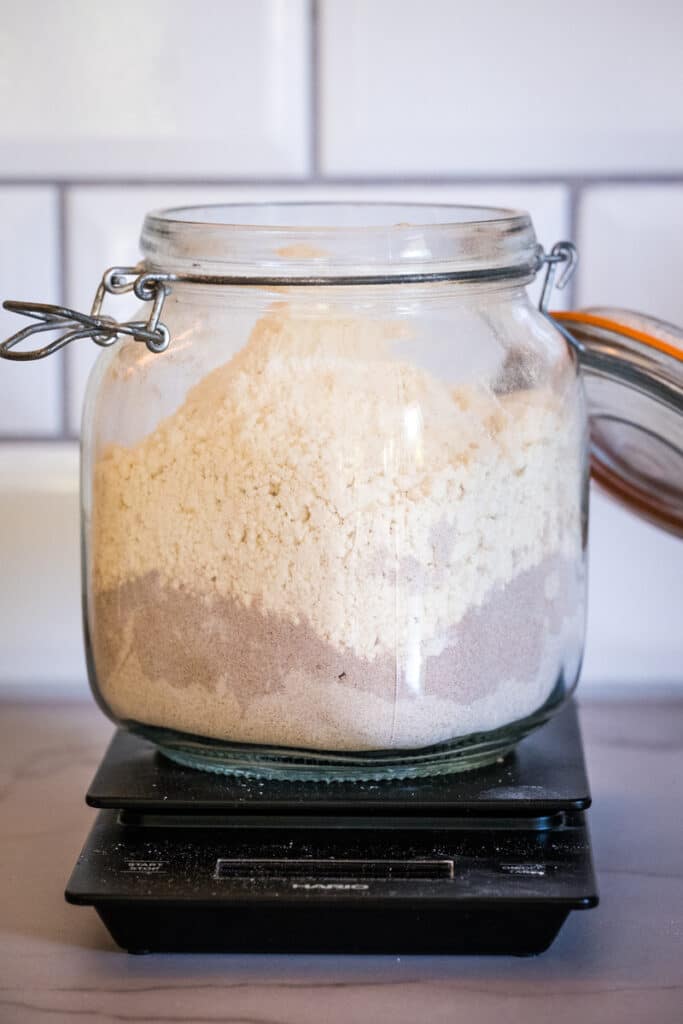
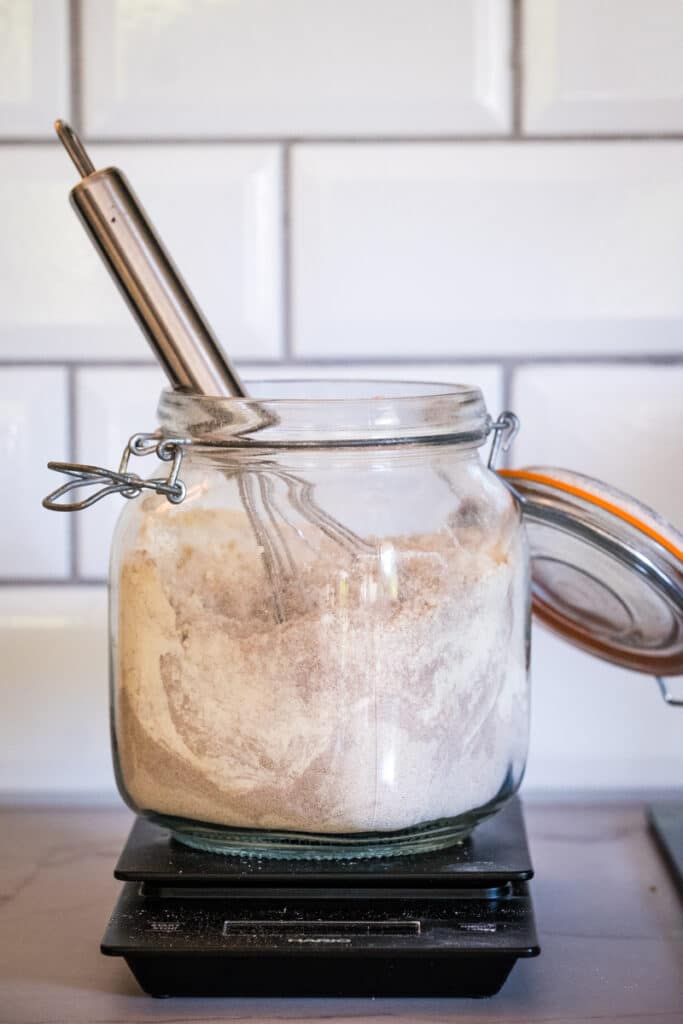
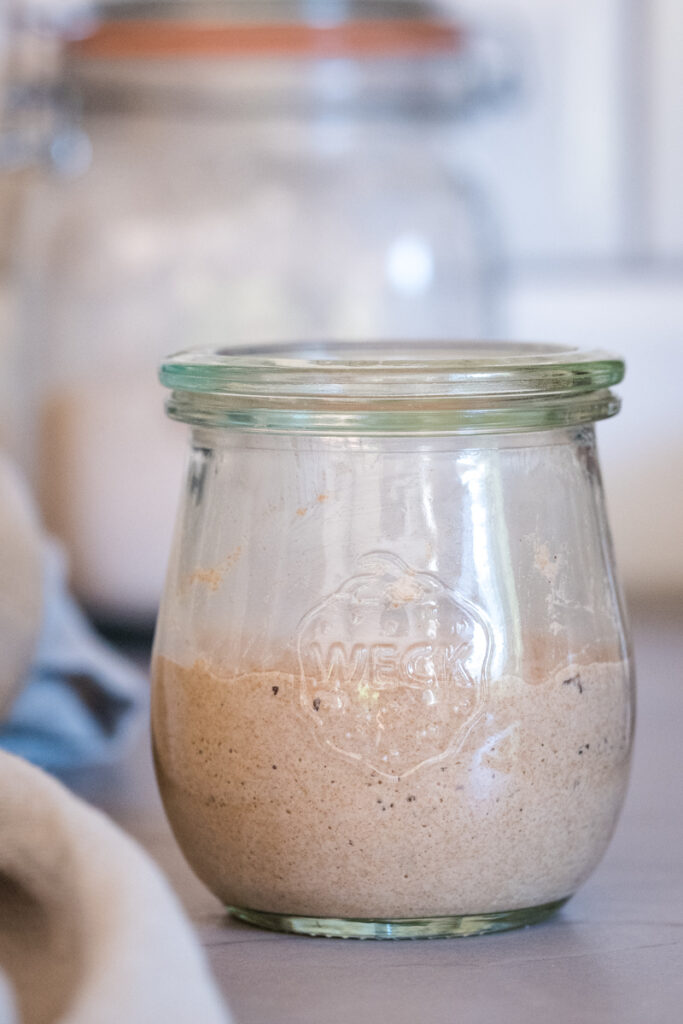
Mix: In a clean jar with a glass lid (mine was bigger, but you need one about 16oz), combine 100g of the flour blend with 100g of yeast water. Stir until a well-hydrated paste forms, adjusting with a little more water if necessary to ensure no dry spots remain. Cover with the glass lid and let it sit at room temperature for 24 hours, looking for signs of activity such as bubbles. After 24 hours, there will be cracks on top, and the texture of the paste will be airy. It might double in size, but that’s not always the case.

STEP 3: CREATE THE SOURDOUGH STARTER
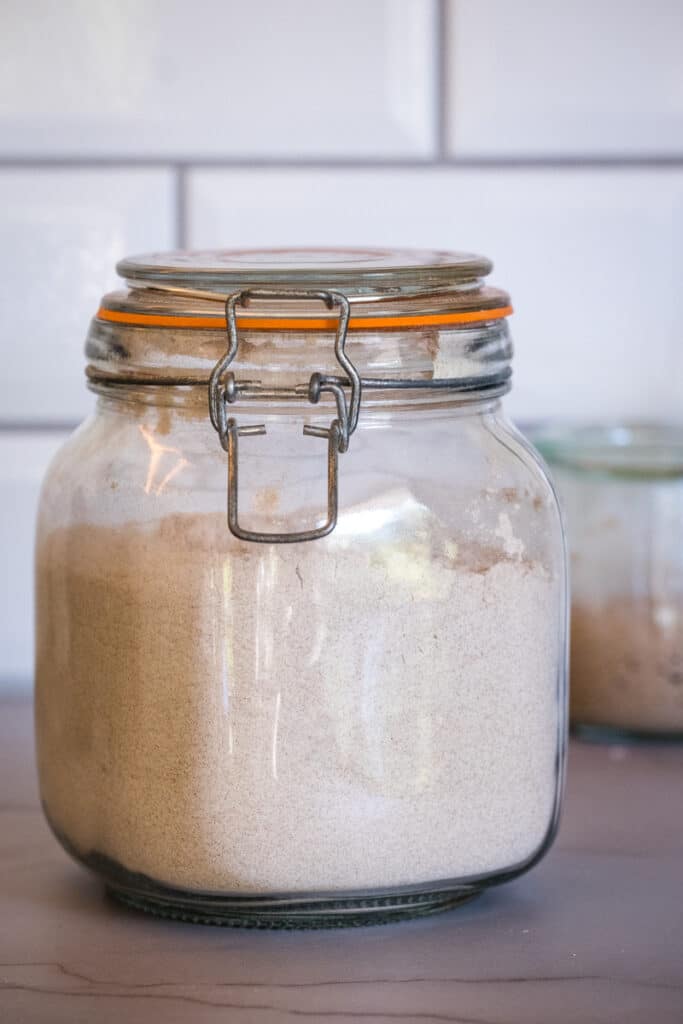
Prepare Feeding Flour Mix: Mix equal parts teff, sorghum, and millet flours and store it in a flour jar. Use this blend for feeding your starter.
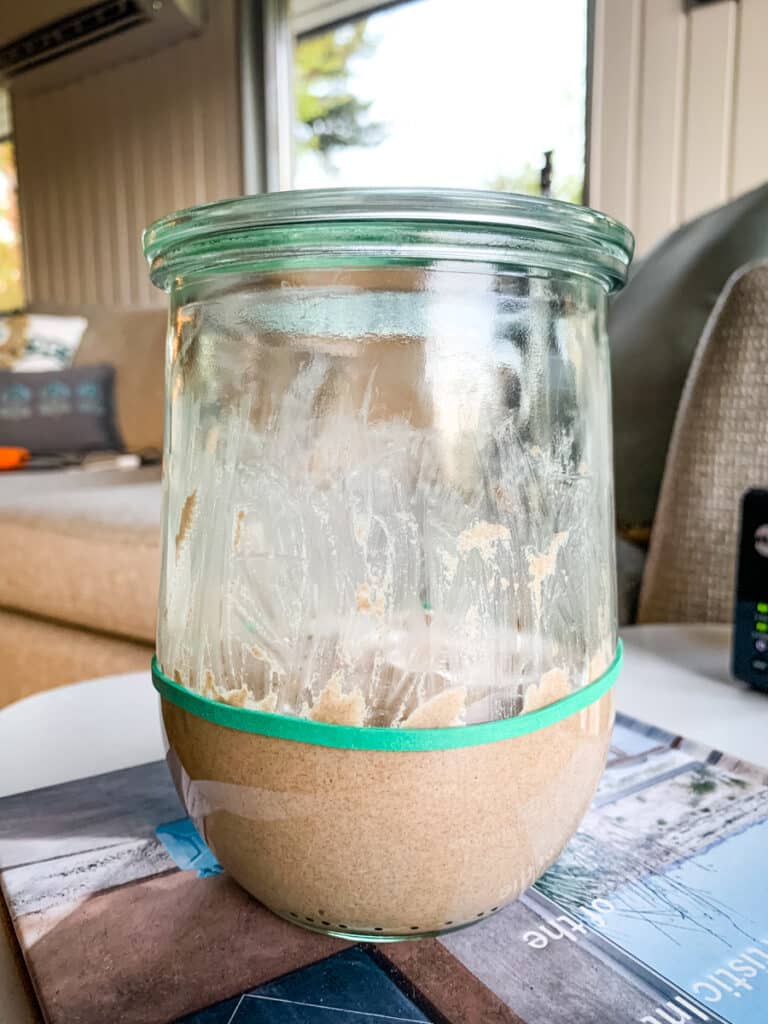
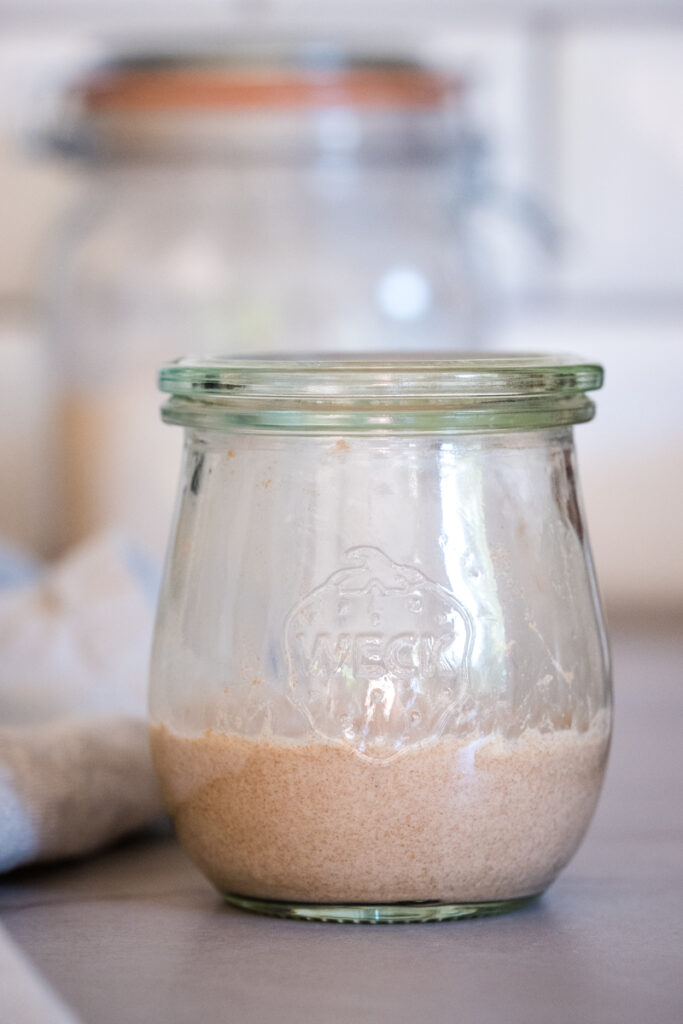
Initial Culture: Combine 10g of the Primary Sourdough Mix with 30g of water and 35g of the feeding flour mix in a new, clean jar (This small Weck jar with a glass lid is the perfect choice for our starter) . Mix to a smooth paste, adding a bit more water if necessary. This is now your sourdough starter, so please give it a name. What’s left of the primary mix can be discarded.
Feeding Routine: Place the starter at room temperature, covered loosely. Feed it twice a day by transferring 10g of the starter to a clean jar and adding 30g of water and 35g of the feeding flour mix. Stir well and let it sit until the next feeding. What’s left in the previous jar is called discard, which you can accumulate in a jar in the fridge (well closed), and use it to make discard recipes.

STEP 4: MAINTENANCE AND BAKING
Feeding: Maintain the starter with twice-daily feedings for optimal health.
Storage: If not used daily, the starter can be refrigerated post-feeding. Cover with a tight lid when in the fridge. Resume regular feedings at least 2 times before baking.
Baking: To bake, create a preferment (also called levain) with the starter, following the feeding ratios described in each recipe. This preferment is the leavening agent for your bread, imparting the sourdough’s distinct flavor and texture.
Understanding Your Sourdough Starter, Creating a Preferment, and Managing Discard
Mastering the rhythm of sourdough baking involves a clear understanding of feeding your starter, preparing a preferment for baking, and utilizing the discard.
If there is still confusion regarding the relation between feeding the starter, creating a preferment, and managing discard, let’s break down these steps for clarity:
- Feeding Your Starter: In the evening, start by transferring 10g of your active sourdough starter to a new, clean jar. To this, add 35g of your feeding flour mix and 30g (up to 35g) of water, mixing until a well-hydrated paste forms. This refreshed starter should be left on the counter to ferment until the next feeding cycle, typically every 12 hours.
- Creating a Preferment: On the evening before you plan to bake, after you’ve transferred and fed your starter for its next cycle, prepare the preferment. Take an additional 10g (or the amount your recipe requires) from the remaining paste in the original jar. Transfer this to another clean jar and combine it with the specific amounts of flour and water your bread recipe dictates. This preferment should also be left on the counter, alongside the newly fed starter, to ferment overnight. It is crucial to use the preferment within 10 hours to ensure it’s at its peak activity for baking.

- Managing Discard: The remaining paste left in the jar after transferring portions for the new starter feed and the preferment creation is known as the “discard.” This discard should be stored in the refrigerator for up to two weeks. Sourdough discard is a wonderfully versatile ingredient, perfect for adding depth of flavor and leavening to a variety of baked goods, from pancakes to crackers.
By meticulously following these steps, you ensure a continuous cycle of starter maintenance, readying your preferment for baking, and finding resourceful uses for the discard. This method not only maximizes the efficiency of your sourdough routine but also embraces a zero-waste approach, making the most out of every part of your starter.
Remember, successful sourdough baking is as much about timing and understanding the life cycle of your starter as it is about the ingredients you use.
Gluten-Free Sourdough Starter Guidelines: DOs and DONTs
By following these guidelines, you ensure the health and vitality of your sourdough starter, paving the way for successful, healthy, and flavorful baking adventures.
DONTs
- Avoid Distilled or Reverse Osmosis Water: These lack essential minerals necessary for a thriving sourdough starter.
- Steer Clear of Chlorinated Water: Chlorine can kill the beneficial bacteria vital to your starter’s ecosystem.
- Opt for Fresh, Organic Fruits for Yeast Water: Don’t use non-organic or frozen fruits as they won’t have the necessary wild yeast you need to cultivate.
- Do Not Neglect Your Starter: Leaving your starter unfed on the counter for more than 24 hours can lead to an imbalance in the ecosystem (like mold). Do not use a starter that has formed mold.
- Choose the Right Size Jar: Your jar should accommodate the starter doubling in size. But don’t use a jar that is too big, as it will be difficult to handle and monitor changes.
- Use Proper Lids: Glass or plastic lids are preferable to cloth or paper, which might not protect your starter as well. I don’t recommend using cloth or paper.
- Maintain Consistency in Flour: While brand changes are acceptable, stick to the same type of flour, though teff color variants are interchangeable without impacting the starter’s strength. For example, if your starter is made with a teff, millet, and sorghum mix, don’t feed it with rice flour.
- Fresh Flour is Key: Outdated flour could compromise your starter’s health and will affect the quality of your bread.
- Regular Feedings Are Crucial: Consistent feedings are crucial to keeping your starter active. Morning and evening (every 12 hours) are the best times of day to feed your starter.
- The Smell of Your Starter: Don’t worry if, in the first days, your starter smells like acetone. That’s a normal smell and just an indication that it is hungry. With each feeding, your starter’s smell will change and eventually become something like fruity wine or vinegar, sour when hungry.
DOs
- Ensure Cleanliness: Utensils and jars should be washed with hot water and dried thoroughly with clean towels or paper to prevent contamination.
- Glass is Best: For mold prevention and to maintain a stable environment, use a glass jar with a glass lid.
- Use a Digital Kitchen Scale at all times when measuring ingredients. Cup and spoon measuring are not accurate and not appropriate for sourdough baking if you want the best results.
- Refrigerate If Inactive: When not baking, store your starter in the fridge post-feeding. Reactivate it with at least two feedings before making a preferment.
- Travel with Your Starter: With proper preparation, your starter can accompany you on your travels. Keep it in a sealed jar under 100g to comply with TSA liquids rules, and use a thermal bag with an ice pack to maintain a low temperature. In hotel rooms, you will usually find a fridge where you can store your jar.
- Personalize Your Starter: Naming your starter and treating it with care (like a pet) can create a more connected baking experience. You would not forget to feed your dog or your cat, right? My starter name is Rosie.
- The Fresher the Flour, the Better: If possible, mill your own flour. Otherwise, opt for high-quality, reputable, organic brands for feeding your starter.
Baking Gluten-Free Sourdough Bread: Start Here
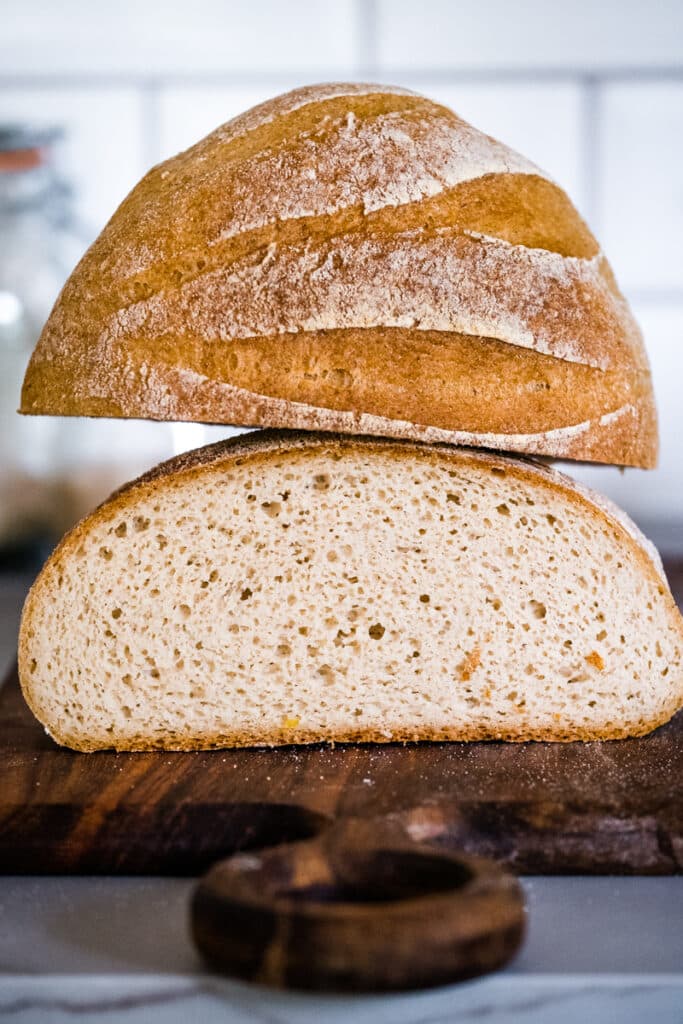
If you’ve just made your starter and you want to bake your first bread, I recommend, after you read our Beginner’s Guide and The Ultimate Tool Guide linked at the beginning of this article, to start with our Gluten-Free Sourdough Bread Recipe With Sorghum and Millet (Lectin-Free).
Our Gluten-Free Sourdough Recipes
The sky is the limit when it comes to creating sourdough recipes with our starter. Once you have an established starter and are familiar with our method, you can start exploring all our recipes, or why not, create your own.
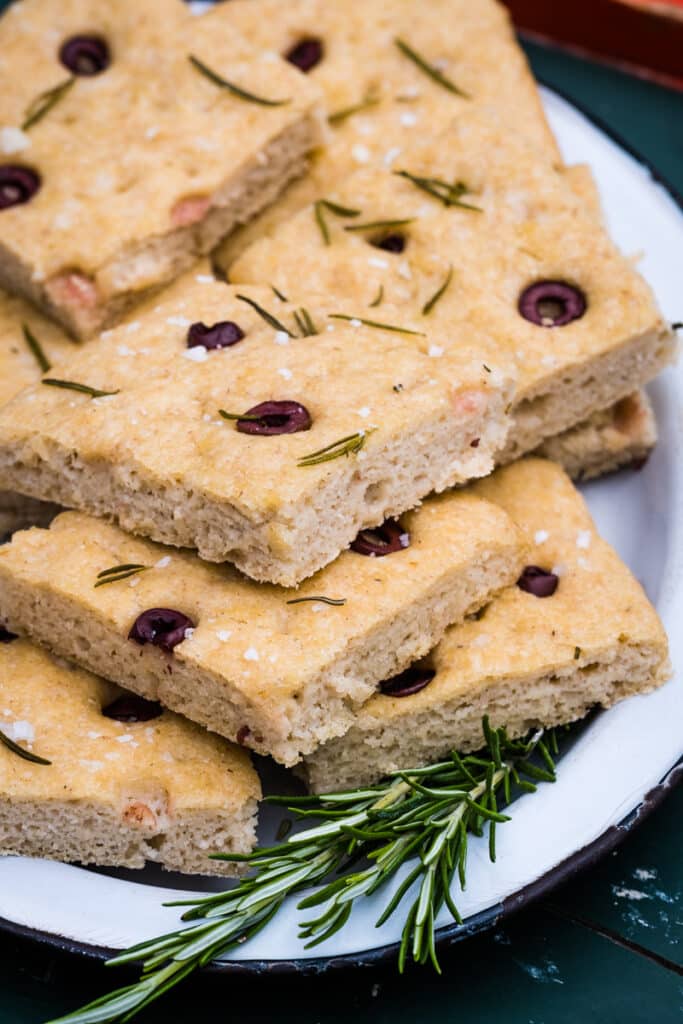
- Guten-Free Sourdough Focaccia (Lectin-Free)
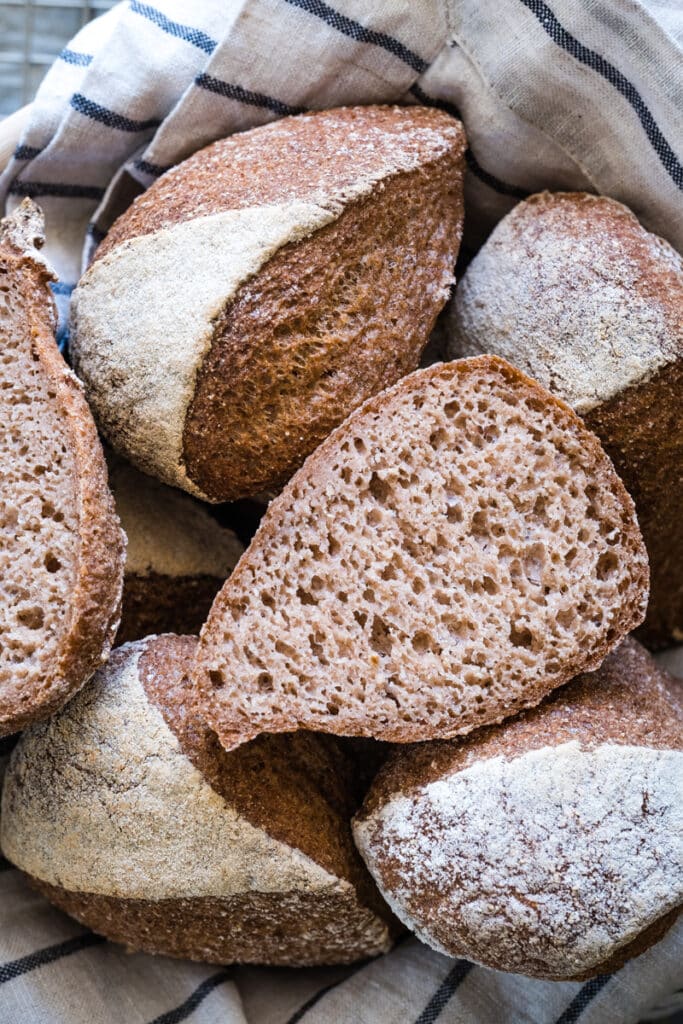
- Rustic Sourdough Rolls With Teff, Millet, and Sorghum (Lectin-Free)
- Sourdough Flatbread with Sorghum Flour
- Sourdough Pizza Crust with Millet and Sorghum
- Hemp Sourdough Bread with Walnuts
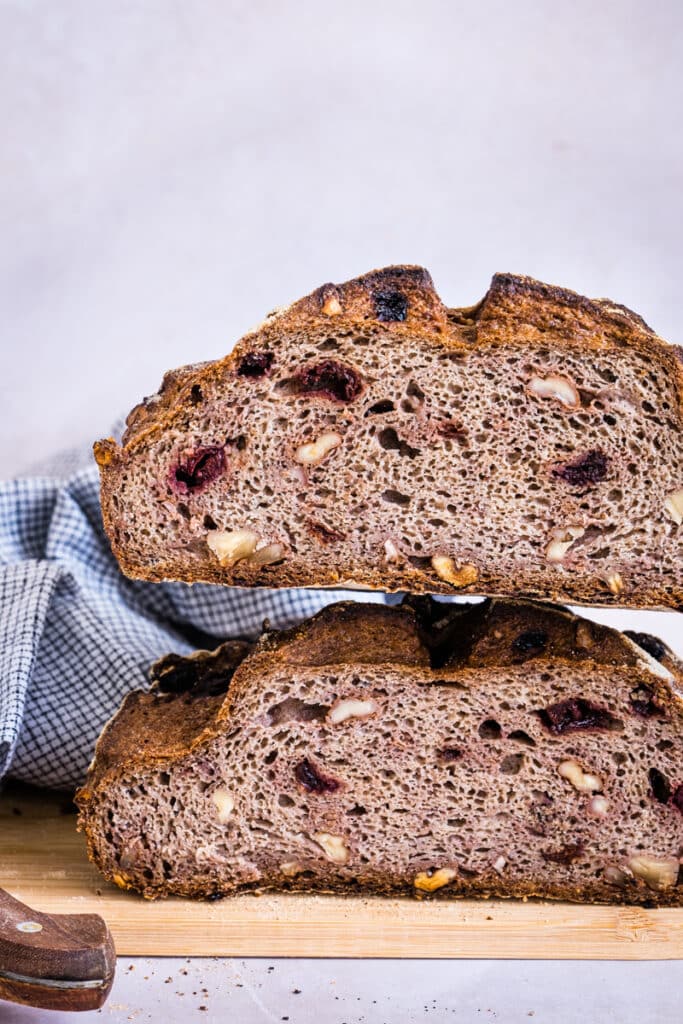
- Walnut Cranberry Sourdough Bread
- Teff Sourdough Bread With Cardamom
- Soft and Cheesy Sourdough Breadsticks
- Gluten-Free Sourdough Croissants
- Gluten-Free Sourdough Muffins with Halloumi Cheese
- Gluten-Free Sourdough Bagels with Teff, Millet, and Sorghum
- Gluten-Free Sourdough Cinnamon Rolls (Chai-Infused)


How to Back Up Your Sourdough Starter
Maybe you wonder, what if something happens to my starter, do I have to start from zero again? While this can be the case, and to be honest, it’s not such a big of a deal to make the yeast water again, there is another way, especially if you are attached to your starter :).
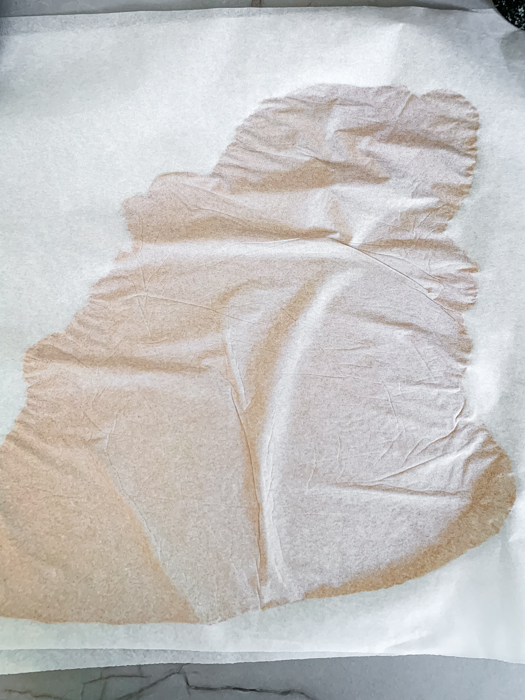
You can dry your sourdough starter. This is especially useful for people like me, who live in different places throughout the year and have to travel with their starters. You can dry your starter anytime; you don’t have to wait until you travel. You can also renew your dry flakes whenever you feel like it.
- After you feed your starter, use the discard (what’s left after you took 10g out) to make the backup starter.
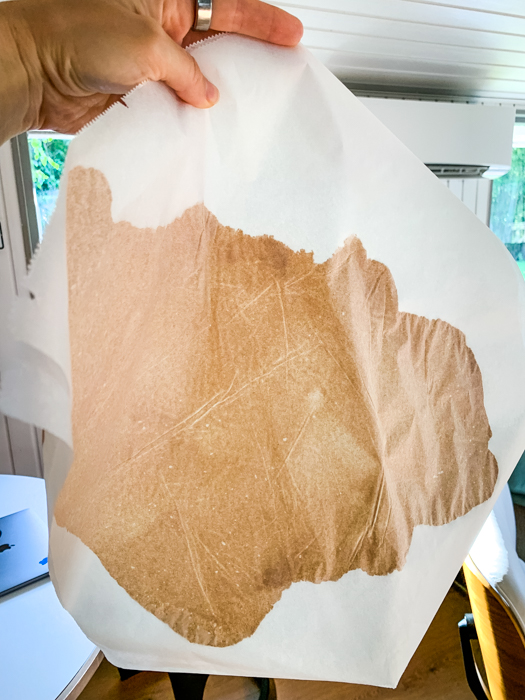
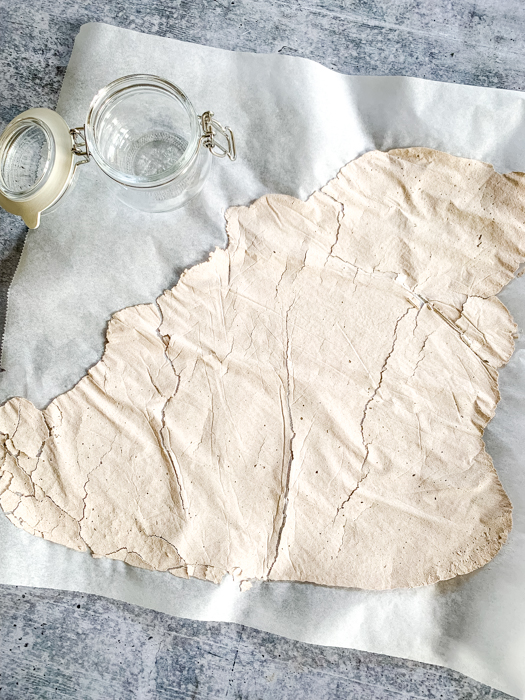
- Add the discard paste on top of a sheet of parchment paper, add another sheet on top, and roll with a rolling pin until the discard spreads out in a very thin layer.
- Take the two sheets and place them where the discard can dry out. It has to be somewhere where it can’t be disturbed by pets, kids, etc. I place it on my dryer. If I do this after the evening feeding, the discard will be dry until the morning.
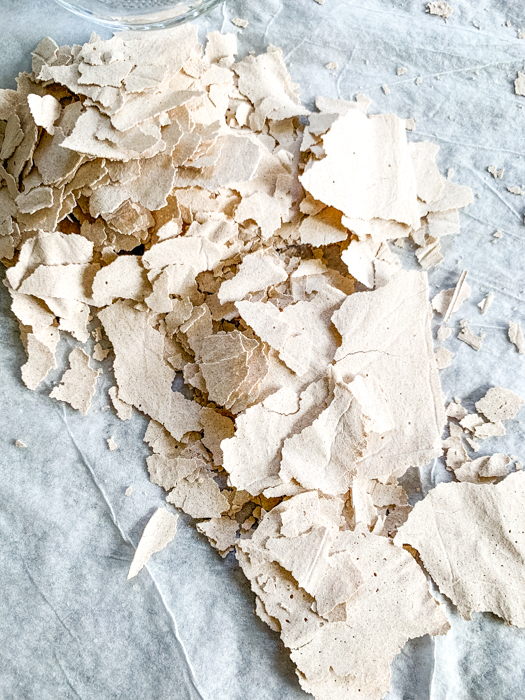
- Lift the top piece of paper and check if completely dry. If so, place it on a table, and gather all the formed flakes.
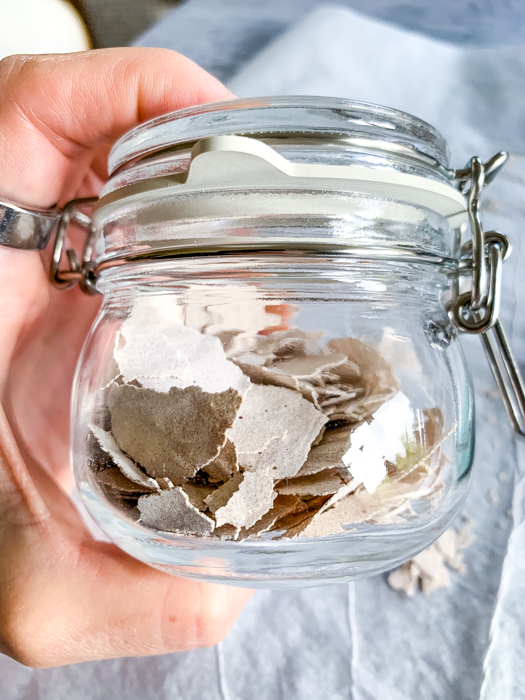
- Put the flakes in a clean and dry jar (very important to be 100% dry) and close the lid. That’s it; this is your backup starter. You can repeat this process one more time and add the flakes to the same jar, so you make sure you have enough flakes if you need to activate your starter.
- Place in a dark place.
How to Activate Dry Sourdough Starter
When you need to activate your starter, follow the below steps (this is something I learned from the sourdough artisan that taught me how to make my first bread). I followed this process when I moved from Romania to Denmark, and it worked.
The first step is to turn your flakes into powder; you can do that with a Nutribullet with a milling blade, a spice mill, or a coffee grinder. Make sure they are very clean and dry before you use them.
- Feeding no. 1 – 20g dry sourdough powder + 20g flour mix (the same you use for feeding) + 40g water (same quality of water you used to make and feed your starter). Wait until you see signs of fermentation (bubbles, air, raise). Can take 24-36 hours.
- Feedings no. 2 and no. 3 – 20g of paste from the previous feeding + 20g water + 20g flour mix
- Feedings no. 4 and no. 5 – 20g of paste from previous feeding + 40g water + 40g flour mix
- Feedings no. 6 and no. 7 – 10g of paste from previous feeding + 30g water + 30g flour mix
- Feedings no. 8+ – 10g of paste + 30g water +35g flour mix
Now you have a new starter. If your paste is too dry with only 30g of water, you can gradually add extra water, up to 35g, until you get a well-hydrated paste with no dry spots, but not watery or too soft.
*This post contains affiliated links, which means I get a small commission if you choose to purchase something via one of my links, at no extra cost to you
Print
Gluten-Free Sourdough Starter With Millet, Teff, and Sorghum Flour (Lectin-Free)
- Prep Time: 30 minutes
- Additional Time: 7 days
- Total Time: 168 hours 30 minutes
- Yield: 1
Description
In this post, you will learn how to make a lectin-free and gluten-free sourdough starter with a mix of millet, teff, sorghum flour, and homemade yeast water made of fruits. After you make this starter, you will be able to use it to make lectin-free and gluten-free sourdough bread loaves, pizza, flatbread, focaccia, and more.
Ingredients
STEP 1: CREATE THE YEAST WATER
- (Tools needed: 34oz mason jar with a tight lid, wooden or glass spoon / stick to stir, PH strips, patience)
- 1/2 cup organic blueberries
- 1 small organic apple
- 1–2 tablespoons organic, sugar-free dried fruits (dates or dried aronia berries are perfect, in my starter I used the aronia berries)
- Filtered, spring, or bottled water (avoid chlorine, fluoride, reverse osmosis, or tap water)
STEP 2: PRIMARY SOURDOUGH MIX
- (Tools needed: a glass jar with a plastic or glass lid that can hold about 400g of content, a wooden or silicon spoon)
- 100 grams flour mix (33g teff, 33g millet, 34g sorghum)
- 100g yeast water (measured in grams)
STEP 3: SOURDOUGH STARTER
- (Tools needed: a small jar with a glass lid that can hold about 200-250g of content, a spoon or a spatula to mix with; a normal stainless steel spoon can be used)
- 10g of the Primary Mix (after 24 hours)
- 30g water, up to 35g is needed (filtered, chlorine-free; avoid reverse osmosis water)
- 35g flour mix (equal parts teff, sorghum, and millet)
Instructions
STEP 1: CREATE THE YEAST WATER
- Prepare the Fruits: Gently rinse the blueberries and apple with filtered water, to preserve the wild yeast on the fruits. Cut the apple into wedges without removing the skin or core. Make sure the dry fruits are organic, with no other ingredients added.
- Ferment: Place the fruits in a jar and cover with water, leaving an inch of space at the top. Seal tightly and keep at room temperature (but a slightly warm place) for 24 hours, then stir twice daily for up to 5 days. In the 5th or 6th day, measure the PH. When bubbles form and the pH is below 6, the yeast water is ready. Strain and store in the fridge until use.
STEP 2: CREATE THE PRIMARY SOURDOUGH MIX
- Mix: In a clean jar, combine 100g of the flour blend with 100g of yeast water. Stir until a well-hydrated paste forms, adjusting with a little more water if necessary to ensure no dry spots remain. Cover with the glass lid and let it sit at room temperature for 24 hours, looking for signs of activity such as bubbles. After 24 hours, there will be cracks on top, and the texture of the paste will be airy. It might double in size, but that’s not always the case.
STEP 3: CREATE THE SOURDOUGH STARTER
- Prepare Feeding Flour Mix: Mix equal parts teff, sorghum, and millet flours and store it in a flour jar. Use this blend for feeding your starter.
- Initial Culture: Combine 10g of the Primary Sourdough Mix with 30g of water and 35g of the feeding flour mix in a new, clean jar. Mix to a smooth paste, adding a bit more water if necessary. This is now your sourdough starter, so please give it a name. What’s left of the primary mix can be discarded.
- Feeding Routine: Place the starter at room temperature, covered loosely. Feed it twice a day by transferring 10g of the starter to a clean jar and adding 30g of water and 35g of the feeding flour mix. Stir well and let it sit until the next feeding. The consistency you are looking for is a well hydrated paste. If it needs more water, you can add up to 35g, but please don;t make it too runny. What’s left in the previous jar is called discard, which you can accumulate in a jar in the fridge (well closed), and use it to make discard recipes.
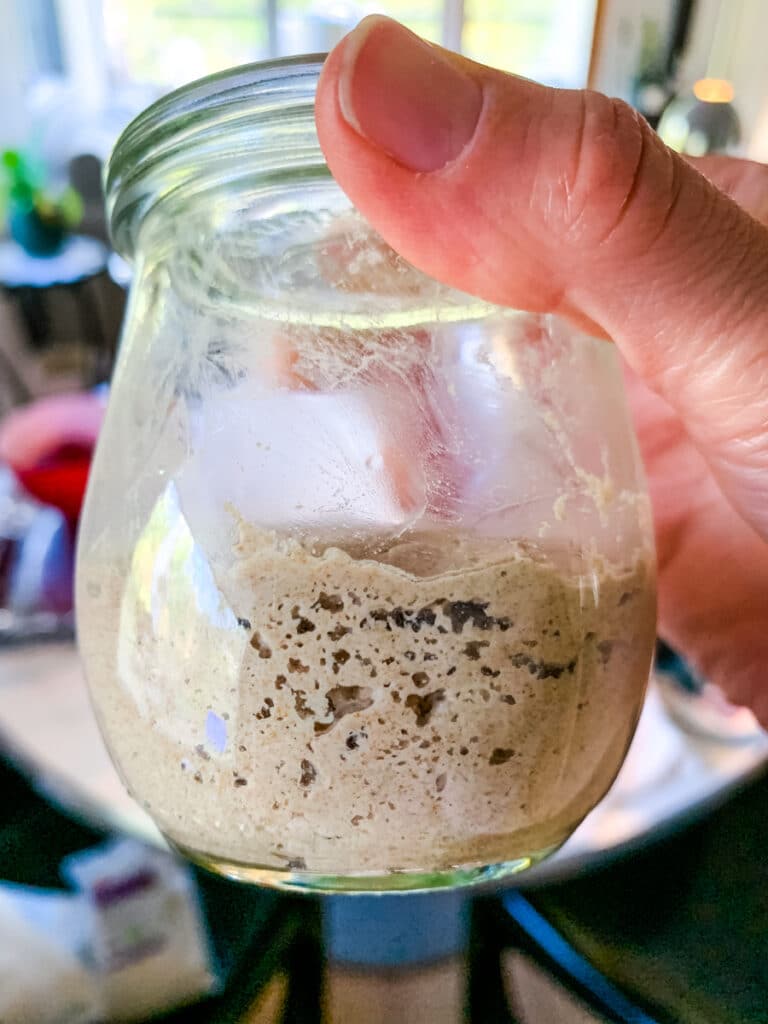
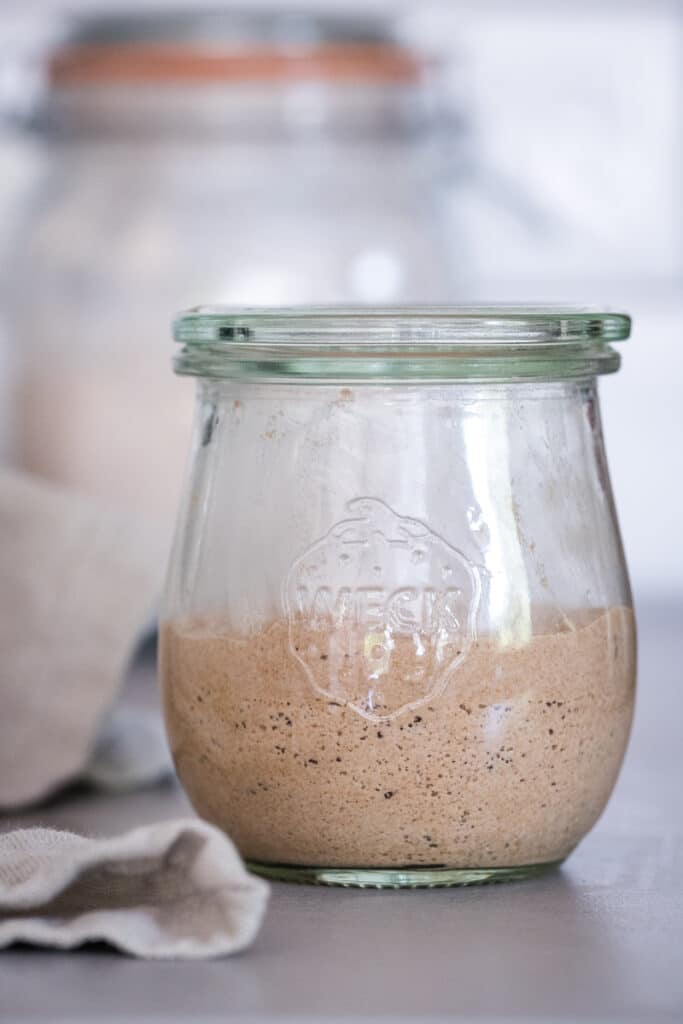
- Ready to use: The starter is ready to use after a few feedings every 12 hours (I like to feed it for about 3 days, which means 6 feedings). The signs your starter is ready are that it doubles in size, is bubbly and airy, and, at peak activity, will form a dome and a few cracks on top. It will also smell fruity and pleasant. If it develops an acetone, or vinegary smell, it simply means it’s hungry. Just continue to feed it as per the schedule until that smell disappears.
STEP 4: MAINTENANCE AND BAKING
- Feeding: Maintain the starter with twice-daily feedings for optimal health.
- Storage: If not used daily, the starter can be refrigerated post-feeding. Cover with a tight lid when in the fridge. Resume regular feedings at least 2 times before baking.
- Baking: To bake, create a preferment (also called levain) with the starter, following the feeding ratios described in each recipe. This preferment is the leavening agent for your bread, imparting the sourdough’s distinct flavor and texture.
Notes
Please read the entire post before proceeding to start. It is important you get the starter right in order to be able to make bread later. If you have any questions, please ask below in the comments.
177 Comments
DT
October 15, 2024 at 5:30 pmIs purified bottled water safe to use for the yeast water and starter?
Claudia
October 16, 2024 at 5:07 amI’m not sure what “purified” means in this case, but you need a water that doesn’t have chlorine and fluoride, but is rich in minerals. So you don’t want a water that has been stripped of minerals. I hope this helps. -Claudia
Kenzie Gardner
September 26, 2024 at 9:01 amHi!
I just put my starter in the fridge and am wondering how long can it stay in the fridge? And, when I want to take it out do I feed it immediately out of the fridge or take it out as is, leave it for 12hrs, then feed?
Claudia
September 26, 2024 at 9:11 amHi Kenzie! I would say 2 weeks is safe. I think pushed it to 3 weeks and it was fine, but just to be on the safe side, feed it every 2 weeks or so. I usually let it come to room temperature for about an hour, then feed it. 12 hours is too long. I hope this helps.xx -Claudia
Kenzie Gardner
September 26, 2024 at 11:49 amThank you so much! I burnt my first loaf of bread using the starter and was furious so I didn’t want to look at the starter for at least a week. Lol. I can’t wait to try again, as even burnt, it was the best bread I’ve had in ages. Thank you for providing such thoughtful instructions and letting us all come along on the bread making journey!
Claudia
September 27, 2024 at 3:37 amLOL, poor starter 😂. Now you have to apologize and give it the best treatment :)))
Wendy
September 10, 2024 at 5:25 pmHi Lori I haven’t made this yet but am about to give it a go. With the yeast water once you’ve made it and used what you need to make your starter if there is any yeast water left can you keep it in the fridge and use for the lot of bread or will you of used all of the yeast water?
Claudia
September 11, 2024 at 4:25 amHi Wendy! There will be a lot of yeast water left. Keep it in the fridge, covered, in case you need a back-up in the next week or so (for about one week, you can use it to restart your starter in case the first try didn’t work). But after you mixed the 100g yeast water and 100g flour, you won’t need more yeast water to feed the starter. Form now on you will use normal water. Technically, yes, you can use the yeast water to make bread. However, I know that at the beginning things will get overwhelming, so I like people to focus on building a strong starter, rather then learning how to make bread with yeast water. I hope this makes sense. xx -Claudia
Danielle Fortier
August 10, 2024 at 4:28 pmQuite inspiring! Is this recipe in one of your cookbooks?
Claudia
August 11, 2024 at 4:55 amHi Danielle! None of my sourdough recipes are in the books. Sourdough is a topic in itself, it requires one dedicated book. Who knows, maybe one day there will be one 🙂 -Claudia
Danielle Fortier
August 11, 2024 at 11:55 amThat would be great 😊
Danielle Fortier
August 16, 2024 at 1:41 pmI am still working on the sourdough. I used the first discard to do pancakes (just added one pastured egg, salt and caraway). I served them with manchego cheese. This is delicious! It is promising for the future breads, thank you!
Claudia
August 17, 2024 at 4:46 amHi Danielle! Pancakes sound wonderful, and can’t wait to hear from you on the bread front. :)) -Claudia
Lori
August 9, 2024 at 10:46 pmHi Claudia,
Thank you for this sourdough recipe! My question is, do I use the fermented water for my twice daily (every 12 hour) 30-35g feedings? I have made the assumption that you use it until you are ready to bake bread, so that is what I have done. Is this okay or should I start over and use it (fermented water) only for the initial 100g feeding? Thanks for your help!
Claudia
August 10, 2024 at 4:31 amHi Lori! I already answered your question in the email, but just in case other people are seeing this and have the same question: you only use yeast water when ‘yeast water’ is mentioned in the recipe. After the initial mix of 100g yeast water + 100g flour mix, you will use regular water. -Claudia