
Embarking on the journey of baking gluten-free sourdough bread is an adventure that requires patience, a passion for home cooking, a love for authentic food, and a set of tools to help you in the process. I compiled a comprehensive list of essential equipment and tools to create that perfect, crusty loaf of gluten-free sourdough bread. Let’s dive into the essentials, some of which you might already have in your kitchen and others that might be new additions to your baking arsenal.
To watch the entire process of making a gluten-free sourdough loaf and using most of the tools I highlight below, check out the video at the end of this article.
If you’re just starting your journey into gluten-free and lectin-free sourdough baking, we strongly suggest exploring our Beginner’s Guide to Baking Gluten-Free Sourdough Bread. It provides a thorough introduction to our baking method, ensuring you have all the knowledge needed to embark on this delicious adventure.
My Gluten-Free Sourdough Method
Before we dive into our topic, I wanted to introduce you to my gluten-free sourdough method. My starter is made of a mix of teff, millet, and sorghum flour, and fruit yeast water. Here you find all the details on how to make this starter, but briefly, this is the process:
- Step One: I make a fruit yeast water, using spring water and organic blueberries, apple and some organic dry fruit. This process lasts about 6 days but requires minimal handling.
- Step Two: I mix 100 grams of yeast water with 100 grams of the flour mix and let it ferment for 24 hours at room temperature.
- Step Three: I use 10 grams of the above mixture, combine with 30-35 grams spring water (depending on how much the flour absorbs), and 35 grams of the three-flour mix, to get a thick paste consistency. This is my starter, which I feed every 12 hours, repeating this same process: carry over 10g of the previous mix in a new, clean jar, and feeding with water and flour. What’s left after feeding is called discard, and I use it to make sourdough discard recipes.
Compared to other methods, I keep a very small starter (75 grams), to avoid too much waste. By only having a small starter and always feeding it in a new, clean jar, I also avoid mold, which is a big problem among gluten-free sourdough bakers. When I want to bake, I make a preferment the night before.

Ingredients I use in my recipes: teff flour, millet flour, and sorghum flour, spring water, psyllium husk flakes, honey (can be optional), extra virgin olive oil, and tapioca starch.
For specialty loaves, I use hemp flour, chestnut flour, carob powder, nuts, seeds, dry fruits, spices, etc.
All my recipes are both naturally gluten-free and lectin-free. If you have celiac disease, please make sure the ingredients you are buying are certified gluten-free.
Ingredients I DON’T use in my recipes: rice flour, buckwheat, potato starch, corn starch, quinoa, sugar, wheat, oats.
Scroll down to the end of this post for a selection of my gluten-free sourdough recipes, including loaves, focaccia, flatbread, pizza dough, muffins, croissants, breadsticks, and more.

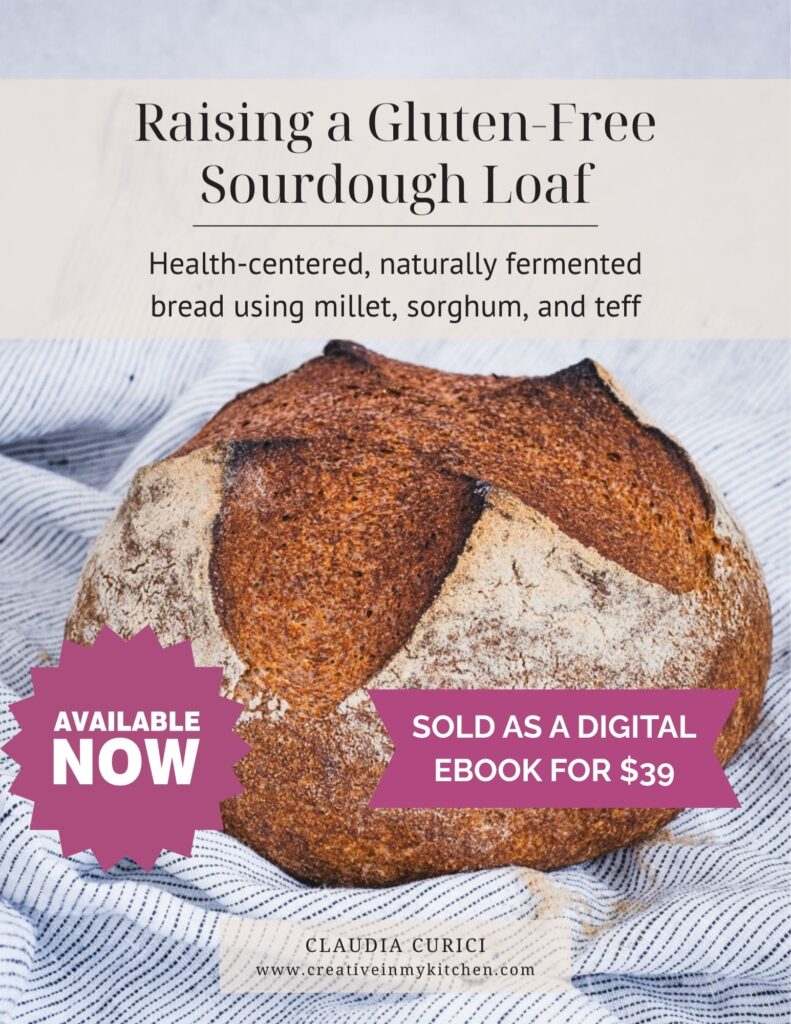
Gluten-Free Sourdough Ebook
If you’d like to master gluten-free sourdough with clarity and confidence, my ebook Raising a Gluten-Free Sourdough Loaf brings the entire method together in one structured, cohesive guide.
While many of the elements are shared across my website, this book organizes everything into a clear progression — from building a strong, resilient starter to mastering the core method you can apply to artisan loaves, sandwich bread, bagels, pizza, and more. No searching between posts — just one complete roadmap supported by original visuals and 15 thoughtfully sequenced recipes across 130+ pages.
Must-Have Sourdough Tools for Gluten-Free Baking
Digital Kitchen Scale
Precision is key in baking, especially for gluten-free sourdough. A digital kitchen scale ensures you measure ingredients accurately for consistent results every time.
If you don’t have one already, please buy one. They are inexpensive and last a long time.

Glass Jars for Preferments and Starter
Your sourdough starter is the heart of your bread. Glass jars are perfect for nurturing your starter and preparing preferments, keeping everything organized and easily accessible.
I know some of the gluten-free sourdough methods out there require big jars, but I prefer to keep my starter small, feed it by transferring it to a clean jar, and make preferments whenever I want to bake.
This will save you money as you don’t need a lot of flour to feed, space on the counter, and it will make it almost impossible to get a moldy starter (which I see happens often in the gluten-free sourdough community). You will also need a couple of big jars, especially if you follow my sourdough method.
- Small jars for the starter, with glass or plastic lids (or something similar). I love and use these Weck tulip jars.
- One big Mason jar (32oz) with a lid for making the fruit yeast water.
- One big Mason jar (16oz) with glass lid for the initial flour and yeast water mix.
- I use one big Mason jar (32oz) to store a mix of the feeding flours (in my case, teff, sorghum, and millet).

Glass Mixing Bowls
A large glass bowl, capable of holding about 9-10 cups (approximately 80oz or 2.5 Qt), is essential for mixing your dough. Its transparent nature lets you easily observe the dough’s rise and texture.
You can use a smaller one to make the psyllium and water gel-like mixture. This glass bowl set with lids can cover all your needs.

Plastic Covers for Bowls and Proofing Basket
If your glass bowl doesn’t come with a lid, plastic covers are necessary to create a snug environment for your dough as it ferments, keeping it moist and protected.
The shower cap style is super handy, and can be reused many times. However, if you prefer a more environmentally friendly option, consider these organic cotton, washable covers.
Another option is to buy glass bowls that come with a lid; however, you still need some plastic or cotton covers for the proofing basket. These sizes will cover all your needs when making gluten-free sourdough bread.
Silicone or Plastic Bowl/Dough Scraper
A silicone, flexible bowl scraper is indispensable for handling high-hydration gluten-free dough, helping you fold and shape your dough with minimal stickiness and mess.
A metal dough scraper, while useful in the kitchen in general, is not a tool you need for gluten-free sourdough.
Wooden Spatula / Spoon for Mixing the Starter and the Dough
For mixing your starter and incorporating ingredients, a wooden spatula or spoon is gentle yet effective, ensuring everything combines smoothly without overworking the dough.
While there is a myth about stainless steel being incompatible with sourdough making, this is just a myth. I use a stainless steel spoon to mix my starter, and many big bakeries use stainless steel utensils, as they are non-reactive. While I like wood for mixing the dough, a silicone spatula can be just as effective.
For sourdough mixing, another popular option is the Danish dough wisk. It’s a pretty tool to have, but not necessary for gluten-free sourdough baking.

Banneton Basket with Liner
A banneton basket provides your dough with a supportive structure during its final proof, imparting a beautiful shape and pattern. The liner helps to release the dough cleanly, but also to protect the basket from humidity.
If I want the beautiful spiral pattern to be visible on my dough, I will use the basket without the liner. Ensure you thoroughly dry it before storing it away to avoid mold building. The liner usually comes with the basket, but you can also simply use a clean tea towel.
The most important thing when you buy a proofing basket, is to get the right size for your dough. The smaller the basket, the rounder your dough will shape, while a too-big basket will result in flatter bread.
My dough weighs 740 grams, and I find an 8-inch banneton is the perfect size (this is for a round banneton). For a battard basket (the oval shape), choose one appropriate for this weight.
- 7.9 inch Round Banneton Brotform Bread Dough Proofing Rising Rattan Handmade Basket with Linen Liner Cloth – 20 x 8cm
- 8-inch Oval Long Banneton Brotform Bread Dough Proofing Rising Rattan Basket & Liner (10-inch will also work for a longer bread)

Bread Towels
You’ll need organic cotton or linen towels for covering your rising dough and wrapping the finished bread. When using them, ensure they’re clean, preferably organic, and free from detergent odors.
Parchment Paper Sheets or Silicone Mat
Invest in heavy-duty parchment paper to withstand high oven temperatures without sticking or tearing, ensuring your bread releases effortlessly after baking.
Another option is using a special silicone mat made to withstand high temperatures and make handling the dough much easier. The most popular among sourdough bakers is TheBreadMat.
Dough Scoring Razor/Lame
A razor or lame is necessary for scoring your dough—a crucial step for controlling how your bread expands in the oven. A handle can provide better control and precision, but it’s not necessary. Please don’t use a knife.
Ball Tea Strainer for Dusting
A small, fine sieve like a ball tea strainer is perfect for dusting your loaf and work surface with flour, preventing sticking and achieving that classic sourdough look.
Cooling Rack
After your gluten-free sourdough bread has baked, transferring it to a cooling rack is crucial. A cooling rack ensures that air circulates freely around the entire loaf, preventing the bottom from becoming soggy and promoting an even cooling process.
This step is essential for achieving the perfect crust and crumb texture, as it stops the cooking process and allows the interior to set properly without the steam from the bread condensing on a solid surface.
Not only does this tool improve the overall quality of your bread, but it also makes handling and slicing much easier once the bread has cooled to the optimal temperature.

Dutch Oven or Suitable Cooker
A Dutch oven traps steam during baking, creating the crispy crust and tender interior characteristic of great sourdough.
If you are not a crispy crust person and prefer a softer crust, you can bake the bread in an open oven (a different baking technique applies to open baking).
I’m often asked about the size, but in my experience, it doesn’t really matter. I baked bread in a small oven, and in a much bigger one, and I haven’t noticed much of a difference. I think a 4-Qt (3.8L) Staub Cocotte is a middle size that works for everyone.
This Lodge Cast Iron Pan is a more affordable option but slightly bigger (5QT). My only advice is to go for reputable brands, as this pan will have to withstand high temperatures for long periods of time.

Proofing Box (Optional)
A proofing box, like the Brod and Taylor Folding Proofer and Slow Cooker, offers controlled temperature and humidity, ideal for challenging environments or achieving consistent results.
If your house is too cold or too hot, a proofer can be helpful, but it’s not necessary. You also need a big kitchen and a lot of available counter space to fit this one (which I personally don’t have).
A Bread Toaster
Gluten-free sourdough bread tends to hold more moisture than regular sourdough bread, that’s why you will see toasting is recommending before eating. It’s not necessary, and some prefer without, but I think slightly toasted, this bread is the best you will ever have.
Even when the bread is a few days old, the heat draws out the extra moisture and makes the bread soft and warm, like the experience of having freshly baked bread for days.

Other Tools
- Whisk Set – to mix the dry ingrediens and combine the feeding flour mix for your starter. It’s useful to have a small one that can fit in a jar (to mix the feeding flours)
- Loaf Pan – if you want to make a sandwhich loaf, a cast iron loaf pan can be used
- Stainless Steel Baking Sheet – for bread rolls, open baking, etc
- Cast Iron Pizza Stone – for baking pizza dough
Conclusion
Gathering these sourdough tools will set you up for success in your gluten-free sourdough baking adventures.
Remember, the quality of your bread is not just in the ingredients but in the care, precision, and love you put into each step of the process.
Happy baking!
Video: Making Gluten-Free Sourdough Bread
Gluten-Free Sourdough Recipes
- Gluten-Free Sourdough Bread Recipe With Sorghum and Millet (Lectin-Free)
- Guten-Free Sourdough Focaccia (Lectin-Free)
- Rustic Sourdough Rolls With Teff, Millet, and Sorghum (Lectin-Free)
- Sourdough Flatbread with Sorghum Flour
- Sourdough Pizza Crust with Millet and Sorghum
- Hemp Sourdough Bread with Walnuts
- Walnut Cranberry Sourdough Bread
- Teff Sourdough Bread With Cardamom
- Soft and Cheesy Sourdough Breadsticks
- Gluten-Free Sourdough Croissants
- Gluten-Free Sourdough Muffins with Halloumi Cheese
- Gluten-Free Sourdough Bagels with Teff, Millet, and Sorghum
*This post contains affiliated links, which means I get a small commission if you choose to purchase something via one of my links, at no extra cost to you.
2 Comments
Nancy Arbogast
November 29, 2025 at 10:22 amI need more explanation on how to preferment.
What exactly is that.?
My bread tastes good but is dense.
Help please!
Claudia
November 29, 2025 at 10:34 amHi Nancy! Each recipe will explain exactly how to make the preferment. So pick one recipe, and follow it step by step. Otherwise, please join our Facebook group we can have more conversations there about different topics. xx -Claudia