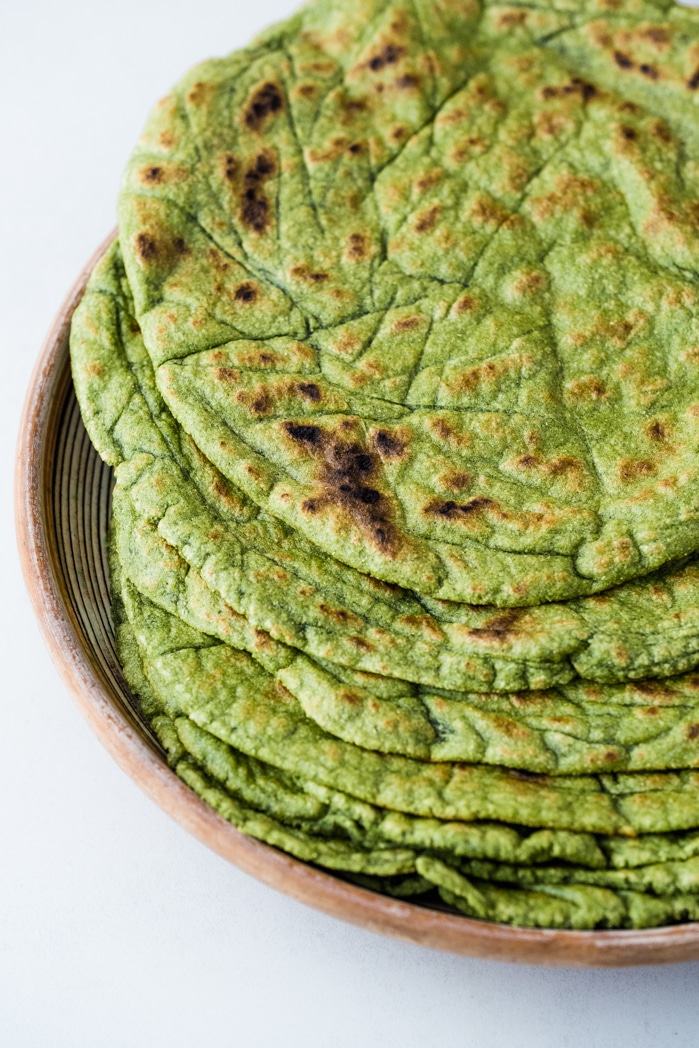
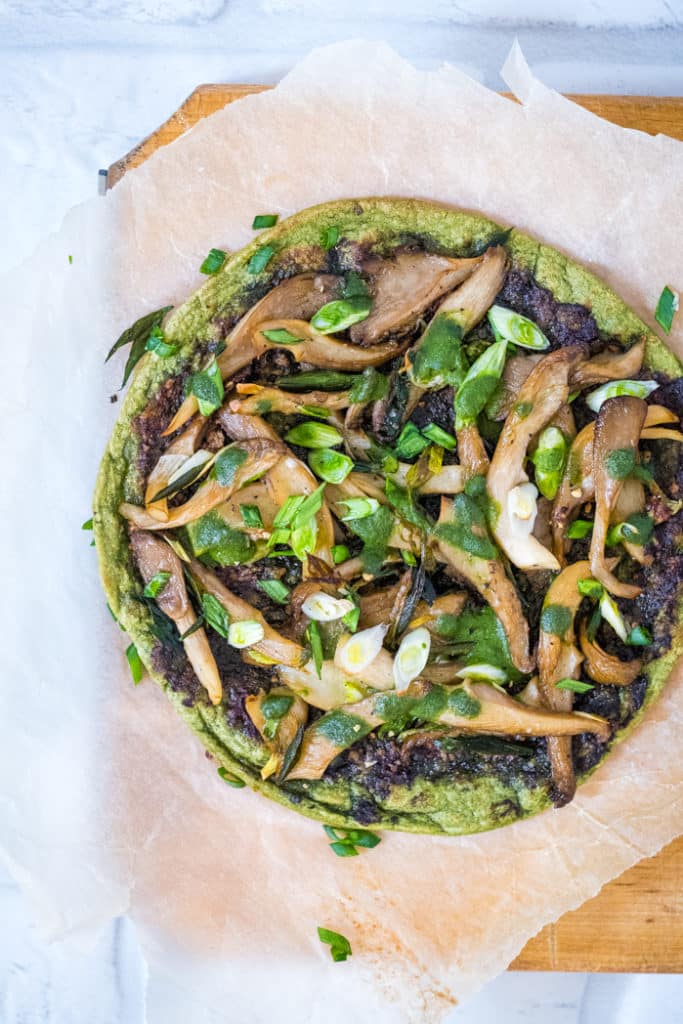
These lectin-free and gluten-free green tortillas are based on my easy cassava flour tortilla recipe with a surprising ingredient: stinging nettles. It is another sneaky way of adding greens wherever I can. And if you don’t have nettles, any green leaves can be used, from spinach to arugula, to green herbs. These gluten-free green tortillas are the perfect pop of green for all your spring (hello St. Patrick’s day!) and summer meals. A healthy tortilla, I might add.
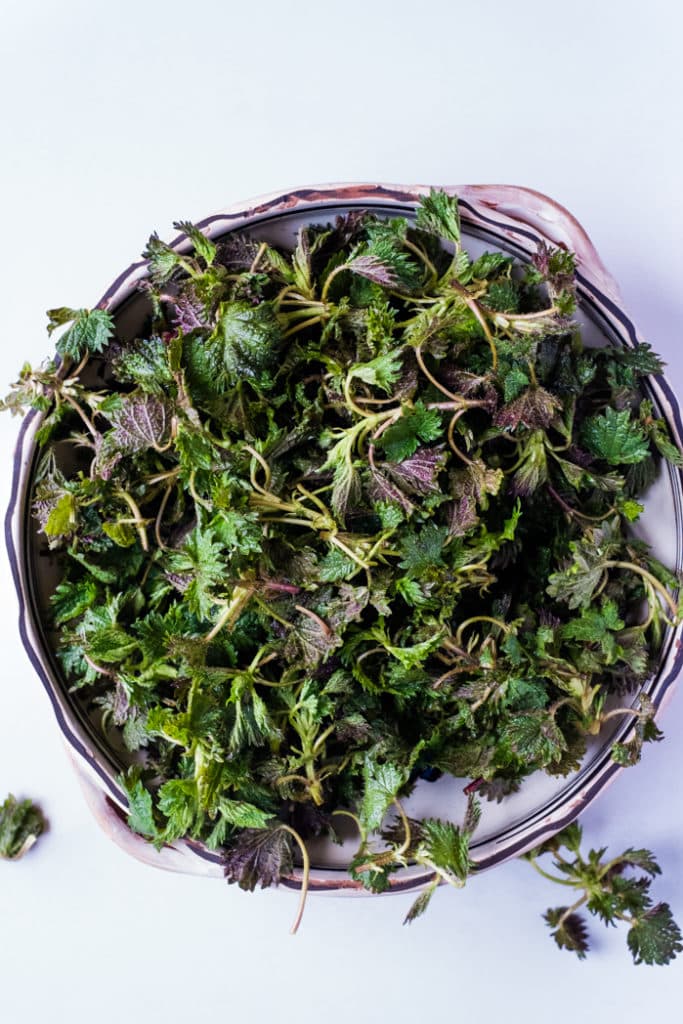
Spring is the season when all the greens pop up, and stinging nettles is one of them. If you are lucky enough to live in an area where you can forage stinging nettles, or you have farmers selling them, this is one way you can use them: making these gluten-free green tortillas.
If they are not in season or you can’t find them near you, feel free to use spinach, even frozen spinach, arugula, or even green herbs. I haven’t tried spinach personally but I know for sure spinach makes beautiful green pancakes.
How to make the nettles puree
Before you start making the green tortillas, you have to make the puree. You need about 5-6 handfuls of fresh stinging nettles (or spinach) which you have to wash very well. Boil some salted water and blanch the nettles for about 2 minutes. Take them out and let them drain in a colander.
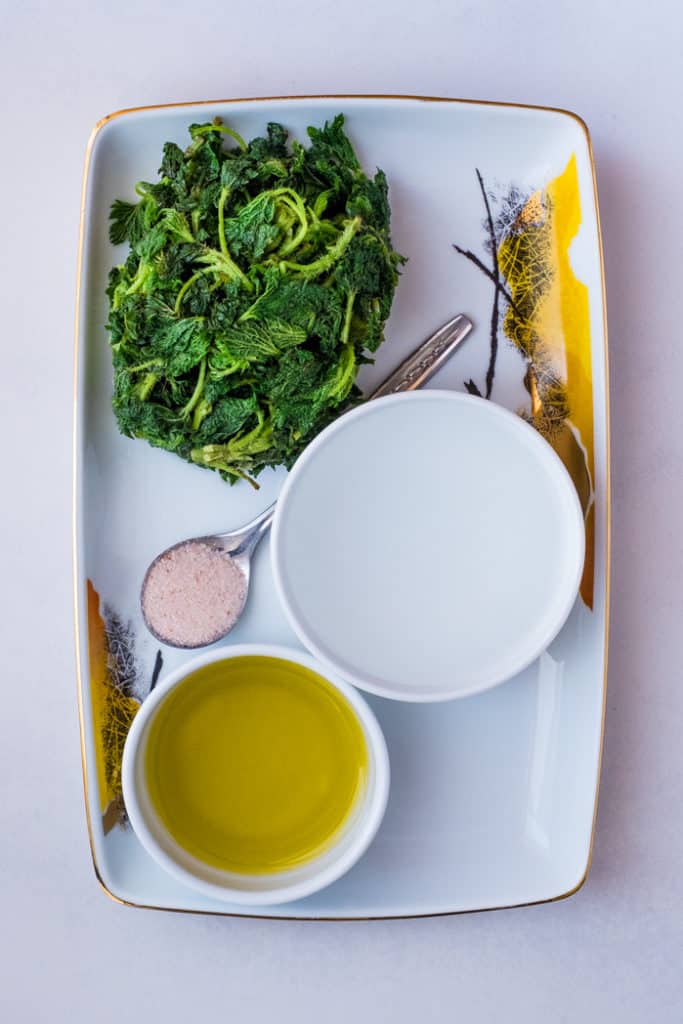
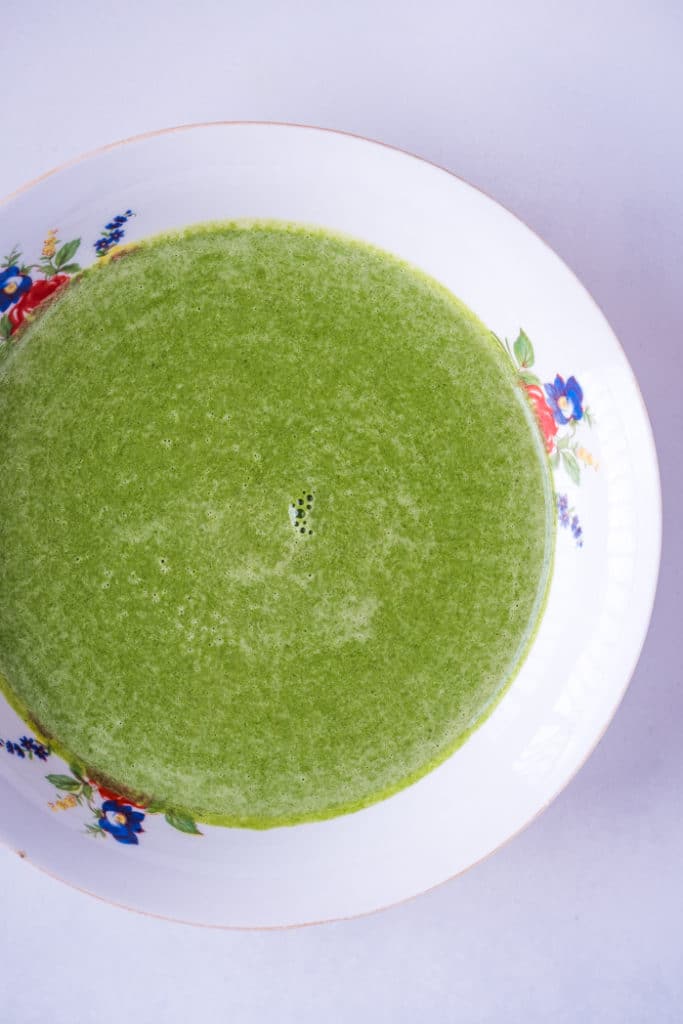
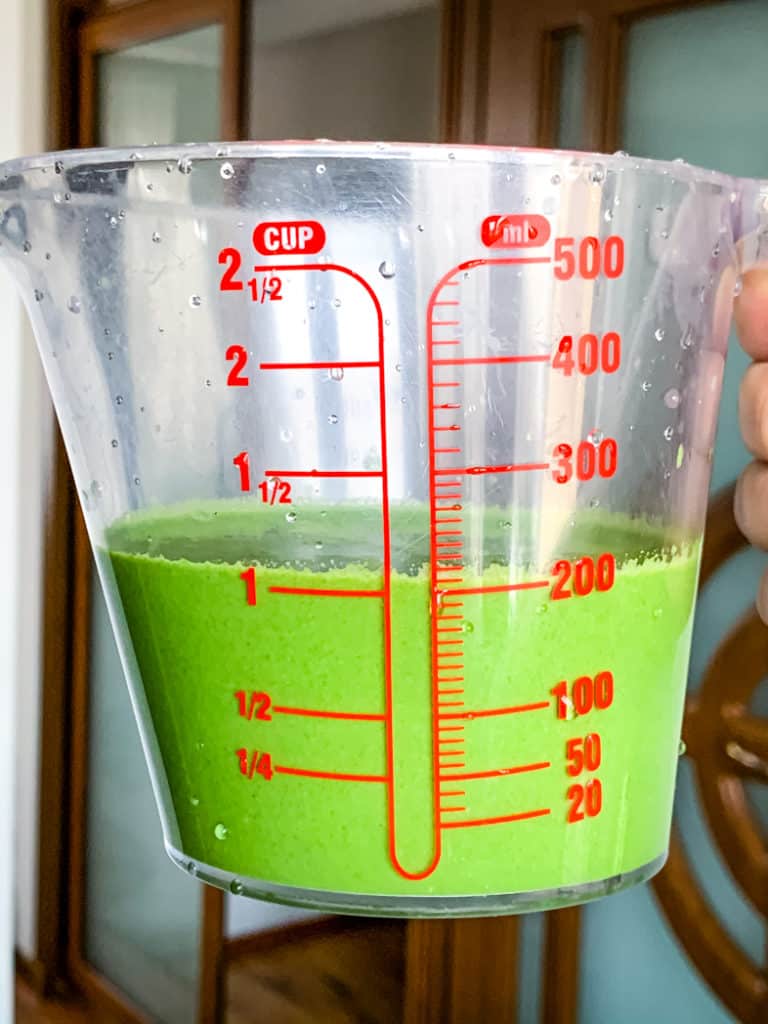
Add to a high-speed blender (you need a smooth puree, so I don’t recommend a food processor): about 2/3 cups of blanched nettles, 1/4 cup water, 4 tablespoons extra virgin olive oil, and 1 teaspoon of salt. Blend until smooth. You should get about 1 cup of liquid. Use this to add to the cassava flour.
Don’t worry if you don’t have the exact quantities. This green liquid will go against the total liquid in the recipe. So, if you have a little more or less you adjust the quantity of water later. What is important is to have those 3 tablespoons of extra virgin olive oil in, the salt, and the green color.
Just a reminder: the original recipe, Easy Cassava Flour Tortillas, is made with just cassava flour, olive oil, salt, and water.
Tips to make gluten-free green tortillas
As mentioned in the introduction, I’ve shared my basic cassava tortillas recipe before, with a lot of details, but I’d like to highlight a few things again.
Ingredients for eight green tortillas
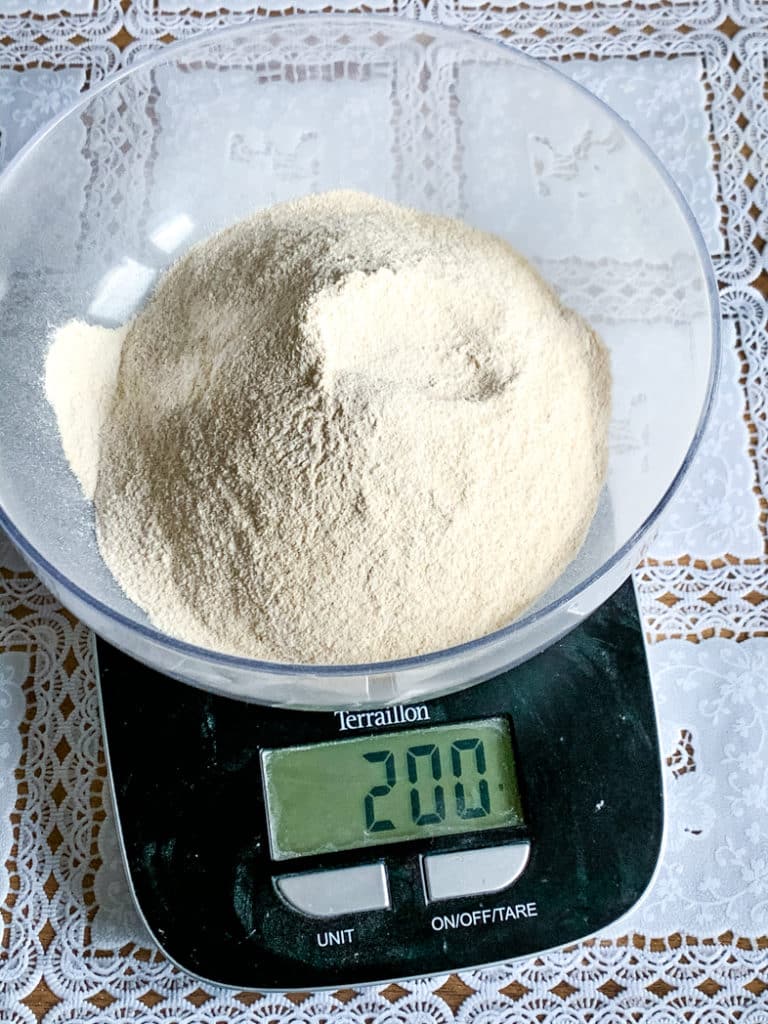
You need 200 grams of cassava flour (my favorite is Otto’s cassava flour), about 1 1/2 cup liquid (here made of one cup of the green puree and a little less than 1/2 cup of lukewarm water; you need 3 tablespoons of extra virgin olive oil, but that’s mixed in the nettles puree here.
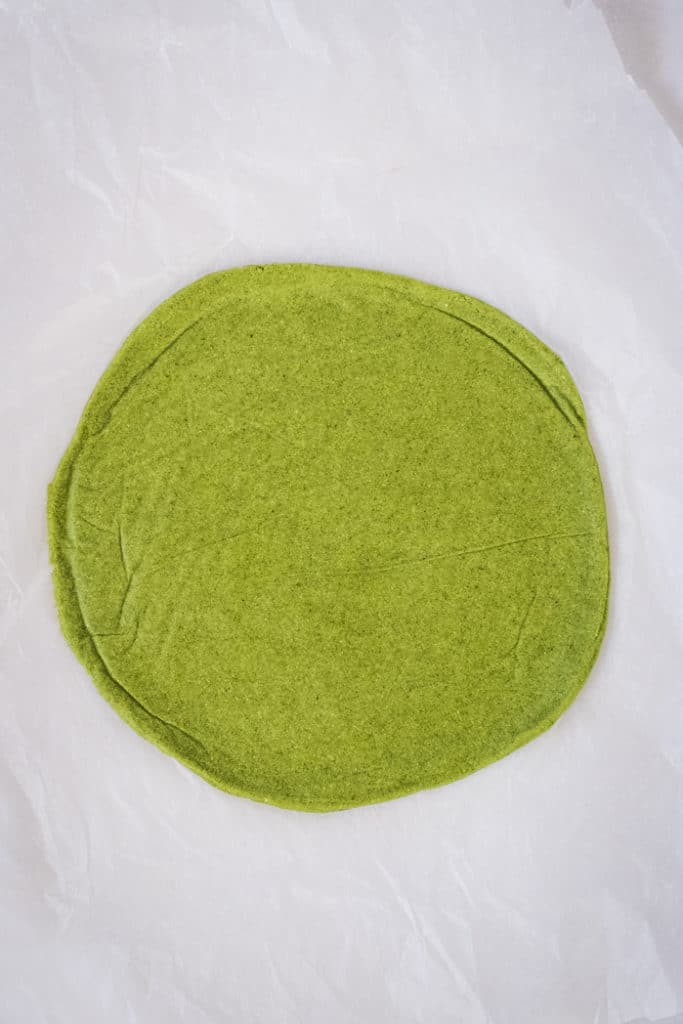
THE SIZE of these tortillas is about 7-8″ or about 20cm. They are not all perfectly equal.
THE CASSAVA FLOUR: from all the brands of cassava flour I used, my favorite is Otto’s cassava flour, available in the US. Since I travel so much, I used cassava flour in many countries, and the quality always differs. In general, if there is an option, look for one branded extra-fine.
Kneading this cassava dough is really important
Do it for about 5. It will become elastic, like playdough, and very easy to manage and roll out. Feel free to get your hands wet if you feel like the dough is getting too dry.
Practice makes perfect gluten-free green tortillas
I hope it comes out perfect for you the first time you try. It wasn’t the case for me. There are many factors to consider, from the thickness and the consistency of the dough, the quality of cassava flour, the pan you use or the source of heat, or how hot your pan is.
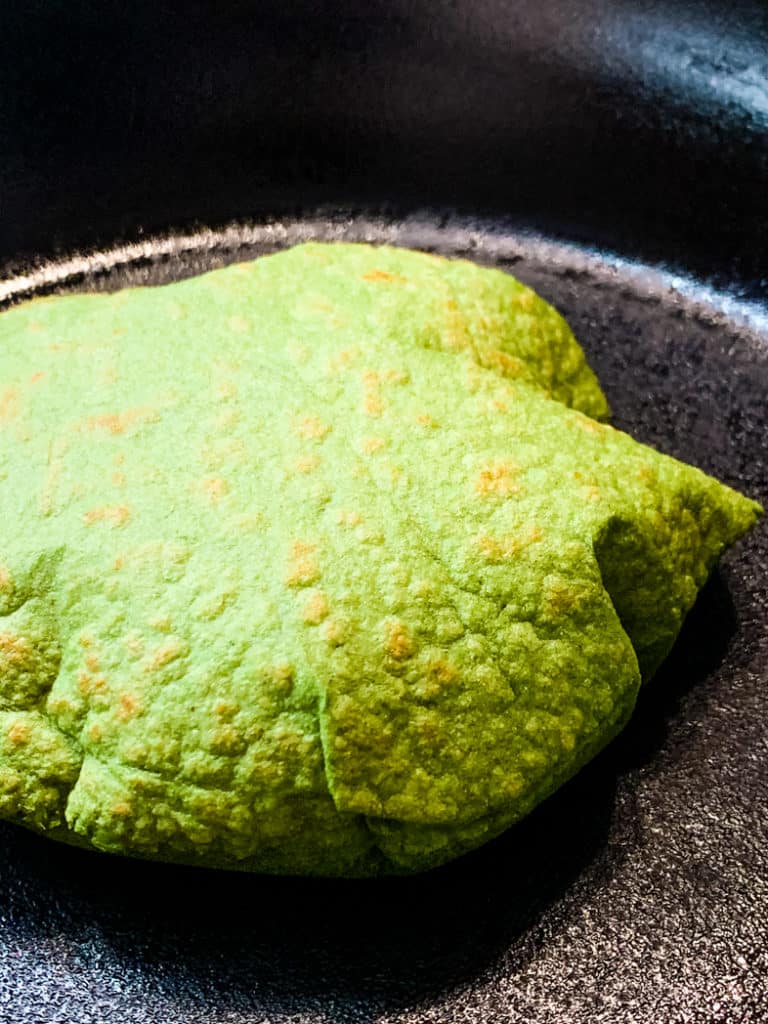
A well-seasoned cast-iron skillet or griddle
A cast iron is the best surface to make these gluten-free green tortillas, but if you don’t have one, I’ve made them in a ceramic-coated skillet before, and it still works. Make sure it is hot before you put your first tortilla on, but for cooking keep it on low to medium heat. You will have to find the sweet spot with your conditions. Better not to add any fat to the pan; that’s why a cast iron works better.
The pockets
Ideally, you will get those air pockets when you flip the tortilla after it has cooked for about 2.5 minutes on the first side. When it gets brown spots, the tortilla is ready to flip. Each green tortilla is different; it’s like all have their personality. You might get a more consistent result if you use a tortilla press. But, even if you don’t get the pockets, they are still good.
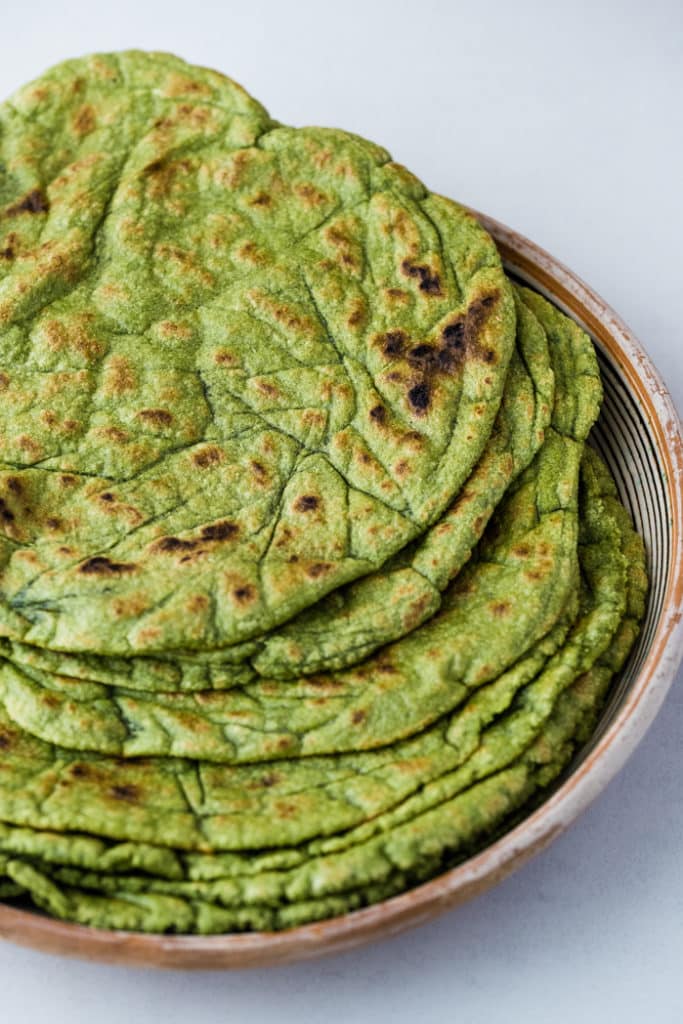
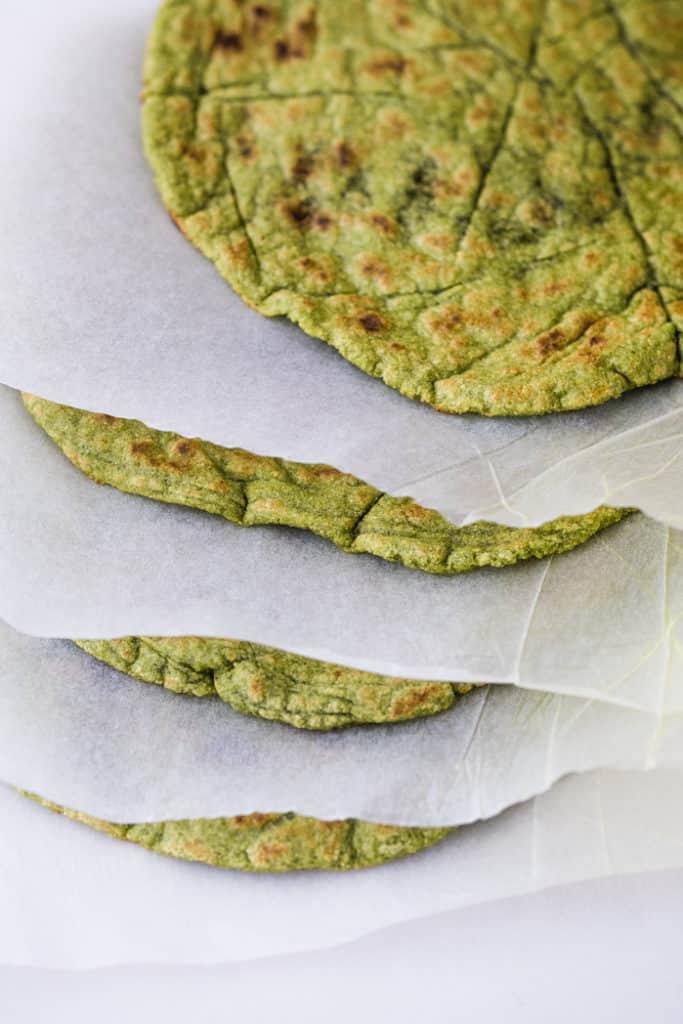
How to store and reheat gluten-free green tortillas
These will stay soft for hours and can be stored in the fridge for a day in an airtight container. What I love to do is to cool them, separate them with parchment paper, and freeze them in a freezer bag. I take them out and put them straight on a hot pan or in the hot oven (usually 350F or 375F / 180C or 190C). The more you let them in, the crispier they’ll get. So check to see the level of doneness you want.
NOTE: I used to cover them with a towel after I cooked them, as I was afraid they will get hard, but it’s not the case with this recipe. Actually, now I prefer to add them on top of each other on a plate but not cover them. This way they’ll keep moisture and heat to each other but there won’t be too much steam or humidity to make them too soft.
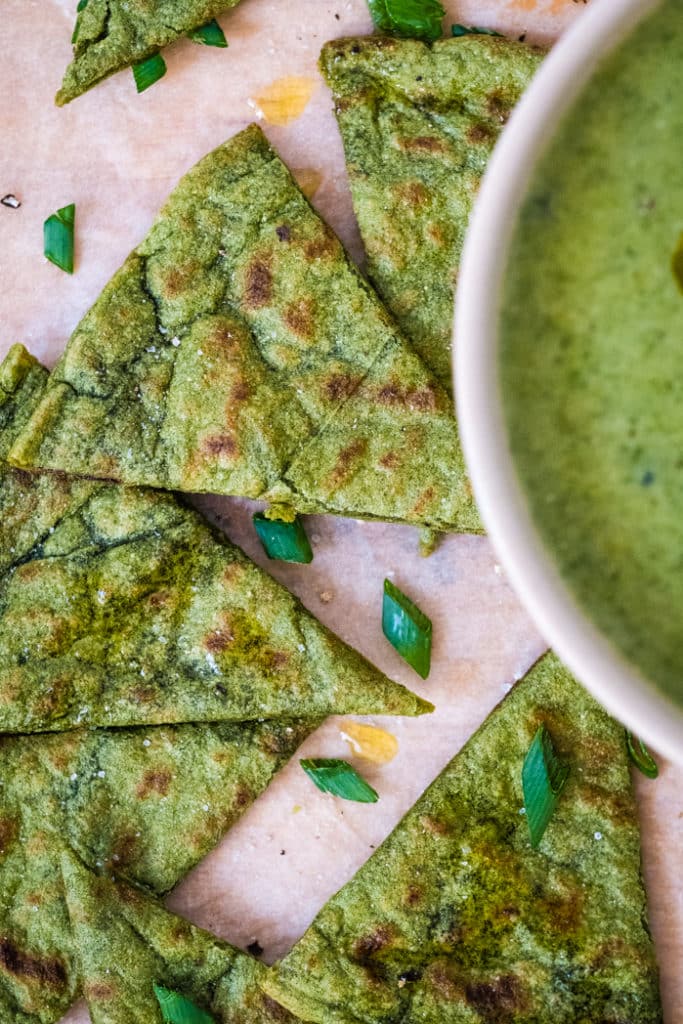
How to make gluten-free green tortilla chips?
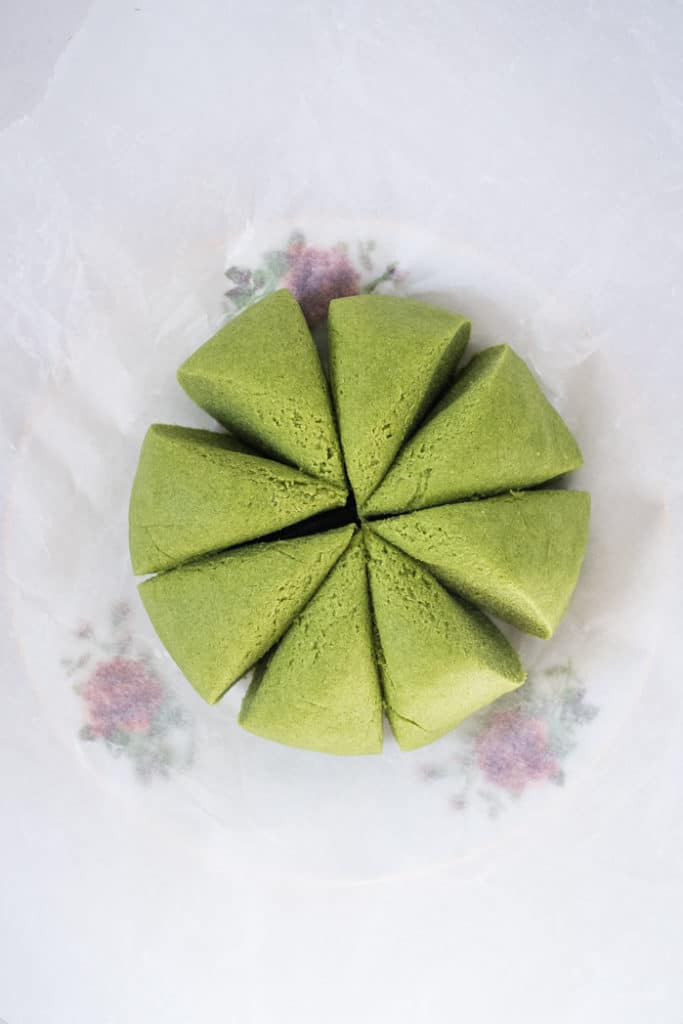
Sometimes, if I want to make green tortilla chips, I portion the cooked tortillas in triangles, put them in the oven (about 375F), and let them in there until they become crispy. They are perfect with a creamy soup or with guacamole.

Serving the gluten-free green tortillas
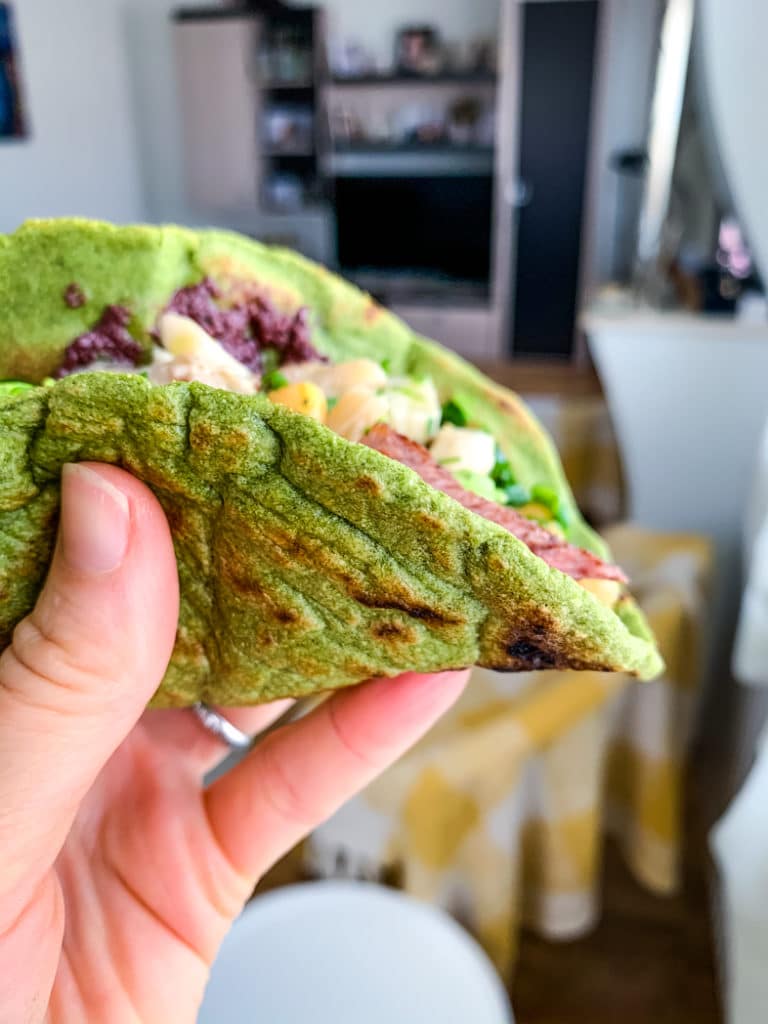
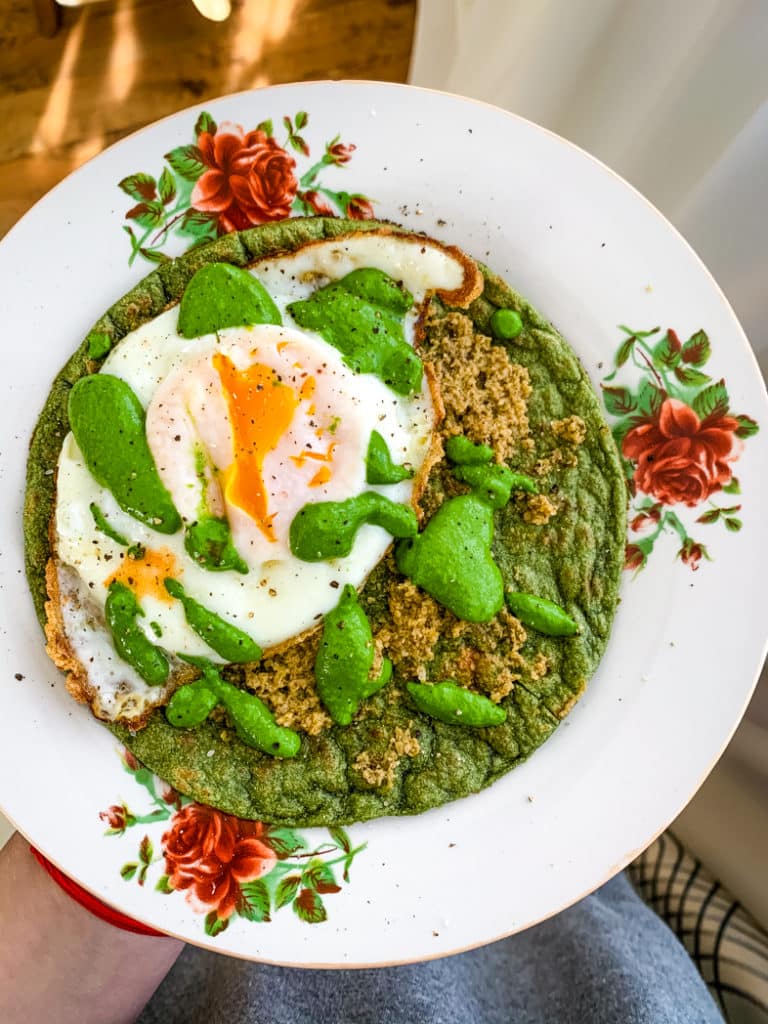
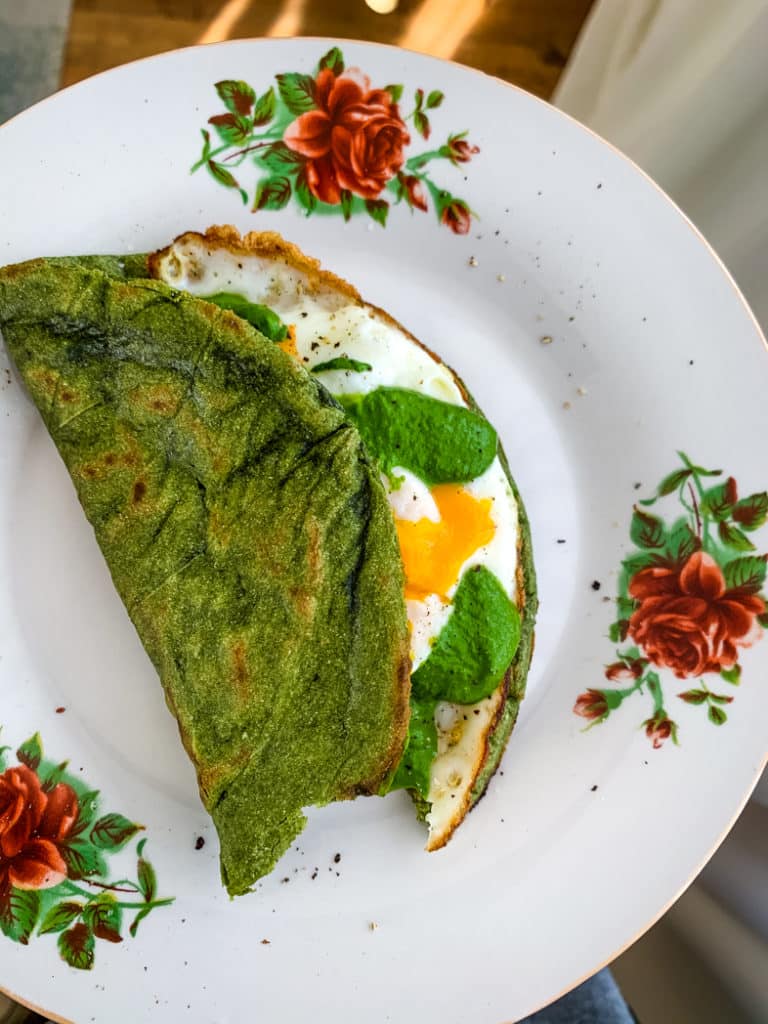
You can use them for tacos, to replace flatbread, tostadas, or to make tortilla chips (see above paragraph). I like to use them for my break-fast meal. Add one egg, some herbs or pesto, olives maybe, and I have a delicious and easy breakfast.
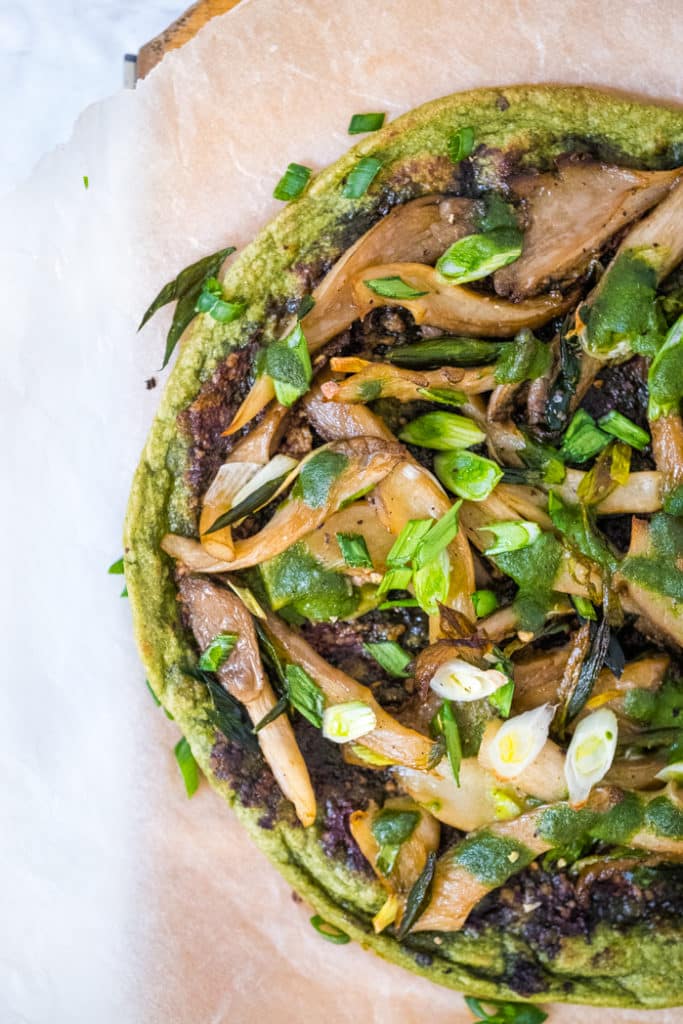
I even use them as a base to make mini pizzas.
If you love a sandwich, try the tortilla wrap hack. You can start by making bigger size tortillas, like the burrito size. In this size, you can also use them to make rolled sandwiches or burritos.
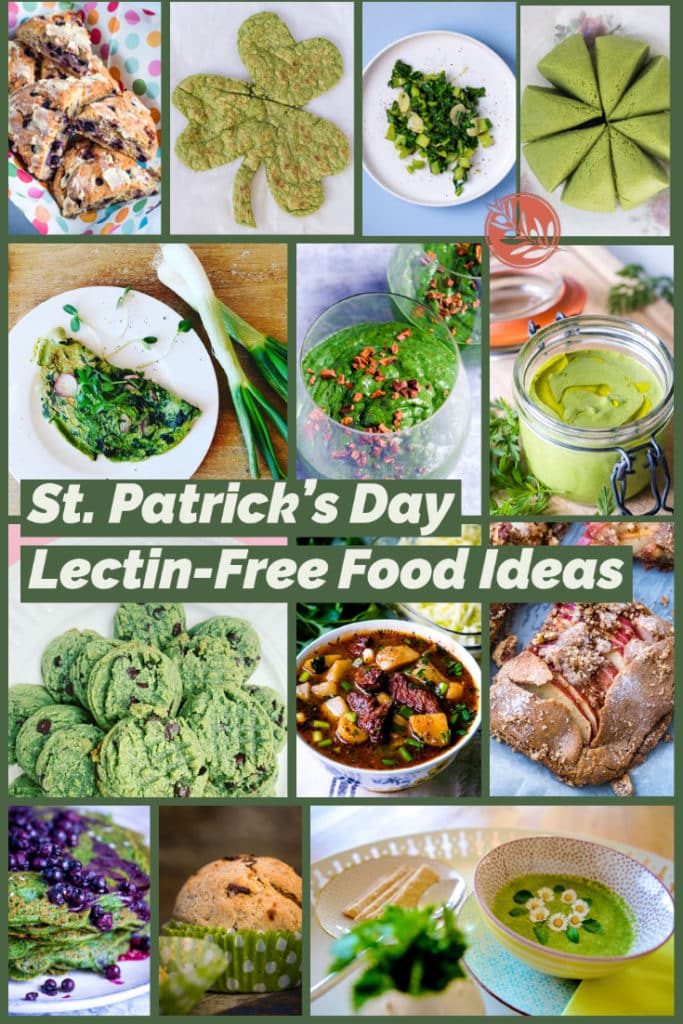
If you love all things green, as I do, or if you are preparing for St. Patrick’s Day celebrations, check out my St. Patrick’s Day Food Ideas Guide.
*This post contains affiliated links, which means I get a small commission if you choose to purchase something via one of my links, at no extra cost to you.
Print
Gluten-Free Green Tortillas
- Prep Time: 30 minutes
- Cook Time: 50 minutes
- Total Time: 1 hour 20 minutes
- Yield: 8
- Category: Bread
- Method: Stovetop
- Diet: Gluten-Free
Description
These lectin-free, gluten-free green tortillas are the perfect pop of green for all your spring meals and summer meals.
Ingredients
TO MAKE THE NETTLES / SPINACH PUREE
- 2/3 cup blanched nettles OR spinach, packed
- 3 tablespoons extra virgin olive oil
- 1/4 cup filtered water
- 1 teaspoon salt
TO MAKE THE TORTILLAS
- 200 grams cassava flour (1 cup + 1 tablespoon)
- 1 cup nettles puree
- a little less than 1/2 cup lukewarm filtered water (start with adding 1/4 cup and gradually add more if necessary)
Instructions
MAKE THE NETTLES / SPINACH PUREE
- Mix all the ingredients in a high-power blender until completely blended and smooth.
MAKE THE TORTILLAS
- Prepare 2 or more sheets of parchment paper (alternatively you can use a tortilla press if you have one). Make sure you have a working surface ready, a rolling pin, and a cast-iron skillet or griddle (or another safe nonstick skillet).
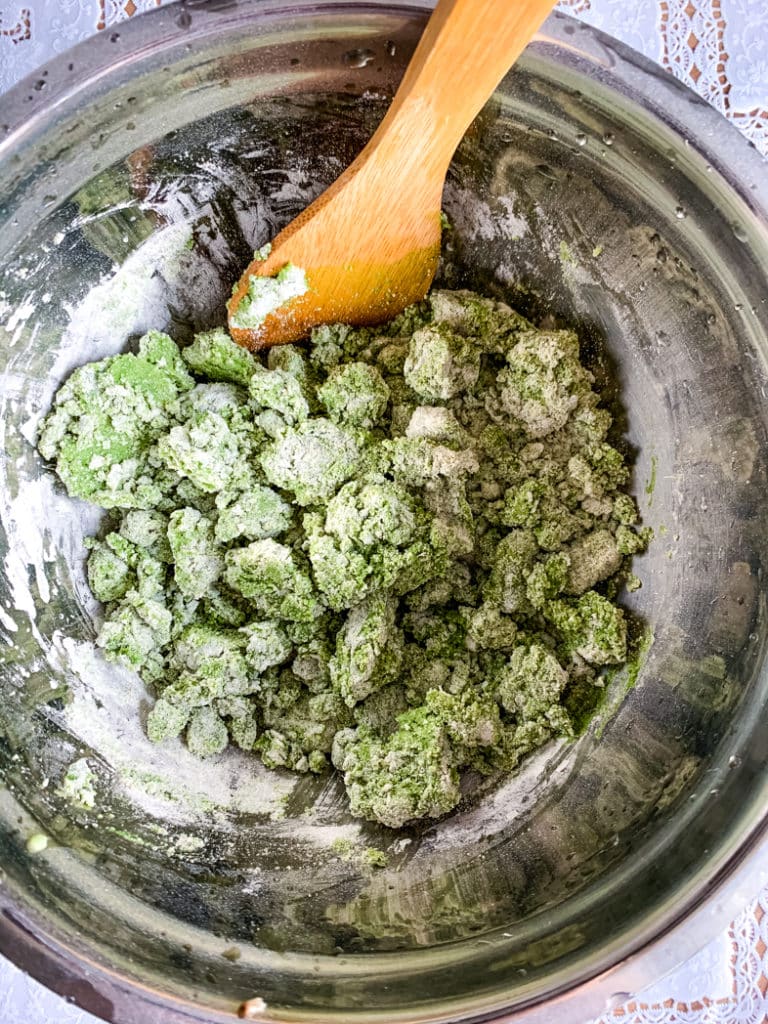
- Add 200 grams cassava flour to a mixing bowl.
- Add the nettles/spinach puree and mix with a spatula.
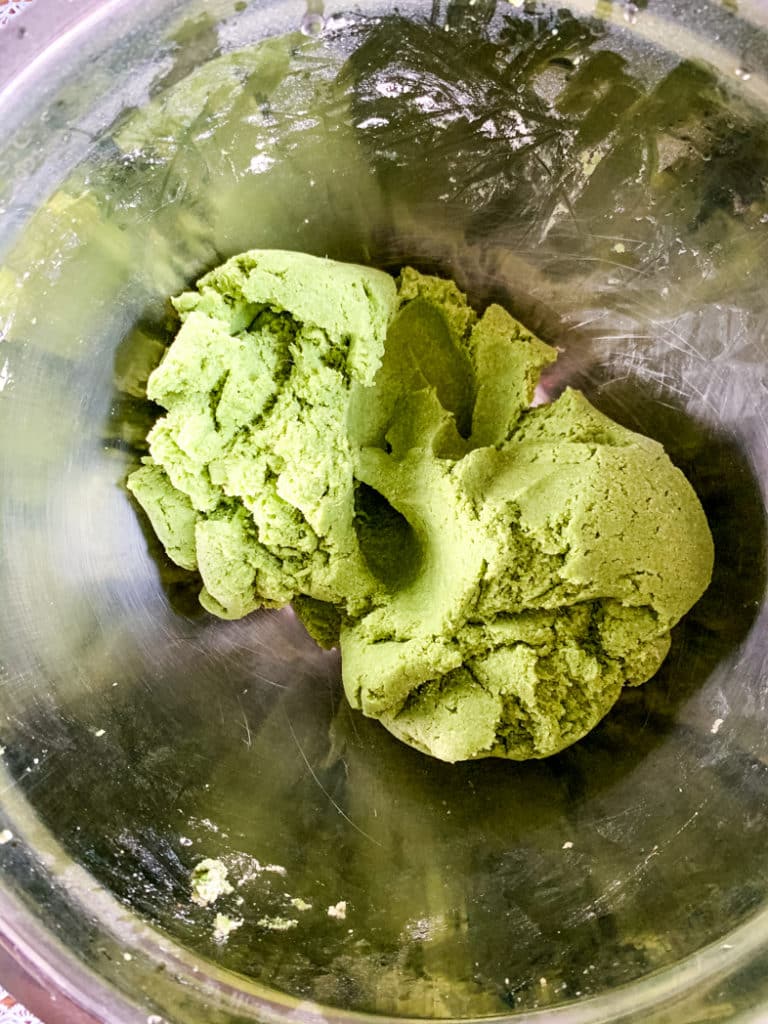
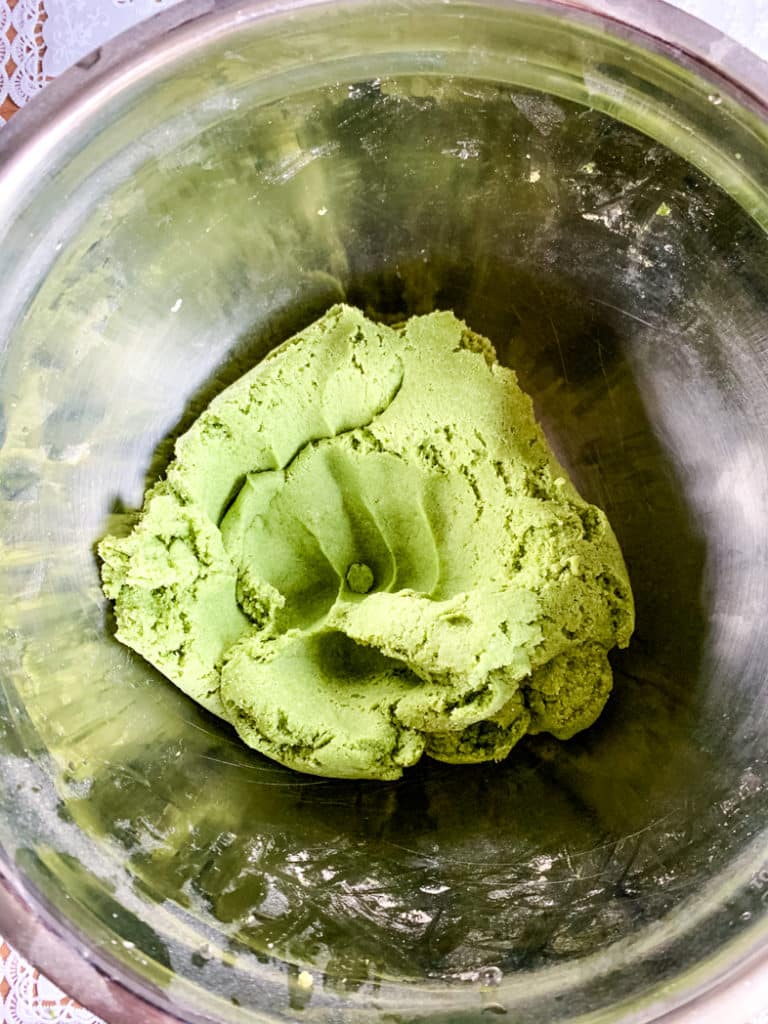
- Start adding the lukewarm water, bit by bit, and mix with the spatula. When the flour is hydrated enough, start working the dough with your hands. Gradually add more water until you get a nice playdough kind of dough. Knead for about 10 minutes. The more you knead this dough, the better. It will get elastic and very easy to handle when you will roll out the tortillas.
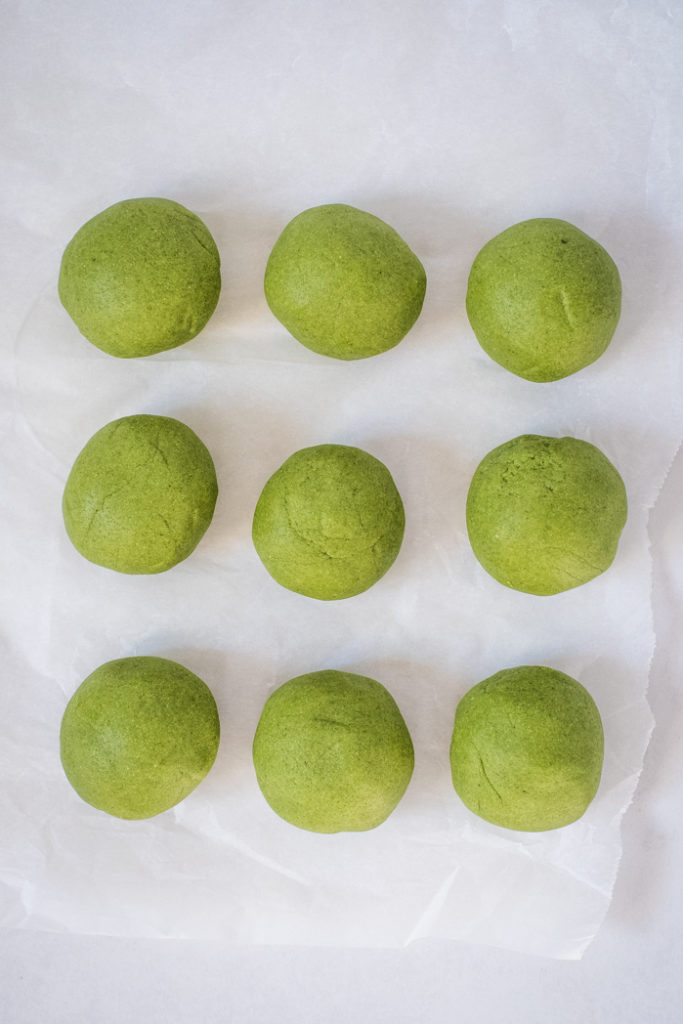
- Make a big ball of dough and portion it into 8 parts, then shape a ball with each part. Set aside.
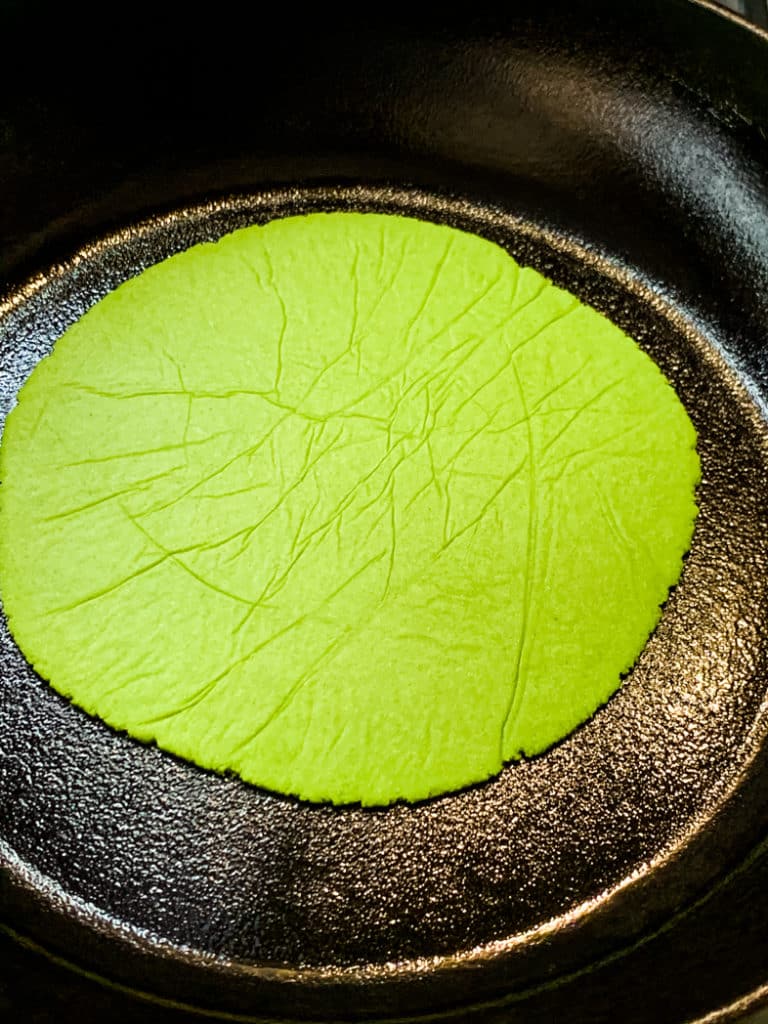
- Start warming your cast iron pan.
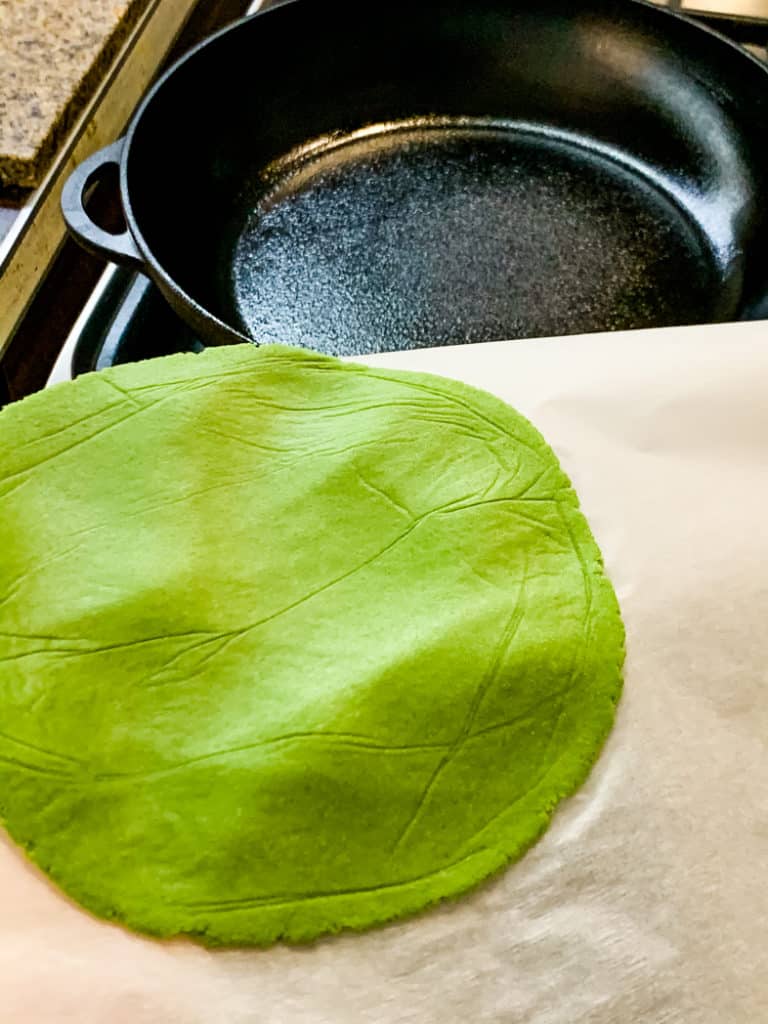
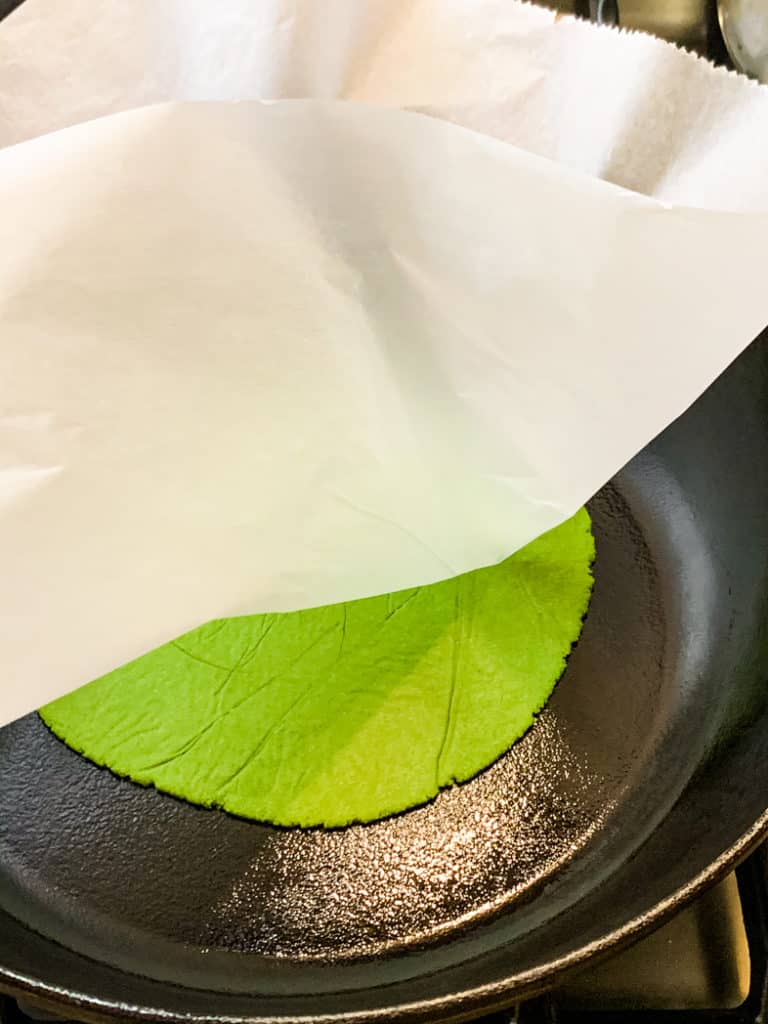
- Start making the first tortilla. Take the first ball, put it on the parchment paper, and flatten with your hands keeping a round shape as much as possible. Add the second parchment paper on top and start rolling out with a pin, as thin as possible. You will get a diameter of around 7-8 inches (20cm), but maybe they are not all perfectly equal.
- Peel off the top paper, take the tortillas with the bottom paper and flip it on the hot pan.
- Let it cook for about 2.5 minutes. In the meantime, you can roll out the next tortilla.
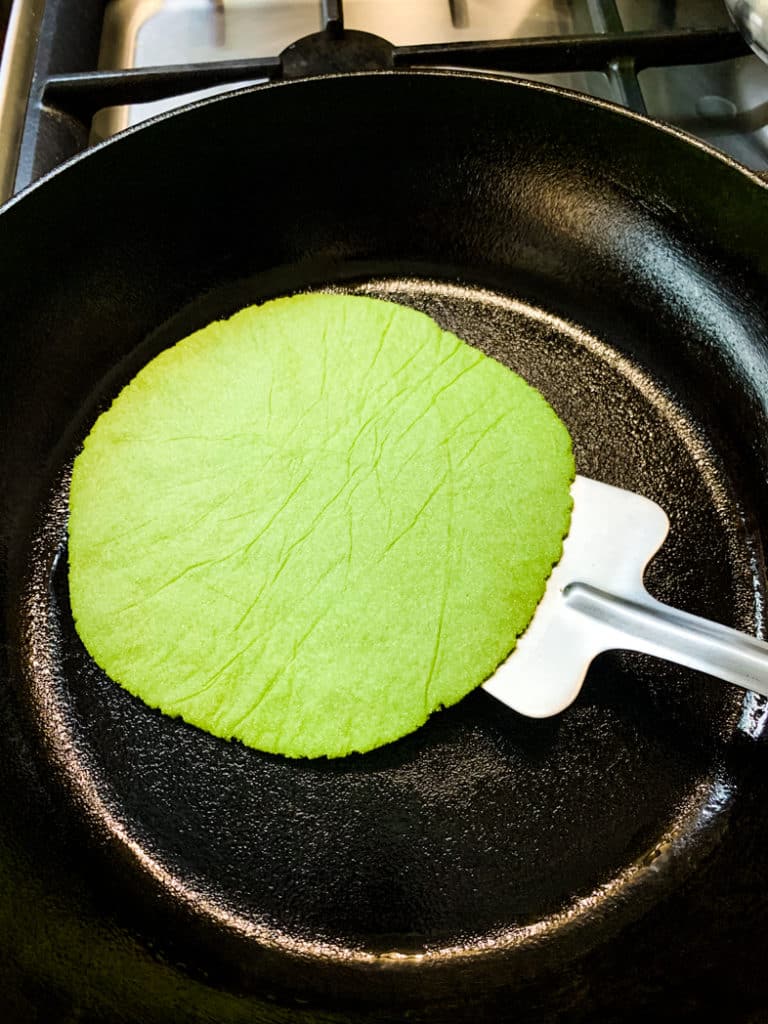
- When the 2.5 minutes are up, flip the tortilla. At this point, you should get some nice pockets, but don’t worry if it doesn’t happen the first time. This is the kind of stuff that requires a little bit of practice to make perfect. If you don’t get pockets, maybe your pan is not hot enough.
- Cook on the second side for another 2 minutes. From this point, I like to flip mine several times, to make sure is cooked through, on both sides. In total, the tortilla spends in the pan about 6 minutes.
- When done, put the tortilla on a plate. If you cover, they will get too soft to my taste, so I prefer to leave them uncovered. You can add parchment paper in between if you want, but it’s not necessary, they won’t stick to each other.
- Repeat until you finish them all.
- You can eat fresh, store them in an airtight container, in the refrigerator, for a day and reheat the next day. You can reheat in a pan or in the oven. The more you leave them on heat the crispier they will get.
- For freezing, add parchment paper in between them, add to an airtight container or a freezer bag, and freeze. When you want to eat, take them out and reheat them in the oven or on a pan.
Notes
Please read the entire post and check the visual guides for more help. This is an easy recipe once you make it a couple of times, but explaining the steps in detail takes a lot of space, hence the long text and instructions.

No Comments