This teff sourdough bread is everything I look for in a wholesome loaf — gluten-free, lectin-free, and made with just a handful of clean ingredients. No gums, no fillers, no fuss.
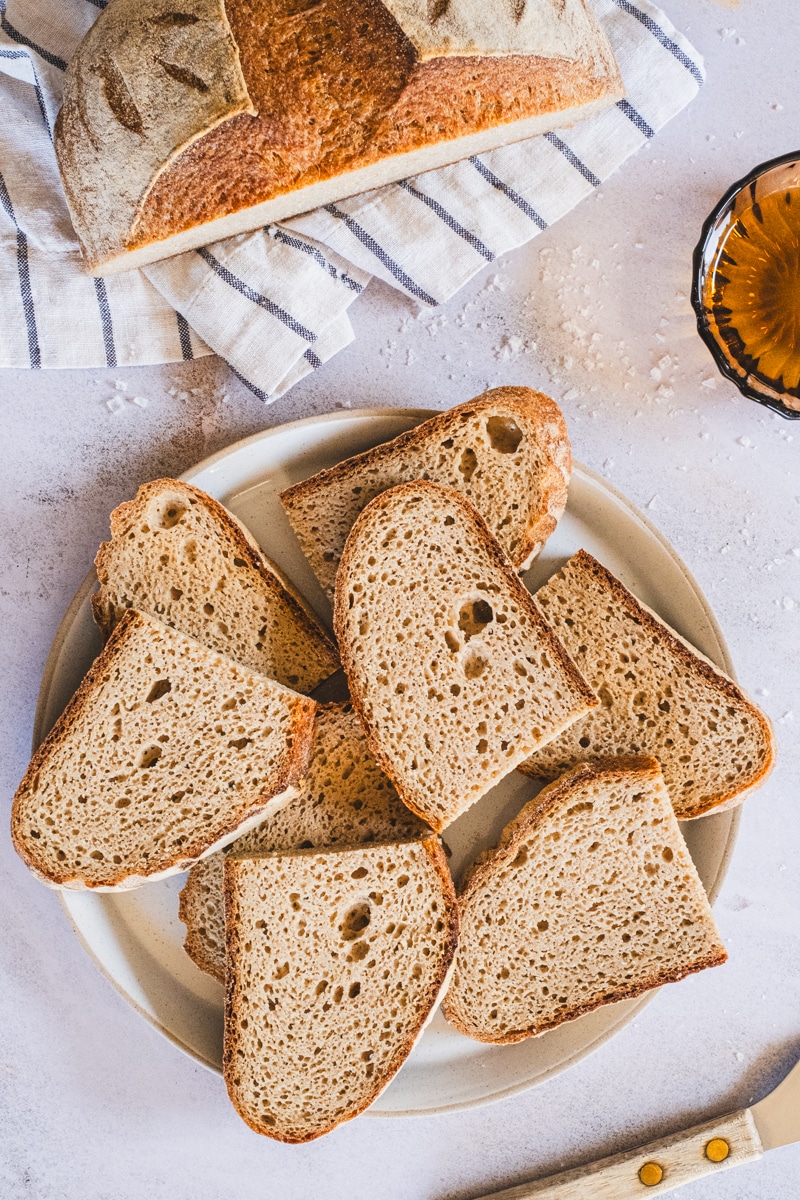
The crumb is light and airy, perfect for toasting and pairing with your favorite toppings. Naturally fermented with a wild gluten-free starter, it’s both nourishing and gut-friendly — and approachable, even if you’re completely new to sourdough baking.
One-Flour Bread Series
This Teff Sourdough Bread is part of my One-Flour Bread Series, where I showcase individual recipes using each of the three main flours in my gluten-free sourdough method: millet, sorghum, and teff.

For all my gluten-free sourdough loaves, I use my active starter, Rosie, which I regularly feed with a mix of millet, sorghum, and teff flours. When developing recipes, I work with a preferment (or levain) — a blend of active starter, water, and the flour featured in the recipe.
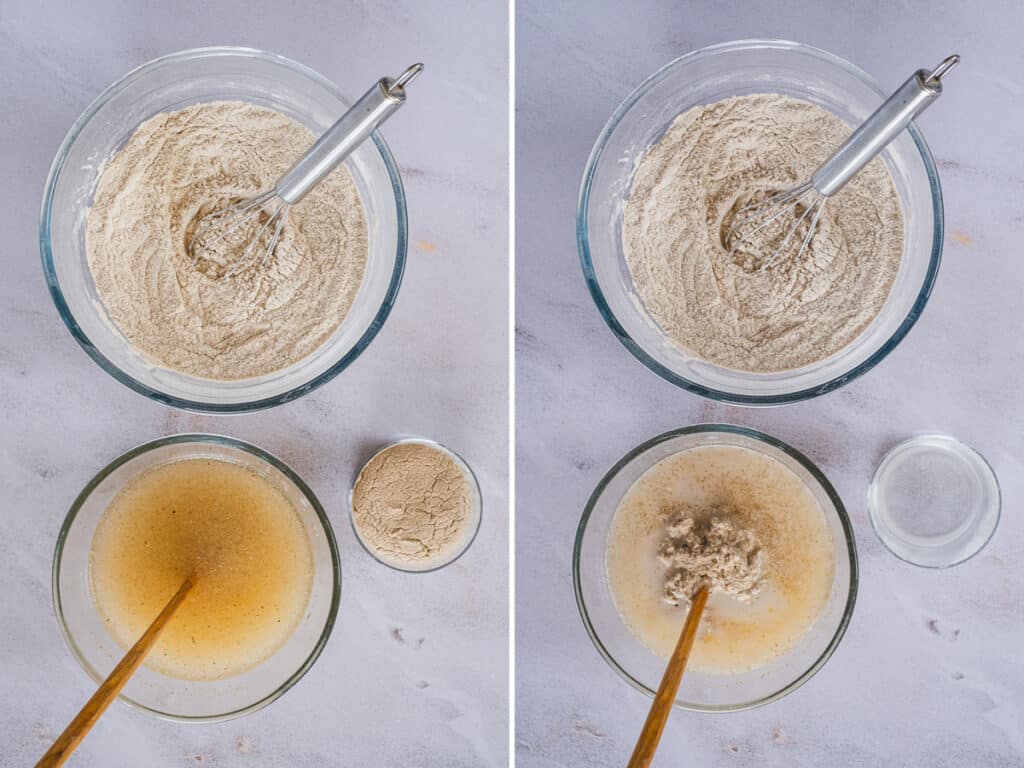
In this case, the preferment is made with 10g of starter, 35g of water, and 35g of teff flour. It takes about 6–7 hours to reach peak activity, and it should be used within 10 hours for best results. You can speed up fermentation by placing it in a gently warmed (but turned-off) oven or on a heating pad, reducing the proof time to as little as 3 hours.
A ready-to-use preferment will double in size, form a dome, and develop cracks on the surface — signs that it’s airy and active.
If you’re new to gluten-free sourdough, I highly recommend starting with my Beginner’s Guide to Baking Gluten-Free Sourdough Bread. You can also learn how to build a strong, versatile starter like Rosie in my Gluten-Free Sourdough Starter Guide.
Gluten-Free Sourdough Ebook
If you’d like to master gluten-free sourdough with clarity and confidence, my ebook Raising a Gluten-Free Sourdough Loaf brings the entire method together in one structured, cohesive guide.
While many of the elements are shared across my website, this book organizes everything into a clear progression — from building a strong, resilient starter to mastering the core method you can apply to artisan loaves, sandwich bread, bagels, pizza, and more. No searching between posts — just one complete roadmap supported by original visuals and 15 thoughtfully sequenced recipes across 130+ pages.

Teff, a Plant-Based Complete Protein
Teff is an ancient grain — technically a seed — originating from Ethiopia and Eritrea, where it has been cultivated for thousands of years. Naturally gluten-free and lectin-free, teff is a nutritional powerhouse, rich in protein, fiber, calcium, iron, and resistant starch. It’s especially high in lysine and contains all nine essential amino acids, making it a rare plant-based complete protein.
With a lower glycemic index and better digestibility than many other grains, teff is an excellent addition to a gut-friendly, anti-inflammatory diet — especially when soaked, fermented, or cooked, which helps reduce naturally occurring anti-nutrients like tannins and phytates.
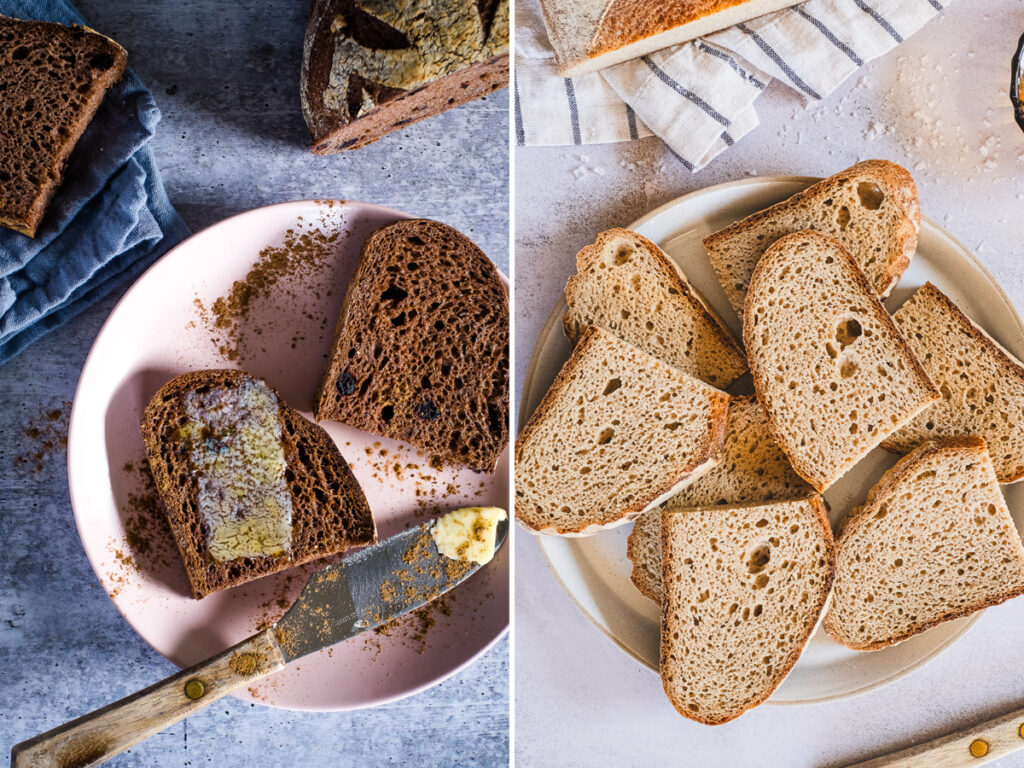
Teff flour, milled from whole teff grains, comes in shades of ivory and brown — each with its own subtle flavor profile. Ivory teff is milder and slightly sweeter, while brown teff has a more robust, earthy, hazelnut-like flavor.
For a long time, I baked mostly with the brown variety, but I now use whichever is available. The brand I rely on recently switched from brown to ivory, so this particular recipe is made with ivory teff. Both varieties work well in sourdough, with only minor differences in color and taste. I didn’t notice any change in hydration between the two colors, but teff is more absorbent than millet or sorghum (so it needs more water).
Teff is particularly well-suited for gluten-free sourdough baking. Every time I include even a small amount in my recipes, the bread turns out lighter and fluffier, so I wholeheartedly recommend adding it to your gluten-free flour mixes.
This loaf is the third recipe in my one-flour sourdough series, spotlighting the three gut-friendly grains that are naturally gluten- and lectin-free: millet, sorghum, and teff. If you’d like to explore more textures and flavors, try:
- My multigrain open-baked sourdough with millet, sorghum, and teff
- My fluffy hemp-enriched sourdough for extra protein and fiber
- My millet-and-sorghum loaf — a light, everyday white-bread alternative
Ready to bake? Let’s turn this humble ancient grain into a nourishing, slice-worthy loaf.
Basic Tools
- Digital kitchen scale (a must!)
- 2 mixing bowls (glass or plastic)
- Silicone spatula or wooden spoon
- Flexible dough scraper (plastic is good)
- Proofing basket (Banneton) or a small bowl lined with a clean cloth
- Dutch oven or heavy cast iron pot with a lid
- Heavy-duty parchment paper
- Razor blade or scoring knife
Ingredients
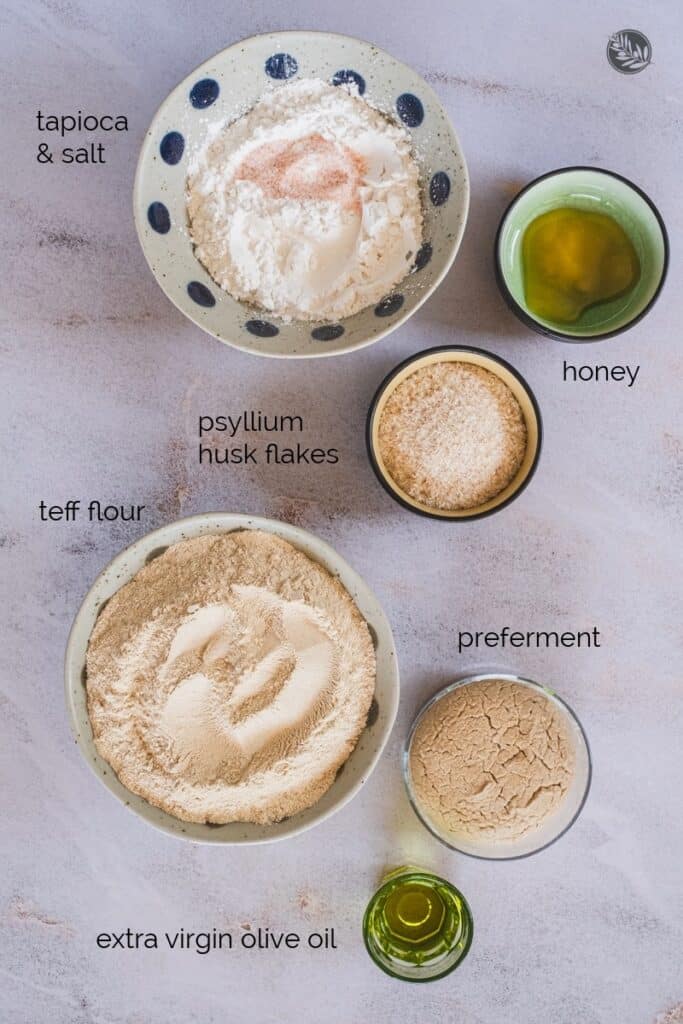
Just six simple ingredients — plus water — are all you need to make this artisan sourdough loaf with teff flour. You’ll find the full ingredient list with exact measurements in the step-by-step guide below and the recipe card at the end of the post.
For the best results, use fresh, organic teff flour and mineral-rich bottled water. I don’t recommend reverse osmosis water unless it has been properly remineralized, as the minerals play an important role in fermentation.
How to Make Teff Sourdough Bread
Step 1: Prepare the Preferment (The Night Before Baking, or 6-8 hours before)
Ingredients:
- 10g active sourdough starter
- 35g filtered water
- 35g teff flour (ivory or brown)
Instructions:
Do this in the evening, or 6-7 hours before mixing the dough. In a small clean jar, mix all ingredients thoroughly until no dry flour remains. I make the preferment the same time I feed my starter.
Cover with a lid (not air-tight) and leave to ferment at room temperature (21–23°C / 70–74°F) overnight. If you want to make the preferment in the morning, it will take about 6-7 hours for it to reach peak activity. To speed it up (to about 3h), you can use a heating pad or a gently heated oven (make sure the heat is OFF).
When at peak, the preferment should be bubbly, almost doubled, cracked on top, and have a light, pleasant aroma. For best results, please use it within 10h.
Step 2: Mix the Wet Ingredients
Ingredients:
- 17g whole psyllium husk flakes
- 440g filtered water, divided (420g+20g)
- 10g raw honey (helps fermentation; if vegan, use maple syrup)
- 10g extra virgin olive oil
- All of the preferment
Note: You might need an additional 10-20g of water, but only add it, if needed, when you mix the dough.
Instructions:
In a medium bowl, mix psyllium flakes, honey, and olive oil with 420g of water. Stir until the honey dissolves.
Let it sit for 3–5 minutes to allow a thick gel to form.
Add all of the preferment. Use the remaining 20g of water to rinse the preferment jar, making sure every bit of the preferment goes into the dough. Mix well until everything is fully incorporated and the mixture is smooth and uniform.
Step 3: Mix the Dry Ingredients
Ingredients:
- 230g teff flour (ivory or brown)
- 70g tapioca flour
- 6g fine sea salt (non-iodized)
Instructions:
In a large mixing bowl, whisk the flours and salt together thoroughly.
Step 4: Combine Wet and Dry Mixtures
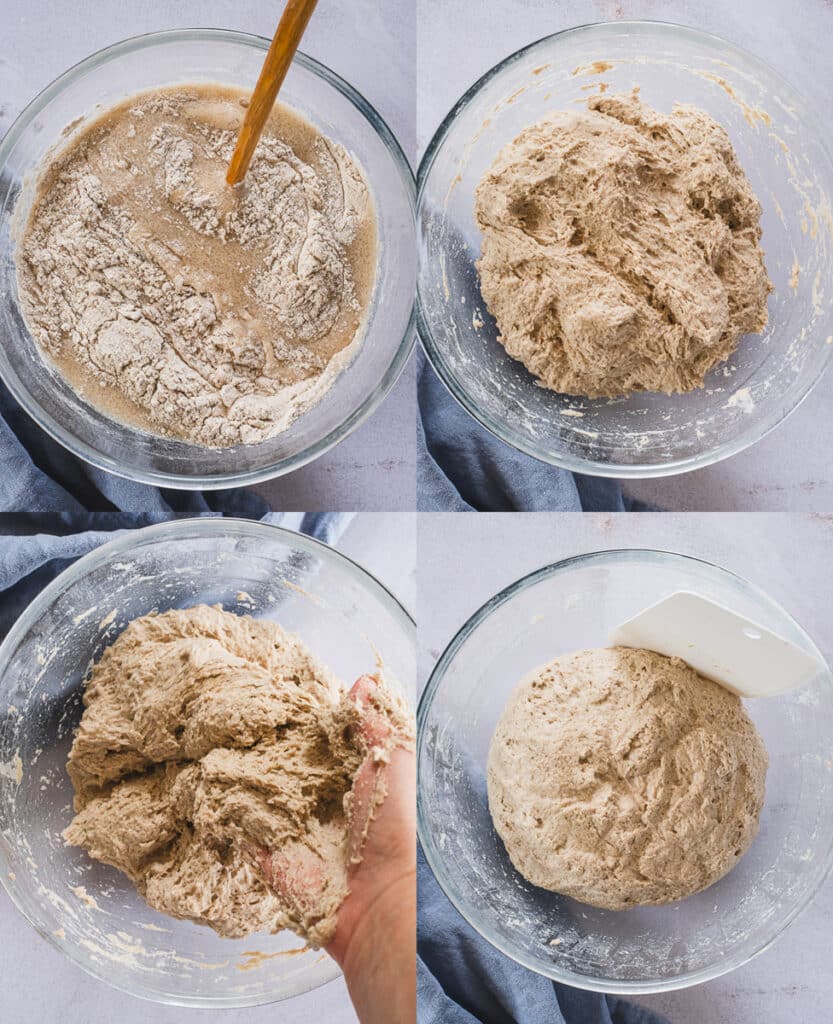
Add the wet gel mixture to the dry flour bowl.
Start mixing with a spatula, then use clean hands to thoroughly mix the dough, until an homogeneous dough forms (about 1-2 minutes). If the dough is too dry, now is time to mix in the extra 10-20g of water. Scrape down the sides with the dough scraper and fold the dough toward the center, rotating the bowl. Repeat the fold about 20 times.
The dough will be thick, soft, and slightly sticky.
Cover the bowl with a lid and set it in a draft-free, warm spot (room temperature is fine if not too cold).
Step 5: Bulk Fermentation (First Rise)
Let the dough ferment at room temperature for 1 to 2 hours, depending on the ambient conditions. This is something you’ll get a feel for with practice. As a general rule: in summer, 1 hour is often enough; in winter, when the house is cooler, it can take up to 2 hours.
I made this loaf in the summer and bulk fermented it for 1 hour at around 72°F (22°C).
Signs it’s ready: slight puffing, a smoother and lighter texture. If you are using a glass bowl (which I recommend), you will notice holes on the bottom and on the sides of the dough.
Step 6: Shaping the Loaf
Lightly flour a clean surface.
Gently invert the dough onto the surface. Gently grab the side further from you, and fold it over to the center of the dough, then repeat with one more fold, toward you. You are basically tightly rolling the dough towards you.
Now the seam-side should be on the bottom. Use your hands to create a slight tension between the dough and the surface, by gently rotating it and shaping it into a smooth ball, until the seam is well sealed. Lightly dust the top of the dough with flour.
Place it seam-side up into a lightly floured proofing basket or cloth-lined bowl. Dust some flour on top and cover with a cloth and a plastic cover.

Step 7: Final Proof (Second Rise)
Proof for 1–2 hours at room temperature. At a temperature of 72F (22C), it takes about 1 hour.
In gluten-free sourdough baking, the signs that the dough is ready are not as obvious as in regular wheat baking. It’s something you will learn to recognize with practice. We are looking for a rise in dough of about 20-30%, a puffy appearance, and a slightly jiggly texture. If your dough has visibly increased in size, it is most probably overproofed.
Step 8: Bake
Preheat your Dutch oven with the lid in the oven at 250°C / 480°F for about 30-40 minutes before baking. This ensures the pot is thoroughly hot and will create the right oven spring.
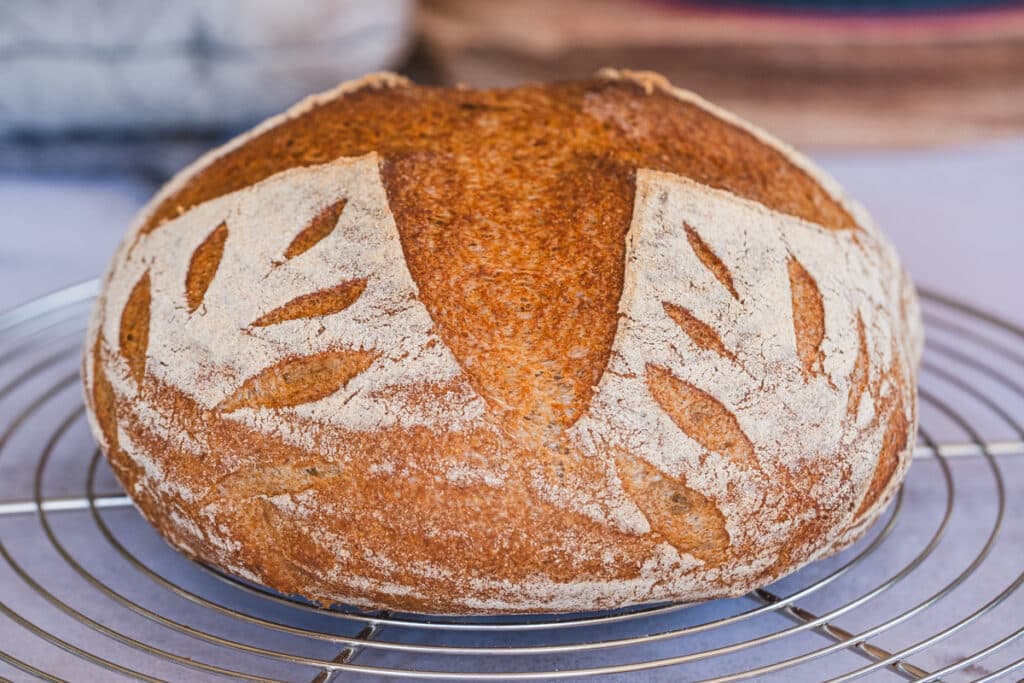
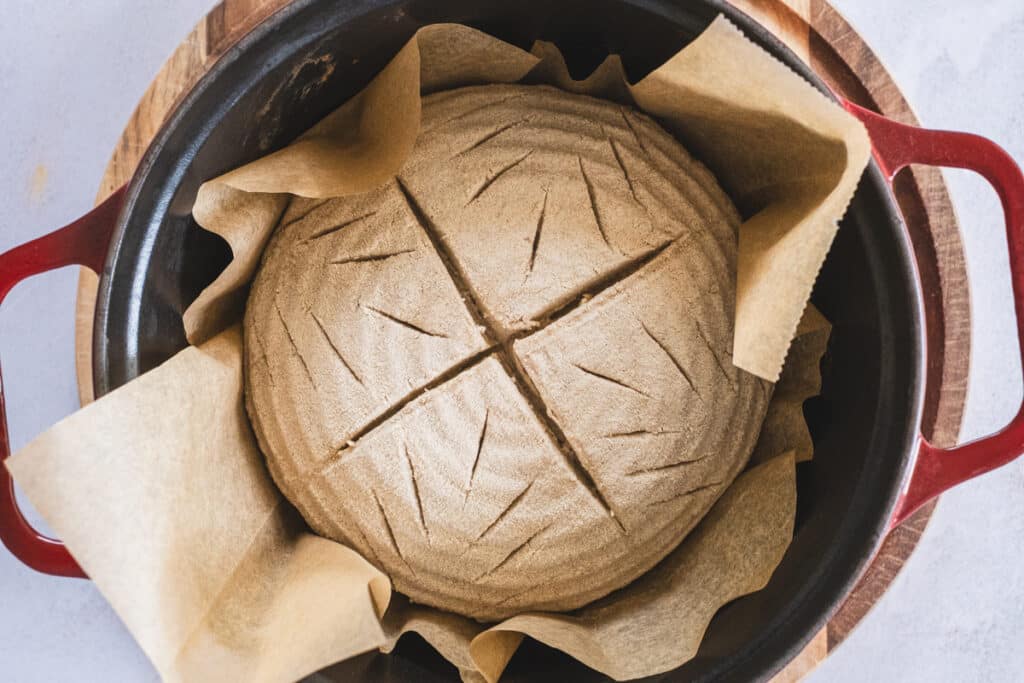
Carefully invert the dough onto a sheet of parchment paper. Score the top with a razor blade — a simple cross, to begin with, works well. You can expand your scoring repertoire once you have mastered the method.
Using oven mitts, remove the hot Dutch oven from the oven and lower the parchment paper with the dough inside.
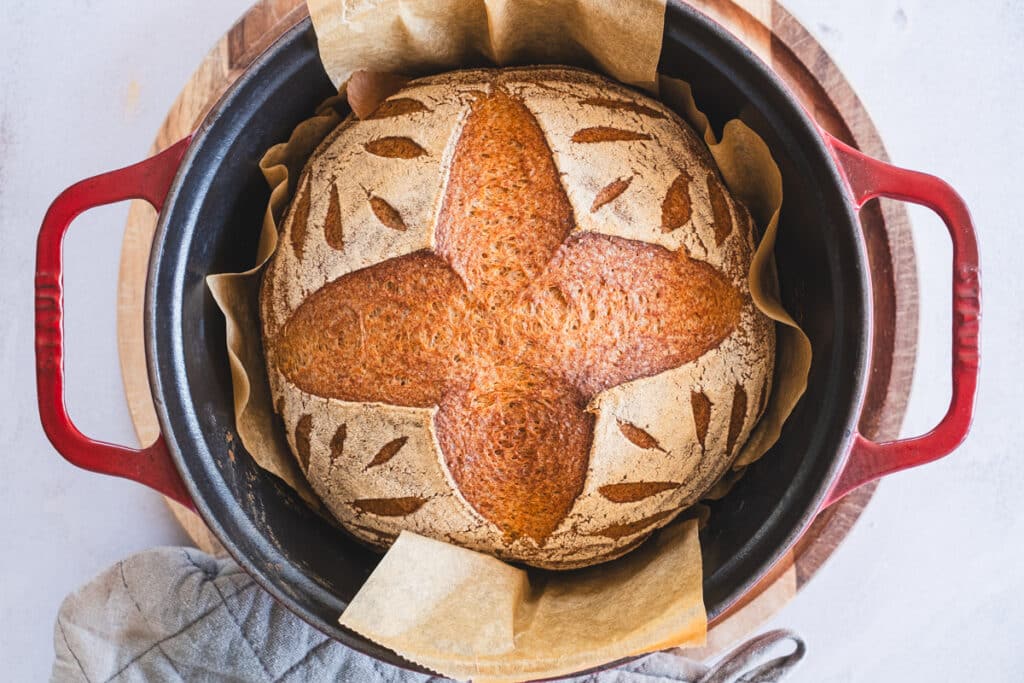
Bake covered for 40 minutes, then uncovered for another 35–40 minutes (the lid remains in the oven), until the loaf is deeply golden brown. The timing might slightly decrease if your oven runs on the hot side (if you noticed the bread had a burnt bottom and crust).
Remove the bread and place it on a cooling rack. Let it cool completely — at least 5 hours, but ideally overnight — before slicing. This allows the crumb to set fully. I know it’s tempting, but do not slice it before 5 hours, you will end up with a gummy crumb.
Proofing Tips:
You can accelerate fermentation (of both preferment and dough) with a warmer environment, or slow it down by using a refrigerator.
Overnight proofing:
If you make the dough later in the evening, you can proof it in the refrigerator, overnight. However, to avoid overproofing, only bulk ferment on the counter for 15 minutes, then shape and place in the proofing basket and cover. Make sure you do this as late as possible at night, and bake first thing in the morning.
Storage & Serving Tips
- Short-term: Wrap the cooled loaf in a clean cotton towel or place it in a paper bag. It keeps well at room temperature for up to 3 days.
- Long-term: Slice and freeze the loaf with parchment paper between slices. You can toast directly from frozen or let it thaw at room temperature and then toast.
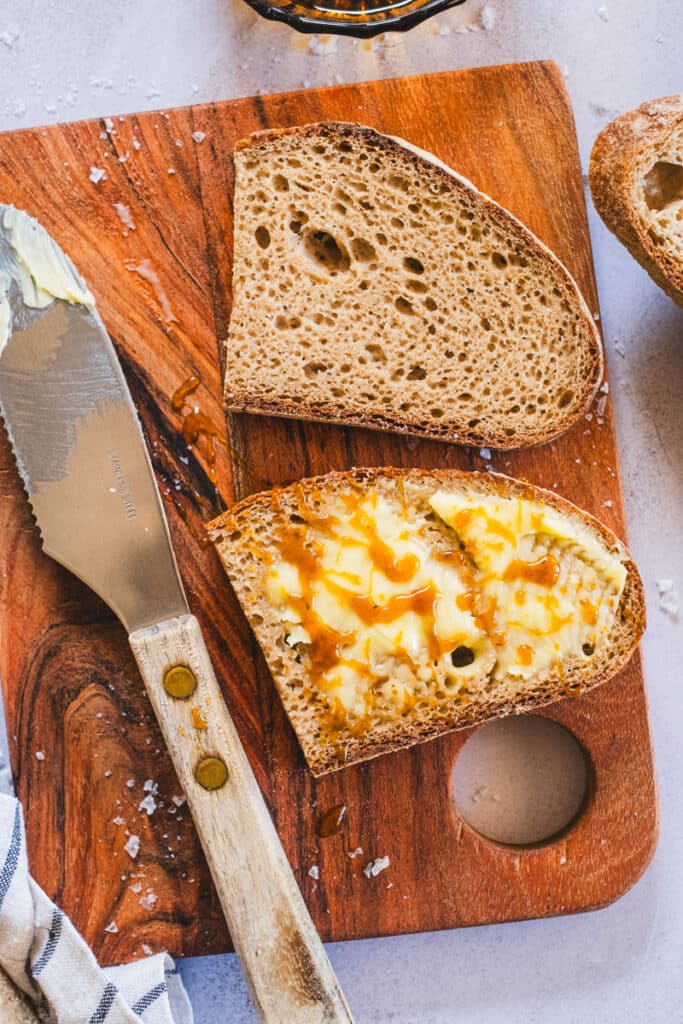
- Serving suggestion: My personal preference is to always toast a slice before serving. Toasting enhances gluten-free bread’s texture and taste. It’s the perfect bread for a buttery morning toast.
Estimated Nutritional Information
Based on 10 servings, one slice (approximately one large serving) contains 119 calories, 3.4 grams of protein, 1.8 grams of fat, 2.5 grams of fiber, and 20 grams of net carbohydrates.
For full details, see the nutritional label below the recipe card.
*This post contains affiliated links, which means I get a small commission if you choose to purchase something via one of my links, at no extra cost to you.
Print
Easy Teff Sourdough Bread (Gluten-Free)
- Prep Time: 30 minutes
- Proofing: 2 hours
- Cook Time: 80 minutes
- Total Time: 3 hours 50 minutes
- Yield: 10 servings
Description
This teff sourdough bread is everything I look for in a wholesome loaf — gluten-free, lectin-free, and made with just a handful of clean ingredients. No gums, no fillers, no fuss. The crumb is light and airy, perfect for toasting and pairing with your favorite toppings. Naturally fermented with a wild gluten-free starter, it’s both nourishing and gut-friendly — and approachable, even if you’re completely new to sourdough baking.
Ingredients
FOR THE PREFERMENT
- 10g active sourdough starter
- 35g filtered water
- 35g teff flour (ivory or brown)
FOR THE PSYLLIUM GEL
- 17g whole psyllium husk flakes
- 440g filtered water, divided (420g+20g)
- 10g raw honey (helps fermentation; if vegan, use sugar)
- 10g extra virgin olive oil
THE DRY INGREDIENTS
- 230g teff flour (ivory or brown)
- 70g tapioca flour
- 6g fine sea salt
Instructions
STEP 1: PREPARE THE PREFERMENT
- Do this in the evening, or 6-7 hours before mixing the dough. In a small clean jar, mix all ingredients thoroughly until no dry flour remains. I make the preferment the same time I feed my starter.
- Cover lightly and leave to ferment at room temperature (21–23°C / 70–74°F) overnight. If you want to make the preferment in the morning, it will take about 6-7 hours for it to reach peak activity. To speed it up (to about 3h), you can use a heating pad or a gently heated oven (make sure the heat is OFF).
- When at peak, the preferment should be bubbly, almost doubled, cracked on top, and have a light, pleasant aroma. For best results, please use it within 10h.
STEP 2: MIX THE WET INGREDIENTS
- In a medium bowl, mix psyllium flakes, honey and olive oil with 420g of water. Stir until the honey is dissolved and all the ingredients are mixed.
- Let sit for 3–5 minutes to allow a thick gel to form.
- Add all of the preferment to the gel. Use the remaining 20g of water to rinse the preferment jar, making sure every bit of the preferment goes into the dough. Mix well until everything is fully incorporated and the mixture is smooth and uniform.
STEP 3: MIX THE DRY INGREDIENTS
- In a large mixing bowl, whisk the flours and salt together thoroughly.
STEP 4: COMBINE WET AND DRY MIXTURES
- Add the wet gel mixture to the dry flour bowl.
- Start mixing with a spatula, then use clean hands to thoroughly mix the dough, until an homogeneous dough forms (about 1-2 minutes). If the dough is too dry, now is time to mix in 10-20g of water. Scrape down the sides with the dough scraper and fold the dough toward the center, rotating the bowl. Repeat about 20 times.
- The dough will be thick, soft, and slightly sticky.
- Cover the bowl with a lid and set in a draft-free, warm spot (room temperature is fine if not too cold).
STEP 5: BULK FERMENTATION (FIRST RISE)
- Let the dough ferment at room temperature for 1 to 2 hours, depending on the ambient conditions. This is something you’ll get a feel for with practice. As a general rule: in summer, 1 hour is often enough; in winter, when the house is cooler, it can take up to 2 hours.
- I made this loaf in the summer and bulk fermented it for 1 hour at around 72°F (22°C).
- Signs it’s ready: slight puffing, a smoother and lighter texture. If you are using a glass bowl (which I recommend), you will notice wholes on the bottom and on the sides of the dough.
STEP 6: SHAPING THE LOAF
- Lightly flour a clean surface.
- Gently invert the dough onto the surface. Gently grab the side further from you, and fold it over to the center of the dough, then repeat with one more fold, toward you. You are basically tightly rolling the dough towards you.
- Now the seam-side should be on the bottom. Use your hands to create a slight tension between the dough and the surface, by gently rotate it and round it into a smooth ball, and the seam is well sealed. Lightly dust the top of the dough with flour.
- Place it seam-side up into a lightly floured proofing basket or cloth-lined bowl. Dust some flour on top and cover with a cloth and a plastic cover.
STEP 7: FINAL PROOF (SECOND RISE)
- Proof for 1–2 hours at room temperature. At a temperature of 72F (22C), it takes about 1 hour.
- In gluten-free sourdough baking, the sighs that the dough is ready are not as obvious as in regular wheat baking. It something you will learn to recognize with practice. We are looking for a rise in dough of about 20-30%, a puffy appearance, and a slightly jiggly texture. If your dough has visibly increased in size, it is most probably overprooved.
STEP 8: BAKE
- Preheat your Dutch oven with the lid in the oven at 250°C / 480°F for about 30-40 minutes before baking. This ensures the pot is thoroughly hot and will create the right oven spring.
- Carefully invert the dough onto a sheet of parchment paper. Score the top with a razor blade — a simple cross, to begin with, works well. You can expand your scoring repertoire once you have mastered the method.
- Using oven mitts, remove the hot Dutch oven from the oven and lower the parchment paper with the dough inside.
- Quickly spray the dough with water using a spray bottle, or add an ice cube to the pot before covering — this helps create steam and a beautiful crust.
- Bake covered for 40 minutes, then lower the heat to 230°C / 446°F, remove the lid, and bake uncovered for another 35–40 minutes (the lid remains in the oven), until the loaf is deeply golden brown. The timing might slightly decrease if your oven runs on the hot side (if you noticed the bread had a burnt bottom and crust).
- Remove the bread immediately and place on a cooling rack. Let it cool completely — at least 5 hours, but ideally overnight — before slicing. This allows the crumb to set fully. I know is tempting, but do not slice it before 5 hours, you will end with a gummy crumb.
- Gluten-free bread is best if lightly toasted before eating.
STORAGE and SERVING TIPS
- Short-term: Wrap the cooled loaf in a clean cotton towel or place it in a paper bag. It keeps well at room temperature for up to 3 days.
- Long-term: Slice and freeze the loaf with parchment paper between slices. You can toast directly from frozen or let it thaw at room temperature and toast.
- Serving suggestion: This bread is best enjoyed toasted. Toasting helps bring back moisture and enhances the texture. It’s the perfect bread for a buttery morning toast.
Notes
PROOFING TIPS: You can accelerate fermentation (of both preferment and dough) with a warmer environment, or slow it down by using a refrigerator.
OVERNIGHT PROOFING: If you make the dough later in the evening, you can proof it in the refrigerator, overnight. However, to avoid overproofing, only bulk ferment on the counter for 15 minutes, then shape and place in the proofing basket and cover. Make sure you do this as late as possible at night, and bake first thing in the morning.

4 Comments
Ella D
February 21, 2026 at 11:07 amDear Claudia —
You are a genius. This was an incredible recipe. It feels like gift to be able to enjoy bread again. I have an immune reaction to gluten and so must avoid all gluten grains. I thought I would never be able to enjoy sourdough baking again. But this recipe was like eating real bread, and I get to enjoy caring for a starter and working with fermentation again. I used brown teff and the result was much like rye. The flavor was AMAZING. Just incredible — so rich, so malty, so complex, so satisgying. The rise was perfect. The crumb was beautiful. My only modification was to use 70g chickpea flour in the flour mix, as I like the bit of chew and protein this adds.
I do have a question: do you think arrowroot flour would work in place of tapioca?
Claudia
February 22, 2026 at 3:54 amHi Ella! Thank you so much for the kind words and the review. I’m so happy you loved this recipe. I love teff bread! And yes, arrowroot works the same. I usually work with tapioca, but I had several instances when I only had arrowroot and I didn’t notice any difference. xx -Claudia
Helmut
September 25, 2025 at 7:36 amBackpulver geht nur bis max. 220 grad
Claudia
September 26, 2025 at 6:49 amThere is no baking powder in this recipe, so I don’t understand the comment. Maybe you got the wrong translation of the recipe. -Claudia