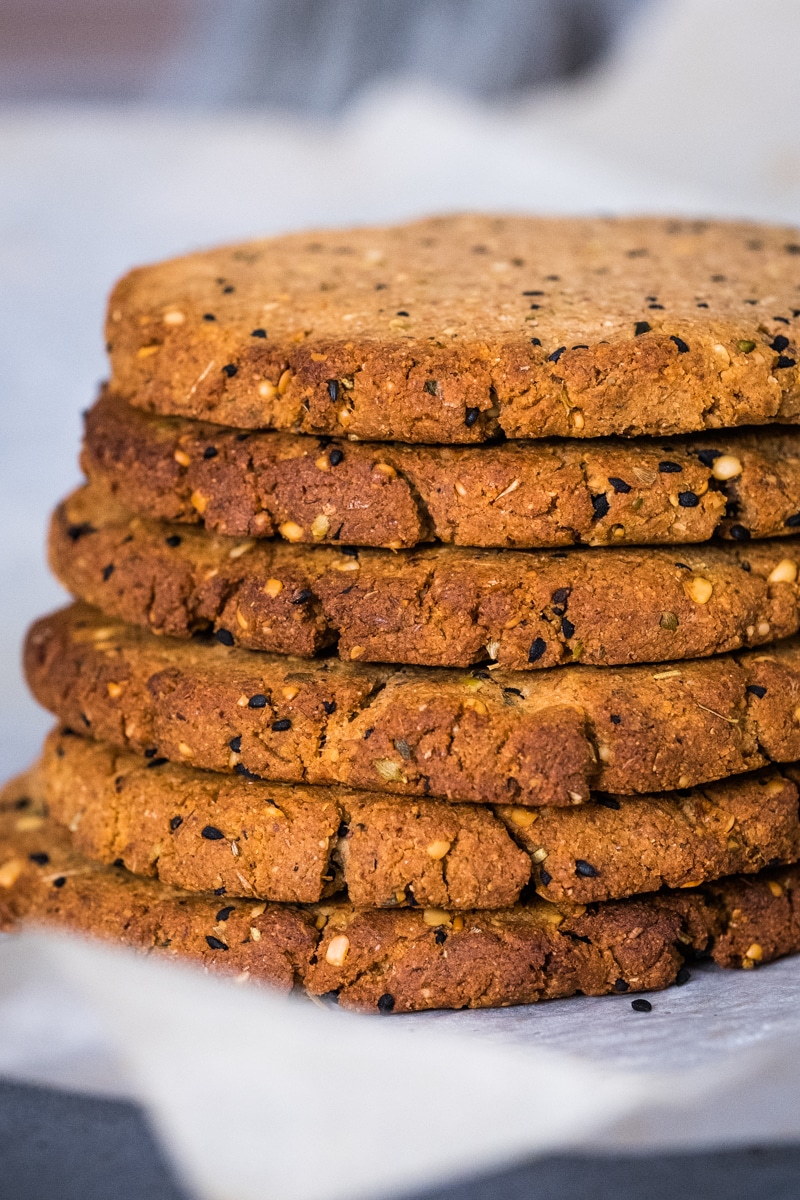
If you are looking for an everyday bread alternative that is gluten-free, lectin-free, and vegan, look no further. These homemade bread thins are so easy to make and require no yeast.
Made with wholesome ingredients like sweet potatoes, cassava, and almond flour, and healthy seeds and spices, they are not only a great replacement for your regular toast, but they are nutritious and super flavorful.
What are bread thins?
Bread thins, also called sandwich thins rolls, are a great invention, especially for those who prefer a higher ratio of crust to crumb. They are used to make sandwiches or simply as a bread replacement, next to your meals.
Usually, sandwich thins can be transversely sliced, but I don’t recommend trying it with this recipe. I made them thin enough to be a perfect accompaniment to any meal, including burgers, without having to be sliced.
Why I love these homemade bread thins
They are so easy to make: mix the dry ingredients, blend the wet ingredients, make a dough, split it into 8 portions and flatten them, then bake. No yeast, no waiting time.
They are nutritious and flavorful, made with a nutrient-dense mix of wholesome ingredients: sweet potato, onion, spices and seeds, cassava, almond, and tigernut flour.
They can accommodate many diets: gluten-free, lectin-free, sugar-free, dairy-free, and vegan. With minor changes, they can also be made nut-free.
They are so versatile: use them as toast, as a base for an open sandwich, or even a burger; serve them next to a salad or stew, or with eggs and vegetables in the morning. So perfect as a travel or lunch box bread.
They are easy to store and great for meal prep: you can eat them warm, or cold, or reheat them. Store them in the refrigerator for a few days, or freeze them. Reheat them in the toaster or in the oven.
The ingredients to make gluten-free bread thins
DRY ingredients:
- 130 grams cassava flour (plus more if needed for kneading)
- 25 grams almond flour (replace with cassava or tigernut for a nut-free version)
- 20 grams tigernut flour
- 20 grams flax seed meal (ground flax seeds)
- 2 tablespoons psyllium husk flakes
- 1 tablespoon arrowroot or tapioca flour (starch)
- 2 tablespoons hemp seeds
- 1 tablespoon Nigella sativa seeds
- 1 teaspoon baking powder
- 1/2 tablespoon herbs de Provence
- 1 teaspoon dry oregano
- 1 teaspoon salt
BLENDER ingredients:
- 1 small onion, chopped
- 2, 3 garlic cloves
- 160 grams sweet potato puree (cooked: boiled or baked)
- 1 teaspoon apple cider vinegar
- 1/4 cup full-fat coconut milk
- 1/4 cup water
- 5 tablespoons extra virgin olive oil
TO FIND SUGGESTIONS FOR ALL THE INGREDIENTS, IN ONE PLACE, CHECK OUT OUR SHOP PAGE


Instructions
- Preheat the oven to 400F and prepare a baking sheet with parchment paper. Prepare another parchment baking sheet and a rolling pin.
- Combine all the dry ingredients in a large bowl.
- Add all the blender ingredients to a blender and combine until all creamy and smooth.
- Add the blender ingredients to the dry mix bowl and combine with a spatula, then with your hands until you form a nice dough ball. If you feel like the dough is too wet, you can dust it with more cassava flour and knead it. If too dry, wet your hands and knead until the dough gets hydrated.
- Split the dough into 8 equal balls and flatten them with your hands or with the help of a rolling pin. From my experience, there is no need for a top sheet of parchment paper, but if you feel it sticks to the rolling pin, you can do that. The thickness should be about 1/4 inch.
- Transfer the little breads on the baking sheet and bake for about 25 minutes. If you plan to freeze them for later use, I would bake them a little less, and when you reheat them, you can cook them soft or with a harder crust.
They’ll stay fresh for a couple of days in the fridge, in an air-tight container, and they freeze well, separated with parchment paper. Take out before serving and warm in the oven for about 10 minutes (straight from the freezer).
You can use these bread thins as mini pizzas, so you can slightly undercook them, add the toppings, and continue to cook for 10 more minutes with toppings. You can roll them thinner if you prefer, or even use a tortilla press to make flatbreads on a griddle.

How to eat these gluten-free homemade bread thins
There are so many ways these come in handy:
- Use them as a burger ‘bun’
- Serve them with your lunch or dinner
- Make open sandwiches
- Easy snack on the go; spread some chicken liver pate for a nutritious bite.
- With eggs in the morning
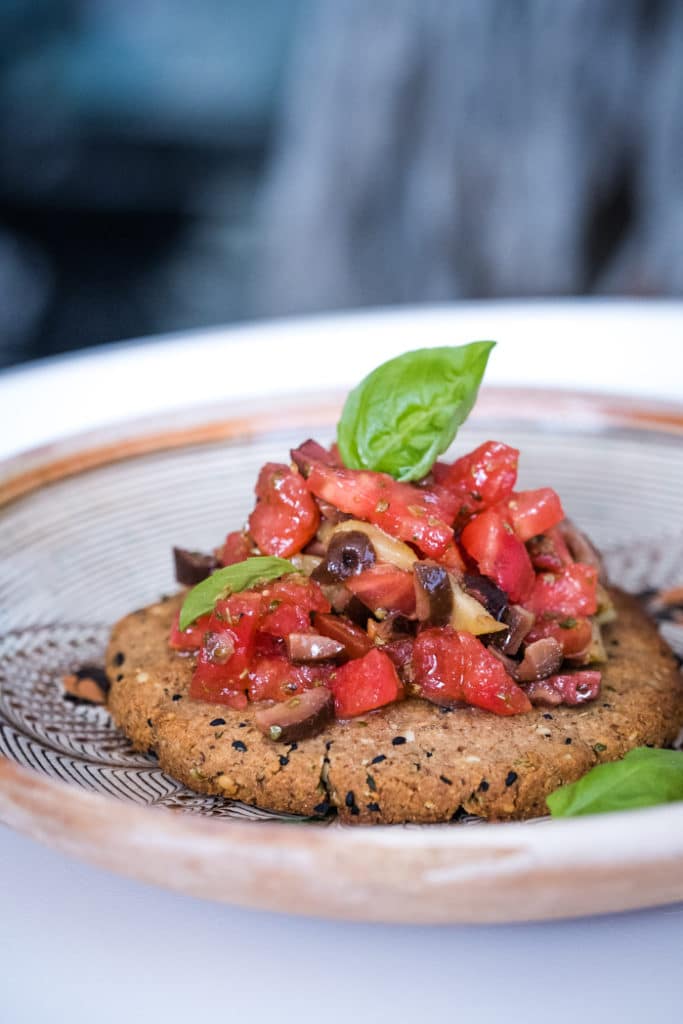
- Make bruschetta with fresh tomatoes (no seeds or skins), olives, basil, extra virgin olive oil, and sea salt
They have great texture and taste so good!


Enjoy!
*This post contains affiliated links, which means I get a small commission if you choose to purchase something via one of my links, at no extra cost to you.
Print
Homemade Bread Thins (Gluten-Free, Vegan)
- Prep Time: 30 minutes
- Cook Time: 25 minutes
- Total Time: 55 minutes
- Yield: 8
- Category: Bread
- Method: Baking
- Diet: Gluten-Free, Vegan
Description
If you are looking for an everyday bread alternative that is gluten-free, lectin-free, and vegan, look no further. These homemade bread thins are so easy to make and require no yeast. Made with wholesome ingredients like sweet potatoes, cassava, and almond flour, and healthy seeds and spices, these bread thins are not only a great replacement for your toast, but they are nutritious and super flavorful.
Ingredients
DRY ingredients
- 130 grams (about 1 cup) cassava flour (plus more if needed for kneading)
- 25 grams (1/4 cup) almond flour
- 20 grams (2 1/2 tablespoons) tigernut flour
- 20 grams (3 tablespoons) flax seed meal (ground flax seeds)
- 2 tablespoons psyllium husk flakes
- 1 tablespoon arrowroot or tapioca flour (starch)
- 2 tablespoons hemp seeds
- 1 tablespoon Nigella sativa seeds
- 1 teaspoon baking powder
- 1/2 tablespoon herbs de Provence
- 1 teaspoon dry oregano
- 1 teaspoon salt
BLENDER ingredients
- 1 small onion, chopped
- 2, 3 garlic cloves
- 160 grams (about 2/3 cup) sweet potato puree (cooked: boiled or baked). Please weight it if you can, it’s more accurate.
- 1 teaspoon apple cider vinegar
- 1/4 cup full fat coconut milk
- 1/4 cup water
- 5 tablespoons extra virgin olive oil
Instructions
- Preheat the oven to 400F and prepare a baking sheet with parchment paper. Prepare another parchment baking sheet and a rolling pin.
- Combine all the dry ingredients in a large bowl.
- Add all the blender ingredients to a blender and combine until all creamy and smooth.
- Add the blender ingredients to the dry mix bowl and combine with a spatula, then with your hands until you form a nice dough ball. The consistency might be different depending on how to measure the ingredients, so add more flour if the dough is too wet or more water if too dry.
- Split the dough into 8 equal balls and flatten them with your hands or with the help of a rolling pin. From my experience, there is no need for a top sheet of parchment paper, but just in case you feel it sticks to the rolling pin you can do that. The thickness should be about 1/4 inch.
- Transfer the little breads on the baking sheet and bake for about 25 minutes. If your plan is to freeze them for later use, I would bake them a little less, and when you reheat them you can cook them soft or with a harder crust.
Notes
They’ll stay fresh for a couple of days in the fridge, in an air-tight container and they freeze well, separated with parchment paper. Take out before serving and warm in the heated oven for about 10 minutes (straight from the freezer). You can use these as mini pizzas, so you can slightly undercook them, add the toppings and continue to cook for 10 more minutes with toppings. You can roll them thinner if you prefer or even use a tortilla press to make flatbreads on a griddle (you might need to add more flour for more crispiness).

13 Comments
Tammy R
January 30, 2025 at 7:42 pmWow, this bread is so delicious! Filling, too! I ate it with your warming cauliflower & mustard greens soup – and with chicken tikka masala- and so wonderful! I froze four of the rounds separated by parchment paper. Then thawed later in the fridge. I popped in the toaster which is my favorite way of reheating. This will be a staple for me. Thank you!
Claudia
January 31, 2025 at 11:58 amThank you so much, Tammy! I agree this is a nutritious and tasty substitute for bread. xx -Claudia