A precious gift from my Brazilian friend Luana and her aunt Jovita, this authentic, easy recipe for Brazilian cheese bread, Pao de Queijo, is such a great gluten-free and lectin-free bread alternative. It only requires five ingredients and about 10 minutes to put together.
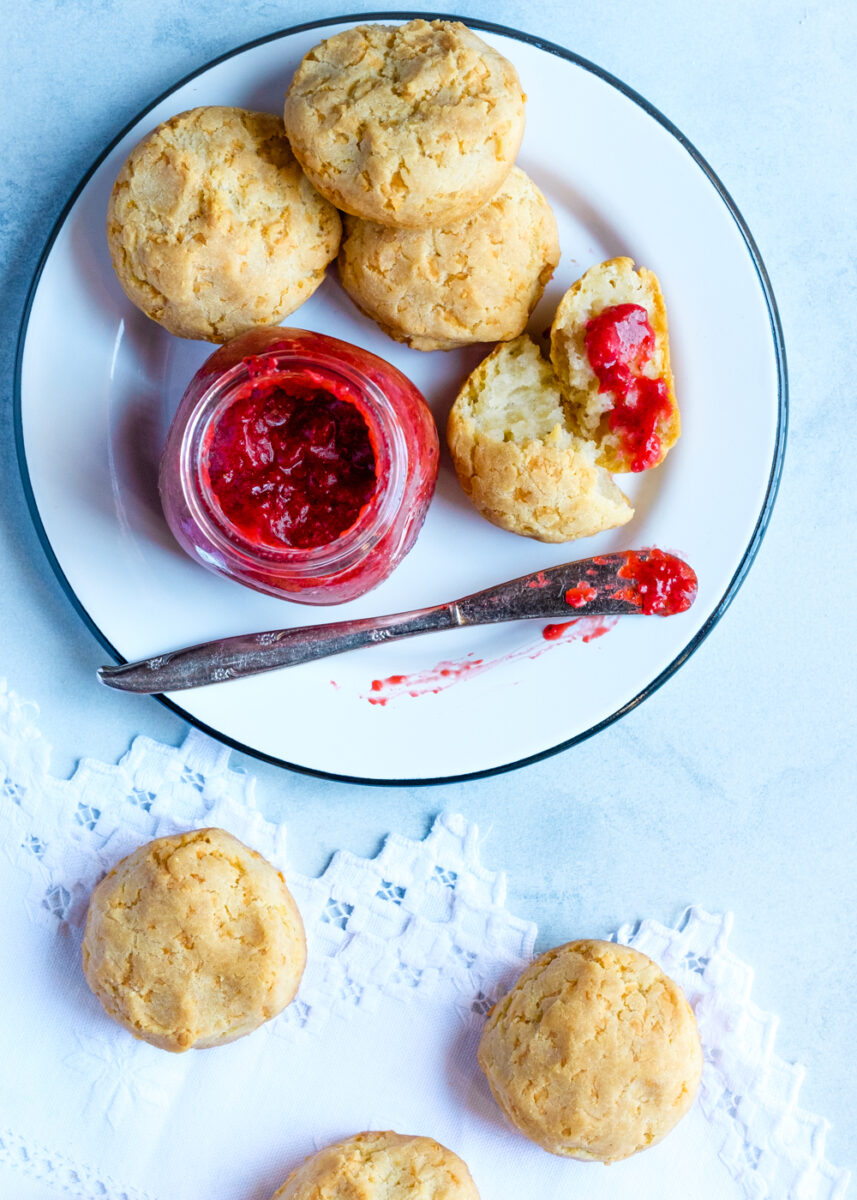
With a golden brown and crispy crust and a gooey, salty, cheesy inside, this easy Pao de Queijo will be perfect for breakfast with butter and jam, as an afternoon snack with tea, or even as mini sandwich bread.
My first experience with Brazilian cheese bread
I remember the first time I had Brazilian cheese bread, Pao de Queijo. It was at a Churrasco restaurant in Dubai. I ate so much that I could barely have any meat after. They were so good.
Since they are originally made with cassava flour and easy to make Plant Paradox compliant, I’ve been contemplating making them for a long time. Still, I’ve always been intimidated by recipes that seem rather complicated, like the classic Pao de Beijo recipe.
What I have here is a treasure because it is absolutely delicious, it takes 10 minutes to put together, and the recipe comes straight from Brazil.
The most precious gift – an authentic but easy Brazilian cheese bread recipe
Jovita is Luana Ferrari’s grand auntie, and Luana is a social media friend. She is Brazilian, lives in Paris, loves to eat real food, and is as passionate about food and cooking at home as I am. So in a proper social media friend fashion, I stalk her all the time and follow her travels and culinary adventures.
When she started posting about being back home in Brazil and enjoying foods and flavors that reminded her of childhood, I became curious. Thank God she enjoys the exchange and is as excited about sharing culinary stories of her family as I am to be at the receiving end.
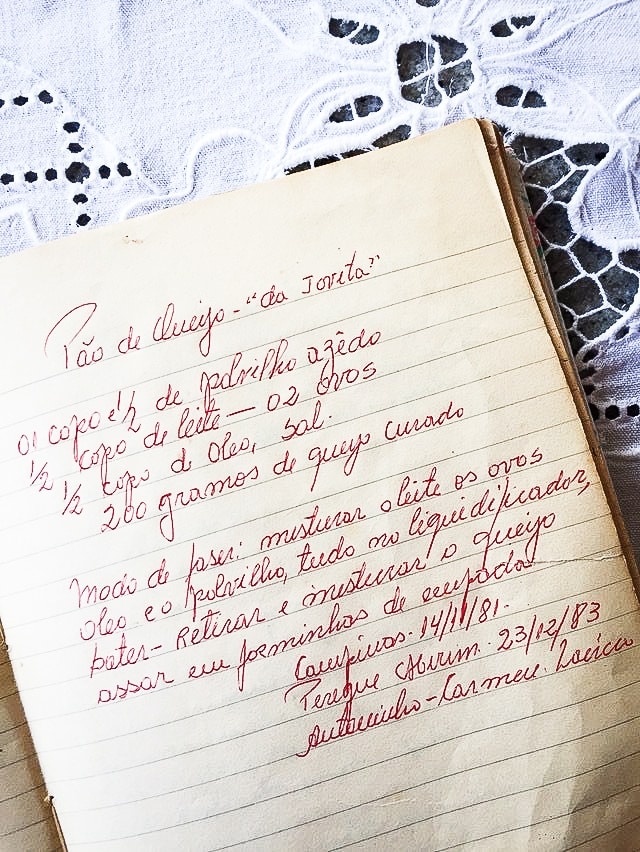
To cut this story short (-er), I ended up with the most precious gift, an easy Pao de Queijo recipe (Brazilian cheese bread) her aunt Jovita makes, handwritten by Jovita’s brother in 1983, just before Christmas (I was four years old at the time!). And I’m now passing it forward thanks to Luana’s generosity.
The easiest Pao de Queijo recipe you will ever find
If you don’t read Portuguese, the original ingredients were:
- cassava flour
- oil
- cured (aged) cheese
- eggs
- milk
And four lines of instructions. My kind of recipe.
I used Otto’s Cassava flour, full-fat coconut milk (unsweetened, in a can, I buy 365 from Whole Foods), Pecorino Romano cheese, avocado oil, and two pastured eggs. Luana told me that Pecorino Romano is also her choice when she needs to replace aged Brazilian cheese.
The way this recipe comes together might change depending on the cassava flour you are using. If you are in the US, I recommend using Otto’s brand; if not, you might have to adjust the quantities slightly (add more flour if too runny or more milk if too hard.
It is super easy to make them. It took me 10 minutes to make the dough and 30 minutes to bake it, and the result was mind-blowing.
Can be served both warm and cold
The crust is golden brown and crispy and hard, and the inside is gooey, salty, cheesy goodness. I’m not even going to mention how many I had, for the sake of being informed to make this post, of course.
But in all seriousness, I had to try it warm and cold, and after keeping it for a few hours in the fridge, all of them were amazing.
How to store them
Store the Brazilian cheese bread on the counter for a day in an air-tight container or freeze it. The best way to store them is to freeze them.
I kept them in a Stasher bag at room temperature overnight. They are still soft the next day, they just lose a little bit of shape and the hard crust, but they are still as tasty as on the first day.
How to eat Brazilian cheese bread
Auntie Jovita and her dad are from Ibiraci, a small town in the State of Minas Gerais in Brazil (North of Rio). At the farm they grew up, Pao de Queijo (‘cheese bread’) was an everyday food (and it still is).
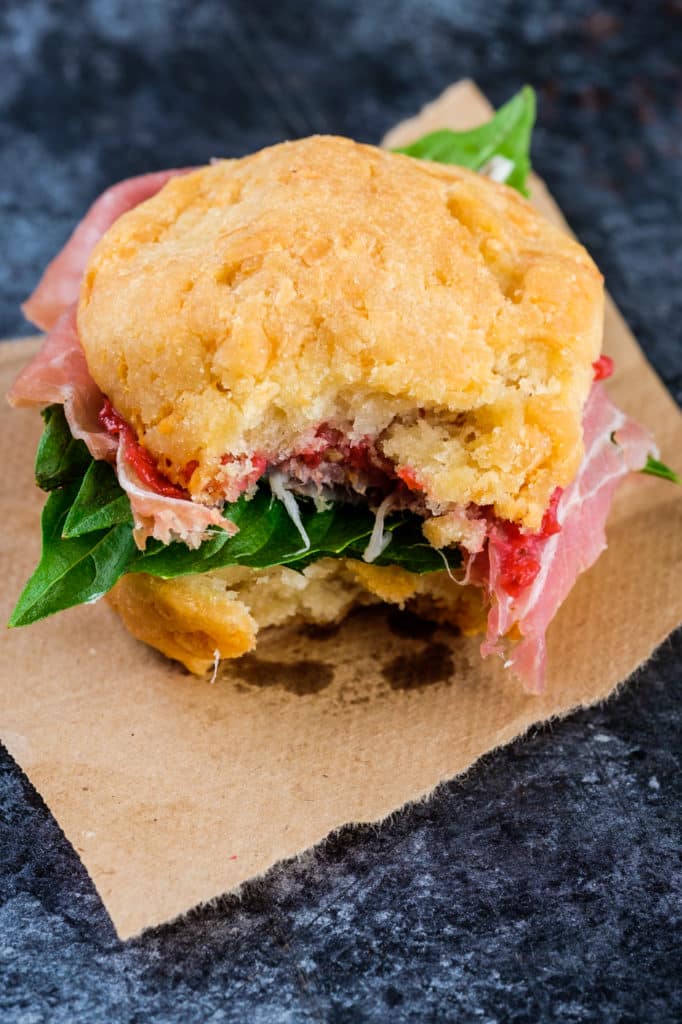
In Brazil, cheese bread can be served as breakfast with butter, jelly, or jam, had as a snack in the afternoon with coffee, or even used for sandwiches, with pretty much anything you can imagine (guess what I’m having tomorrow?). I had some with homemade strawberry jam, and it was delicious.
This is not a keto bread
Because some of you have commented, this is not a low-carb bread. I have added the nutritional label below. Anything made with cassava flour will not be low-carb or keto friendly.
For more information on gluten-free and lectin-free flour types and which ones are keto-friendly, check this article: Quick Guide to Lectin-Free, Gluten-Free Flours
Vegan Brazilian Bread
For a vegan version of Brazilian cassava bread, try our Pao de Beijo recipe, made with cassava flour and sweet potato.
*This post contains affiliated links, which means I get a small commission if you choose to purchase something via one of my links, at no extra cost to you.
Print
Easy Brazilian Cheese Bread Recipe (Pao de Queijo)
- Prep Time: 10 minutes
- Cook Time: 30 minutes
- Total Time: 40 minutes
- Yield: 12
- Category: Bread
- Method: Baking
- Cuisine: Brazilian
- Diet: Gluten-Free
Description
A precious gift from my Brazilian friend Luana and her aunt Jovita, this authentic, easy recipe for Brazilian cheese bread, Pao de Queijo, is such a great gluten-free and lectin-free bread alternative. It only requires five ingredients and about 10 minutes to put together. With a golden brown and crispy crust and a gooey, salty, cheesy inside, this easy Pao de Queijo will be perfect for breakfast with butter and jam, as an afternoon snack with tea, or even as mini sandwich bread.
Ingredients
- 1 1/2 cup cassava flour
- 1/2 cup full-fat coconut milk (in a can)
- 1/2 cup avocado oil
- 2 pasture-raised eggs
- 200g grated Pecorino Romano cheese (about 2 heaping cups)
Instructions
- Preheat oven to 410F.
- Prepare a muffin pan by oiling it (you can use ghee or avocado oil).
- Mix coconut milk with avocado oil and eggs. Add the flour and incorporate it into the wet mixture. Add the cheese and mix. You will get a sticky dough.
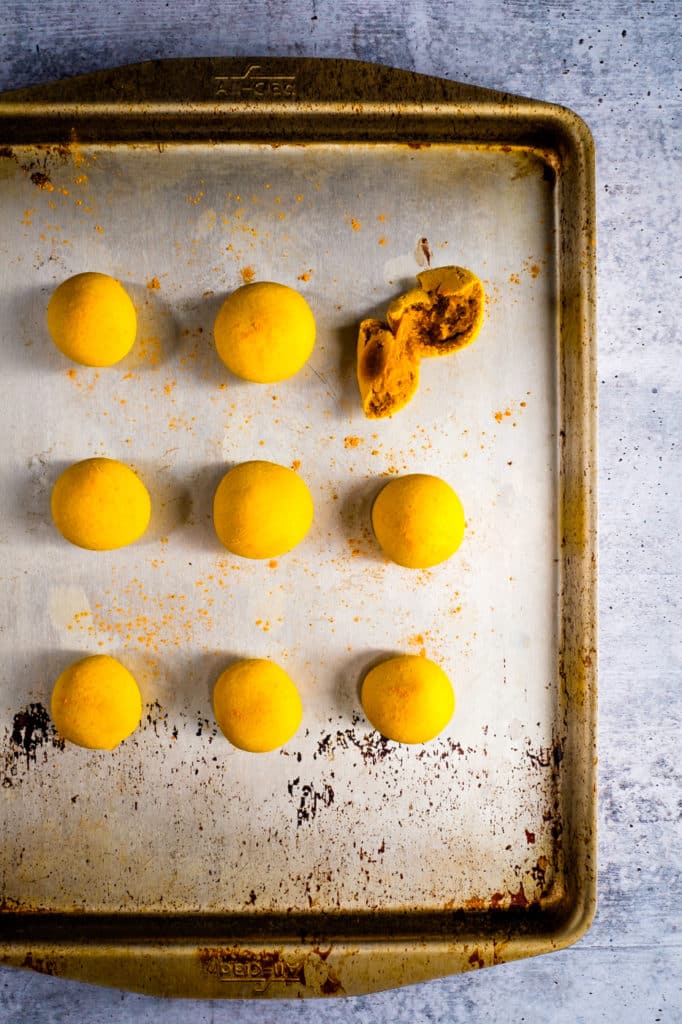
- Split the dough in two, then each half in two halves, then each of the quarters in three equal portions. You will end up with 12 balls that will fit in the muffin pan. Add them to the muffin pan and bake for 30 minutes or until slightly golden on top. (Mine took exactly 30 minutes, but keep an eye on them just in case your oven is slightly different).
Notes
Store on the counter for a day in an air-tight container or freeze. The best way to store them is to freeze them and reheat them in the oven. The consistency of the dough might differ when you use another type of cassava flour. If you are in the US, I recommend using Otto’s brand. If you don’t have access to Otto’s, you might have to adjust the flour-to-liquid ratio to get a sticky dough slightly.
47 Comments
Darby
August 27, 2019 at 6:34 pmCan vegan cheese replace the real cheese?
Claudia
September 13, 2019 at 2:17 pmHi Darby, I couldn’t say, never worked with vegan cheese. My vegan version of this bread is Pao de Beijo, made with sweet potato instead of cheese. Is delicious, you can find it on the website.
Joelle
December 7, 2022 at 7:40 pmHi Darby I have followed exactly the recipe my batter is thick but runny. I have spoon it in to patty cake paper. And are cooking them now. Thinking they may take longer to cook?
Claudia
December 8, 2022 at 4:59 amHi Darby, I’m not sure if this comment was meant for me or for Darby’s comment. But I’d be curious to know how they came out. Claudia
Eliz
March 7, 2019 at 7:33 pmCould almond flour be substituted?
Claudia
March 7, 2019 at 8:43 pmI don’t think so, not the same result anyway. If you try let us know. xx
rachel
June 19, 2019 at 7:56 pmhi i can’t get cassava flour here could i use tapioca instead? i’m new to the plant paradox eating and this recipe looks amazing!
Claudia
June 20, 2019 at 4:42 pmHi Rachel, yes you can use tapioca, but be careful it has a high glycemic index, so keep the portions really small and rare.
norma N
November 18, 2018 at 1:59 pmHi claudia, I was disappointed in to product because is tasted very starchy like cassava flour. I did use a food processor to knead the dough and maybe that is the problem. I did taste it while still warm- any thoughts, I’d love to nail this. thanks
Claudia
November 18, 2018 at 2:13 pmHi Norma, I’m not sure what to say. I had a lot of people doing this recipe and never heard anyone being disappointed,on the contrary, so maybe it’s a question of taste? Did you use a quality Pecorino Romano (the real one, fresh grated)? I would not mix it in a food processor, but not sure if that alone can be the reason you didn’t like it. Maybe it’s just your taste. We don’t all like the same things. I love it when I eat it straight from the oven, it should taste good and cheesy, not starchy.
Brenda Anderson
September 17, 2018 at 6:02 pmJust made these and my husband loves them. Thanks!
Claudia
September 18, 2018 at 8:59 amThank you so much for letting me know Brenda <3
Pamela
September 17, 2018 at 9:02 amI tried (making) these yesterday, unfortunately they were a flop. I used all ingredients listed, but wonder 200g I googled to convert to cups… what should this be. I am guessing I added way too much Romano. I hope to test them once again with the correct conversion for the cheese.
Claudia
September 17, 2018 at 9:52 amIt must be. That’s why I think is important you weight the cheese, because grated cheese can be very fluffy, it’s going to be hard to figure how packed your cup would be. I’d say ask your cheese vendor to weight it for you if you don’t have a scale? Or ask them to cut you a 200g piece (0.44lbs), and grate it all. Or make it slightly bigger because the crust that you don’t use is heavy. The recipe works because I had a lot of people making it successfully, so I guess the measurement might have been the problem. Please update me if you make it again.
Christine
September 17, 2018 at 12:06 pmI have made these a couple times and simply used one cup of the grated cheese—they turned out perfect!
Claudia
September 17, 2018 at 2:43 pmThank you so much Christine! This is so helpful <3