
Fermented vegetables are not only delicious but also incredibly healthy, thanks to the beneficial bacteria they contain. Making your own mixed fermented vegetables at home is easy and affordable and allows you to experiment with different flavors and textures.
In this article, we’ll provide you with an easy-to-follow recipe and essential tips to help you create your own delicious mixed fermented vegetables. This recipe was inspired by the fermented vegetables I grew up with, made by my parents.
Whether you’re a beginner or an experienced fermenter, this guide has everything you need to know to get started.
The fermentation process and its health benefits
Fermentation, especially lacto-fermentation, is one of the oldest and safest methods of processing and preserving foods known to humanity.
Through the fermentation process, the food is transformed nutritionally.
Lactobacillus bacteria convert sugars naturally present in fruits and vegetables into lactic acid. Lactic acid is a natural preservative that helps fight bad bacteria and preserves not only the flavor and texture of food but also its nutrients. The anti-nutrients will be removed, the mineral availability will be improved, and this whole process will provide the unique micronutrients that are byproducts of the fermentation process.
That’s why fermentation is one of the methods used to remove lectins in lectin-rich foods.
Be aware, the live bacterial cultures that are beneficial for our gut health will only be available in non-heated fermented foods (raw). Many of the so-called fermented vegetables you find in stores are exposed to heat, hence don’t have these properties anymore.
The raw fermented vegetables will always be in the refrigerated area of the store.
The live lactic acid bacteria stimulate our immune function and have the ability to enhance overall health and immune system by populating our gut with good bacteria.
Basic rules of fermenting vegetables
There are a few basic rules you need to follow to succeed with fermenting vegetables. Here they are:
- Make sure your jars are squeaky clean. The dishwasher will do a great job, or some hot water and dish soap. You can also boil them, but in my experience, I don’t find that necessary.
- Use spring water. Tap water has chlorine, and the point of chlorine is to kill harmful bacteria, but beneficial bacteria (the good ones) are the main ingredient of the fermentation process. It makes sense to use spring water or filtered water.
- Use non-iodized, good-quality sea salt or rock salt. Added iodine is a no-no for fermentation, so make sure the salt is the right kind.
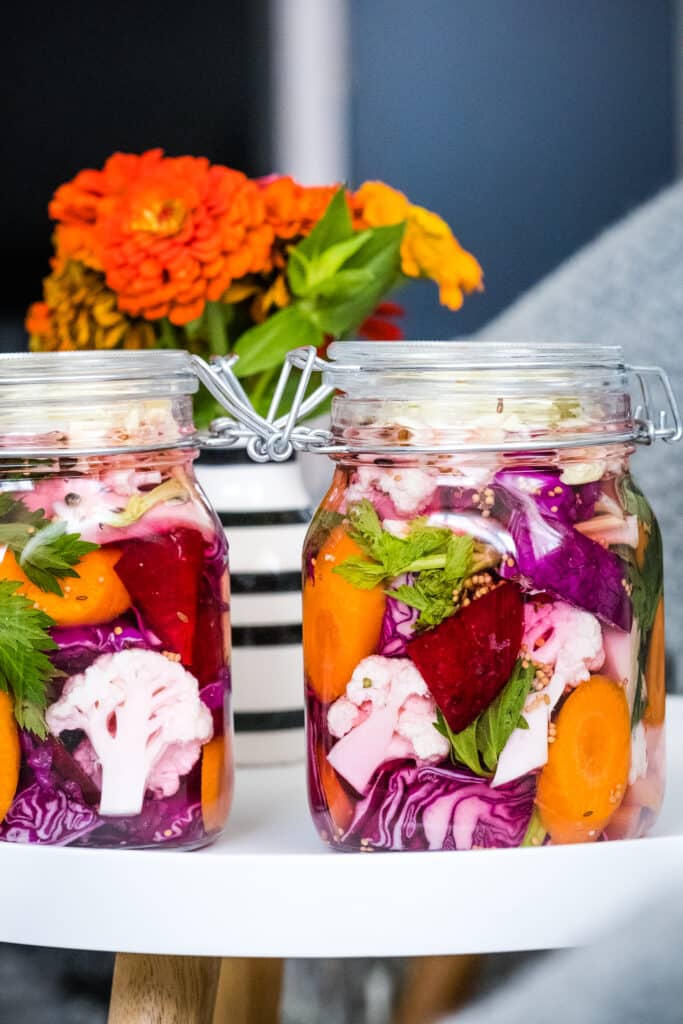
- Do not completely close your jars. Of course, I made this mistake in the past because I’m obsessed with tightly closing jars and containers. After filling your jars with the vegetables and the brine, add a lid on top but don’t tighten it. I use the canning jars you see in the picture and just put the lid down without the rubber ring. Now and then, remove the lid and press the vegetables with a clean fork to let more air in. If you have some fermentation weights around, you can use them, but if you don’t, it’s ok.
- Keep your jar at room temperature until it ferments, then cover and store it in the fridge or cold pantry. The warmer it is in the house, the faster the fermentation process is. For example, my jar was ready after seven days on the kitchen counter, while my dad’s batch took about two weeks (even more) in a cold pantry. While the specialty books recommend a controlled temperature environment, I think that’s hard to achieve at home.
What are the vegetables that work together for fermented mixed vegetables?
In my experience, these vegetables work well together, both in terms of flavor and texture, and timing.
- Cauliflower
- Celeriac
- Celery leaves
- Cabbage (red or white)
- Beetroot (it will turn your brine all red)
- Carrots
- Green/unripe tomatoes (this is very specific to Romania, and the fermentation process should take care of the lectins in tomatoes, but if you don’t have them or don’t want to add them, no problem)
- Fresh horseradish root (this is mainly for taste and its preserving properties, and only used in small quantities, more like an add-on)
Green beans are sometimes used, but they are not among my favorite foods, so I never include them.
Spices for fermented mixed vegetables
The spices I used are a mix of (in the order of proportion):
- mustard seeds
- fennel seeds
- black peppercorns
- coriander seeds
- juniper berries
- cloves
- bay leaves
- chili or red pepper flakes
- allspice berries
You don’t need to use them all. Anything you have will work. The minimum, in my opinion, is mustard seeds, fennel seeds, black peppercorns, and bay leaves.
Chili, although not lectin-free, will go through the fermentation process, which will remove the most harmful lectins. Also, it’s used in a minimum quantity, and you can skip it.
The quantities for 1L of brine
These are the quantities to make 1L of brine:
- 1L spring water
- 40 grams of non-iodized salt (you can use kosher salt, sea salt or Himalayan pink salt)
- 2-3 teaspoons of spice mix (use whatever spices you have from the list above, and consider the order they are listed in: the top is the higher proportion, the bottom is the lowest).
- The mix of vegetables: I can’t give you an exact quantity, as it depends on how you cut them, what exactly you use from the list above, and what you like most. My favorite vegetables to eat from a mixed jar are cabbage and cauliflower, so I always add more of those. As a rough estimate, for 1L brine, you will need about 1/2 small cauliflower, 1/4 to 1/2 cabbage head, two carrots, one small beetroot, one small celeriac, a few celery leaves, 2, 3 small green tomatoes. But you can fill your jar as you desire.
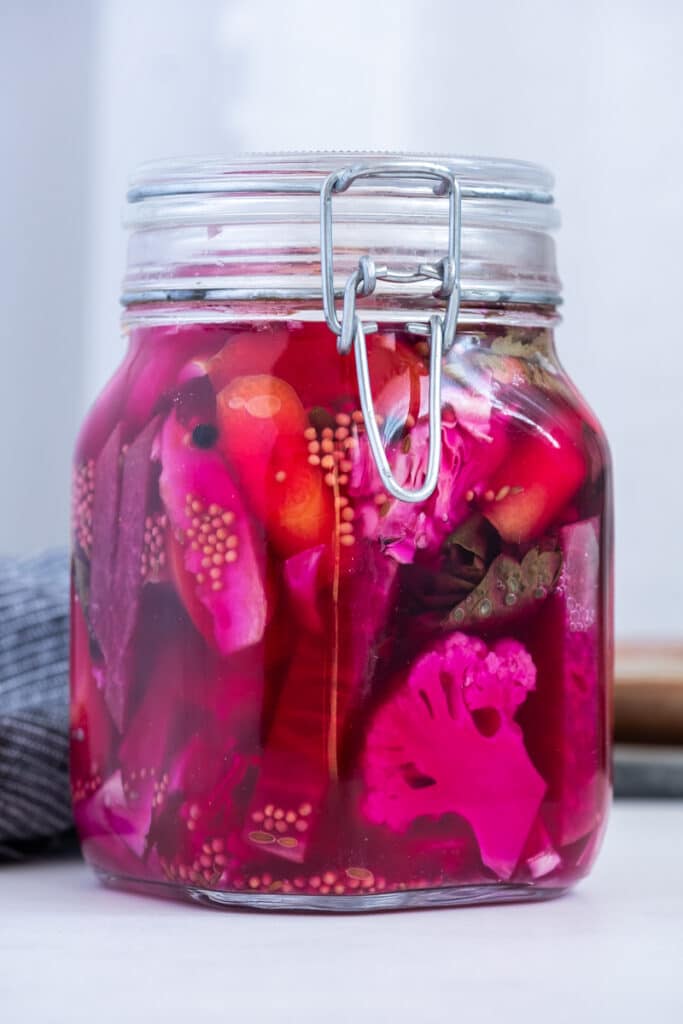
Note: Don’t use beetroot or red cabbage if you want the brine to remain clear (like in the first picture) and the vegetables to retain their colors. They will turn everything red, like in the below photo, taken seven days after the fermentation started.
Tools you need
For this easy fermented vegetable recipe, you only need x2 mason jars, one quart each.
I use 1 quart / 36oz / 1L jars. 1L brine will fill x2 1L jars.
The method for making fermented mixed vegetables
- Start with preparing your jars, as mentioned above.
- Make the spice mix.
- Prepare your vegetables: peel, clean, wash, drain in a colander and cut into smaller pieces (you can get creative with shapes if you want).
- Fill each glass jar with a mix of vegetables, covering as many gaps as possible, and the vegetables are well stuffed in the jar and completely submerged.
- Make the brine: Mix the water, salt, and spices and stir until the salt is completely dissolved.
- Add the salt brine on top of the vegetables and fill the jar’s top, ensuring the brine covers the vegetables.
- Cover without closing the lid and let the jars on the counter. Take the lid off every now and then, and gently push the vegetables down with a clean fork.
- Place a plate or a bowl under the jar, as the brine might overspill during fermentation.
- Try them after 5-7 days and see if they have reached your desired taste. The smell will also guide you. To me, after seven days on the counter, they were perfect. I covered the jar and stored it in the fridge.
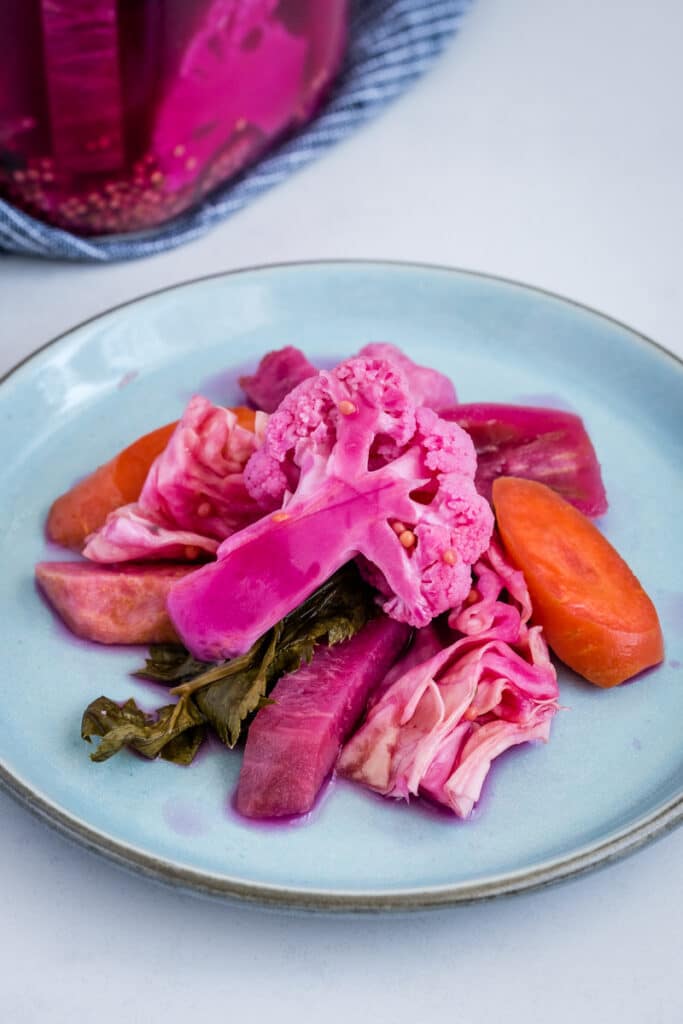
How to serve fermented mixed vegetables
Fermented veggies are great for your gut, and they add a little kick to a lot of meals. Have some with your eggs in the morning, with meat or vegetable stews. They complement this Swiss chard frittata very well.
More Fermented Vegetables
This is another staple and one of my favorite ways to ferment cabbage, and great for exploring another type of basic fermentation without using water. Check the guide below:
How to Make Red Cabbage and Carrot Sauerkraut
Also make sure to try these fermented dill pickles. They are the perfect gut-healthy treat for summer.
Fermented Dill Pickles (Summer Pickles)
Enjoy!
*This post contains affiliated links, which means I get a small commission if you choose to purchase something via one of my links, at no extra cost to you.

4 Comments
Jackie
September 30, 2024 at 7:08 pmHi I’d love to try these!! Do you know what the expiry on these are? How long do you have to eat these roughly? Also, could I seal the jar after 7 days and store them for months? Or is that not suitable with these raw-fermented ones?
Claudia
October 1, 2024 at 9:39 amHi Jackie! After they are fermented, you have to keep them in a cold place (fridge or cold pantry). They will last for a few weeks in the fridge (my dad ferments cabbage all winter long, but he keeps it in a cold place. If you keep them at room temp they will continue to ferment and they’ll become too soggy / sour. That’s why I like to make them in small jars, store them in the fridge after fermentation and consume them within a couple of weeks. Then make another batch. I hope this helps. -Claudia
Mokcyn
December 4, 2023 at 9:39 amHow do you know when they are ready? And one jar is cloudy on top. I am only 3 days into the fermentation process. Thank you!
Claudia
December 4, 2023 at 10:42 amThree days is probably not enough. I would give them five days at least and then taste them. If you like the level of sourness, cover and refrigerate. And yes, the water will get cloudy during fermentation. -Claudia