
This gluten-free sourdough sandwich bread is easy to make, perfectly sliceable, and sturdy enough to hold all your favorite fillings without crumbling or getting soggy. Light yet satisfying, it’s baked in a loaf pan with a handful of wholesome ingredients, minimal starches, and no dairy or eggs — a healthy, homemade alternative to store-bought gluten-free bread.
Your Everyday Gluten-Free Sandwich Bread
I love the rustic character of artisan loaves baked in a Dutch oven, but there’s something special about a simple, easy-to-slice sandwich bread — especially when it’s gluten-free. This loaf is made with my gluten-free and lectin-free sourdough starter, though any strong, active gluten-free starter should work beautifully.
This isn’t “wonder bread” — it’s better. Many gluten-free sandwich breads aim for that ultra-soft, white texture, often achieved using only starchy flours like potato, rice, and tapioca. While these have their place in gluten-free baking, they offer little nutrition. The whiter and fluffier the bread, the higher the starch and the glycemic index, and the lower the nutrient content.

With this recipe, my goal was to keep the bread nutrient-dense and allergen-friendly, avoiding dairy, eggs, and nuts while maintaining a light, airy crumb and excellent structure. It slices beautifully for open or stacked sandwiches. My first test? A sardine melt sandwich — and it was absolutely divine.

For more details on my sourdough method and recipes, check out my Beginner’s Guide to Baking Gluten-Free Sourdough.
Here’s the complete list of ingredients, quantities, and a step-by-step guide with photos. At the end of the post, you’ll find a printable recipe card and a detailed nutrition label.
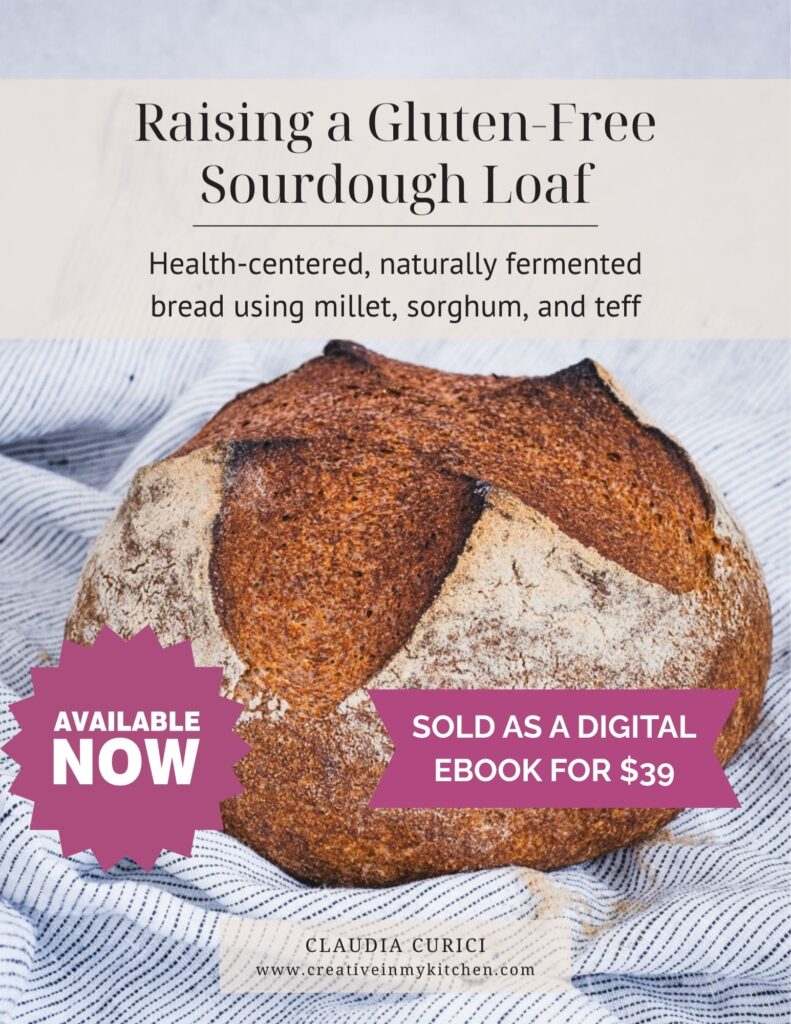
Gluten-Free Sourdough Ebook
If you’d like to master gluten-free sourdough with clarity and confidence, my ebook Raising a Gluten-Free Sourdough Loaf brings the entire method together in one structured, cohesive guide.
While many of the elements are shared across my website, this book organizes everything into a clear progression — from building a strong, resilient starter to mastering the core method you can apply to artisan loaves, sandwich bread, bagels, pizza, and more. No searching between posts — just one complete roadmap supported by original visuals and 15 thoughtfully sequenced recipes across 130+ pages.
Gluten-Free Sourdough Sandwich Bread: The Ingredients
For the Preferment
(Prepare about 6 hours before mixing the dough — see Step 1)
- 20 grams gluten-free sourdough starter
- About 62 grams filtered, non-chlorinated water (enough for a thick paste consistency; add 1–2 grams more if needed)
- 70 grams flour mix (equal parts sorghum, millet, and teff)
For the Dough
- 17 grams whole psyllium husk (flakes)
- 10 grams organic raw honey (preferably local)
- 17 grams extra-virgin olive oil
- 420 grams filtered, non-chlorinated water (400 g + 20 g)
- Prepared preferment
- 230 grams flour mix (100g millet, 65g teff, 65g sorghum)
- 70 grams tapioca starch
- 6 grams fine, non-iodized salt

Step-by-Step Instructions
STEP 1: Prepare the Preferment
Mix the starter, water, and flour blend until well combined. Let it ferment at room temperature (around 72°F / 22°C) for about 6 hours, or until it reaches its peak. For a quicker fermentation, place the preferment in a warmer spot (80–85°F / 27–29°C) for about 3 hours. Alternatively, prepare it the night before and use it within 9–10 hours.
STEP 2: Mix the Wet Ingredients
In a medium bowl, combine the psyllium powder, honey, and olive oil with 400 g of water. Stir until the honey dissolves and everything is mixed well. Let the mixture sit for 3–5 minutes to allow a thick gel to form. Add all of the preferment to the gel. Use the remaining 20 g of water to rinse the preferment jar, making sure every bit is added to the bowl. Mix until smooth and fully incorporated.
STEP 3: Mix the Dry Ingredients
In a large mixing bowl, whisk together the flours, tapioca, and salt until thoroughly combined.
STEP 4: Combine Wet and Dry Mixtures
Add the wet gel mixture to the dry ingredients. Start mixing with a spatula, then use clean hands to bring the dough together until it forms a homogeneous mass (about 1–2 minutes).

Scrape down the sides with a dough scraper and fold the dough toward the center, rotating the bowl as you go. Repeat about 20 times. The dough will be soft and slightly sticky but should hold its shape. Cover the bowl with a lid and set it in a draft-free, warm spot (room temperature is fine if not too cold).

STEP 5: Bulk Fermentation (First Rise)
Let the dough ferment at room temperature for about 1 hour, depending on ambient conditions. In summer, 1 hour is often enough; in winter, it can take up to 2 hours. Signs it’s ready: slight puffing, a smoother and lighter texture. If using a glass bowl (recommended), you’ll notice small holes on the bottom and sides of the dough.
STEP 6: Shape the Loaf
Lightly oil a regular loaf pan and line it with parchment paper. Flour a clean work surface. Gently invert the dough onto the surface. Take the side farthest from you and fold it over to the center, then repeat once more, folding toward yourself — essentially rolling the dough tightly toward you. The seam should now be on the bottom.
Use your hands to create gentle tension between the dough and the surface, shaping it into a smooth log with the seam sealed. Lightly dust the top of the dough and the bottom of the loaf pan with flour. Place the log seam-side down in the pan, cover with plastic wrap and a towel.

STEP 7: Final Proof (Second Rise)
Proof for 1 hour at room temperature (about 72°F / 22°C). In gluten-free sourdough baking, the signs of readiness are more subtle than with wheat dough. With practice, you’ll learn to recognize them: a rise of about 20%, a slightly puffy appearance, and a gentle jiggle when moved. If your dough has risen significantly, it’s likely over-proofed.
STEP 8: Bake
Preheat the oven to 210°C / 410°F with a baking stone or heavy-duty pan in the middle rack and another empty heavy-duty pan below. Heat water in a kettle.
Lightly dust the dough with flour and score it with four oblique lines. Place the pan on the hot stone or pan, and pour the hot water into the bottom tray to create steam. Bake for 20 minutes with steam, then carefully remove the bottom tray.
Continue baking for another 20 minutes, until the loaf feels set (the crust should be firm, not soft to the touch). Using the parchment paper as handles, remove the bread from the loaf pan and place it directly on the hot stone or pan.
Peel the parchment from the sides and bake for another 25 minutes, or until golden brown and hollow-sounding when tapped on the bottom. Remove from the oven, discard the parchment, and cool completely on a rack for at least 4 hours before slicing.

How to Store Gluten-Free Sandwich Bread
Short-term: Wrap the cooled loaf in a clean cotton towel or place it in a paper bag. Keeps well at room temperature for up to 3 days. Toast it before serving.
Long-term: Slice and freeze with parchment between slices. Toast directly from frozen, or thaw and toast before serving.

Tips For a Better Serving Experience
Gluten-free bread naturally holds more moisture than wheat bread, so a few small adjustments can make a big difference:
- If you are making an open sandwich, toast the bread to your preference first, then add your toppings.
- If you’re making a stacked sandwich, lightly toast the bread first — about 30 seconds is enough.
- After toasting, place the slices on a cooling rack, not a plate. Setting warm bread directly on a plate creates condensation, which can make the bottom soggy.
- Once slightly cooled, butter the top sides if desired, then build your sandwich. You can enjoy it right away or toast it again in a pan or sandwich maker for extra crispness.
- Just remember: avoid placing a warm sandwich directly on a plate — always use a cooling rack to keep it perfectly crisp.

I hope you enjoy this gluten-free sourdough sandwich bread as much as we do!
For a non-sourdough gluten-free recipe, try this Sorghum Sandwich Bread.
*This post contains affiliated links, which means I get a small commission if you choose to purchase something via one of my links, at no extra cost to you.
Print
Sturdy Gluten-Free Sourdough Sandwich Bread
- Prep Time: 30 minutes
- Cook Time: 60 minutes
- Total Time: 1 hour 30 minutes
- Yield: 12 slices
Description
This gluten-free sourdough sandwich bread is easy to make, perfectly sliceable, and sturdy enough to hold all your favorite fillings without crumbling or getting soggy. Light yet satisfying, it’s baked in a loaf pan with a handful of wholesome ingredients, minimal starches, and no dairy or eggs — a healthy, homemade alternative to store-bought gluten-free bread.
Ingredients
FOR THE PREFERMENT (Prepare about 6 hours before mixing the dough — see Step 1)
- 20 grams gluten-free sourdough starter
- About 62 grams filtered, non-chlorinated water (enough for a thick paste consistency; add 1–2 grams more if needed)
- 70 grams flour mix (equal parts sorghum, millet, and teff)
FOR THE DOUGH
- 17 grams whole psyllium husk (flakes)
- 10 grams organic raw honey (preferably local)
- 17 grams extra-virgin olive oil
- 420 grams filtered, non-chlorinated water (400 g + 20 g)
- Prepared preferment
- 230 grams flour mix (100g millet, 65g teff, 65g sorghum)
- 70 grams tapioca starch
- 6 grams fine, non-iodized salt
- EXTRA: Millet or sorghum flour, for dusting
Instructions
STEP 1: PREPARE THE PREFERMENT
- Mix the starter, water, and flour blend until well combined. Let it ferment at room temperature (around 72°F / 22°C) for about 6 hours, or until it reaches its peak.
- For a quicker fermentation, place the preferment in a warmer spot (80–85°F / 27–29°C) for about 3 hours. Alternatively, prepare it the night before and use it within 9–10 hours.
STEP 2: MIX THE WET INGREDIENTS
- In a medium bowl, combine the psyllium powder, honey, and olive oil with 400 g of water. Stir until the honey dissolves and everything is mixed well.
- Let the mixture sit for 3–5 minutes to allow a thick gel to form.
- Add all of the preferment to the gel. Use the remaining 20 g of water to rinse the preferment jar, making sure every bit is added to the bowl. Mix until smooth and fully incorporated.
STEP 3: MIX THE DRY INGREDIENTS
- In a large mixing bowl, whisk together the flours, tapioca and salt until thoroughly combined.
STEP 4: COMBINE WET AND DRY MIXTURES
- Add the wet gel mixture to the dry ingredients.
Start mixing with a spatula, then use clean hands to bring the dough together until it forms a homogeneous mass (about 1–2 minutes). - Scrape down the sides with a dough scraper and fold the dough toward the center, rotating the bowl as you go. Repeat about 20 times. The dough will be soft and slightly sticky but should hold its shape.
- Cover the bowl with a lid and set it in a draft-free, warm spot (room temperature is fine if not too cold).
STEP 5: BULK FERMENTATION (FIRST RISE)
- Let the dough ferment at room temperature for about 1 hour, depending on ambient conditions. In summer, 1 hour is often enough; in winter, it can take up to 2 hours.
- Signs it’s ready: slight puffing, a smoother and lighter texture. If using a glass bowl (recommended), you’ll notice small holes on the bottom and sides of the dough.
STEP 6: SHAPE THE LOAF
- Lightly oil a regular loaf pan and line it with parchment paper. Flour a clean work surface.Gently invert the dough onto the surface.
- Take the side farthest from you and fold it over to the center, then repeat once more, folding toward yourself — essentially rolling the dough tightly toward you. The seam should now be on the bottom. Use your hands to create gentle tension between the dough and the surface, shaping it into a smooth log with the seam sealed.
- Lightly dust the top of the dough and the bottom of the loaf pan with flour. Place the log seam-side down in the pan, cover with plastic wrap and a towel.
STEP 7: FINAL PROOF (SECOND RISE)
- Proof for 1 hour at room temperature (about 72°F / 22°C). In gluten-free sourdough baking, the signs of readiness are more subtle than with wheat dough. With practice, you’ll learn to recognize them: a rise of about 20%, a slightly puffy appearance, and a gentle jiggle when moved. If your dough has risen significantly, it’s likely over-proofed.
STEP 8: BAKE
- Preheat the oven to 210°C / 410°F with a baking stone or heavy-duty pan in the middle rack and another empty heavy-duty pan below. Heat water in a kettle.
- Lightly dust the dough with flour and score it with four oblique lines.
- Place the pan on the hot stone or pan, and pour the hot water into the bottom tray to create steam.
- Bake for 20 minutes with steam, then carefully remove the bottom tray. Continue baking for another 20 minutes, until the loaf feels set (the crust should be firm, not soft to the touch).
- Using the parchment paper as handles, remove the bread from the loaf pan and place it directly on the hot stone or pan. Peel the parchment from the sides and bake for another 20-25 minutes, or until golden brown and hollow-sounding when tapped on the bottom.
- Remove from the oven, discard the parchment, and cool completely on a rack for at least 4 hours before slicing.

4 Comments
Josée Benoît
February 17, 2026 at 11:37 amGreat recipe that I made with my sorghum sourdough. I doubled the recipe so that it would make a good size sandwich bread in my loaf pan. I guess my loaf pan is larger because I often need to increase bread recipes to make fair sized slices. I baked it in a Dutch oven rather than the suggested method. It worked our well.
Claudia
February 22, 2026 at 3:56 amThank you so much, Josée! I’m happy it worked for you. xx -Claudia
Ella D
February 8, 2026 at 5:24 pmTruly fantastic. I didn’t have teff flour so I used the same amount of chickpea flour, but otherwise followed the recipe closely. The result was a golden loaf with a hard crust, a beautifully soft crumb with modest air holes, pleasantly toothsome in texture, a complex and pleasant flavor that was something like corn, milk, nut, and grass from the millet, sorghum, and chickpea flours. The chickpea flour added a bit of density, which I like, but is otherwise undetectable. It really feels like I am eating a French pain de traditions, without any of the painful side effects I get from gluten. Just wonderful. I anticipate this will be a staple I make every few days.
Claudia
February 9, 2026 at 3:08 amThank you so much, Ella! So happy you loved it xx -Claudia