
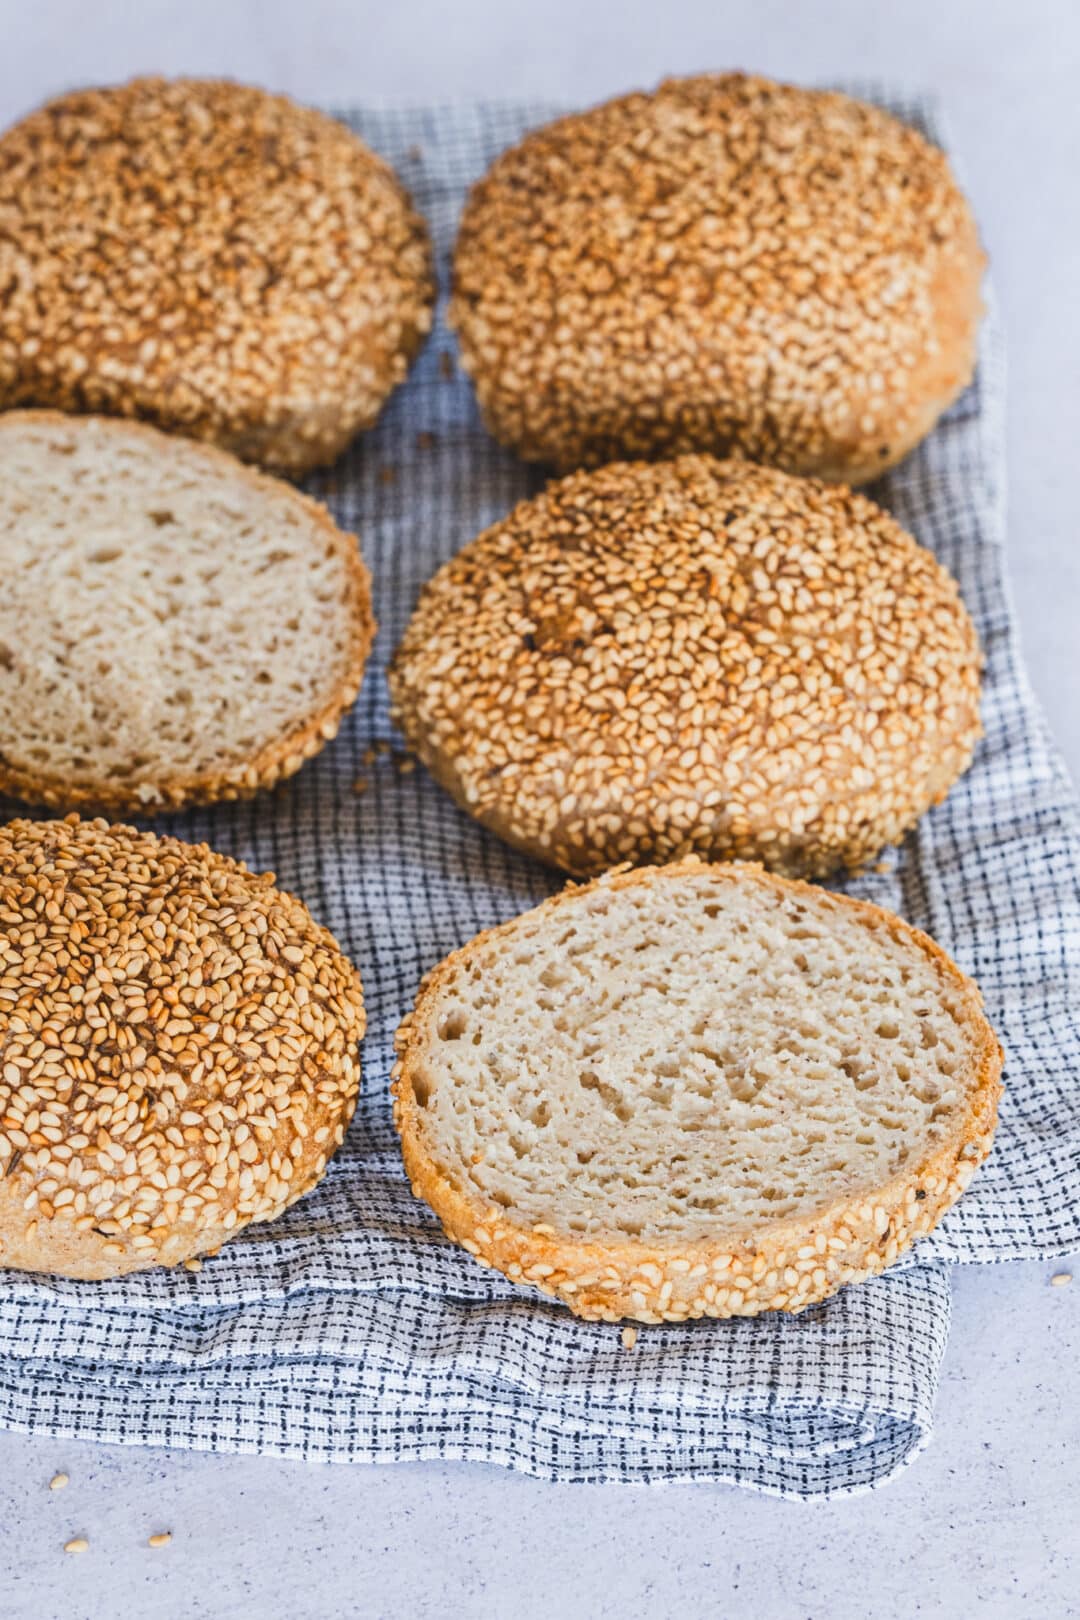
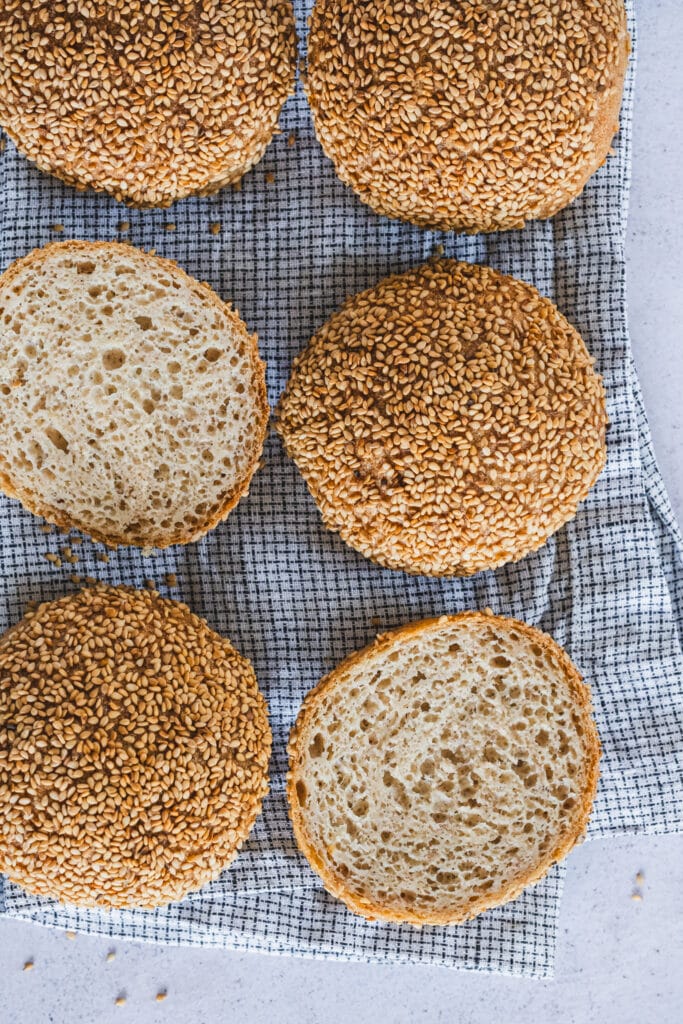
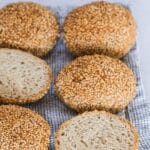
These sesame-crusted gluten-free sourdough buns are the kind of artisan bread you’d expect to find in a great bakery or café: a thin, lightly crisp crust coated in toasted sesame seeds, a soft, airy crumb, and the naturally nutty flavor of sorghum, millet, and teff. My streamlined shaping method keeps handling to a minimum, making these buns surprisingly easy to prepare while creating the beautiful shape and texture of artisan bakery bread.
They bake in under an hour, are ready to enjoy after just 30 to 60 minutes of cooling, and freeze and reheat beautifully. Serve them simply with good butter, aged cheese, homemade jam, or quality cured meats, and you’ll understand why they’re one of the most satisfying recipes I’ve ever created.
Inspired by Danish Boller, Made with My Gluten-Free Sourdough Method
Ever since moving to Denmark, I’ve been so impressed with the everyday bread culture here. Freshly baked boller — simple artisan buns served with butter, aged cheese, homemade jam, or quality cured meats — are a staple in homes, cafés, and bakeries. These sesame-crusted gluten-free sourdough buns are my take on that tradition. They have the same versatile, everyday appeal, but are made entirely with whole-grain gluten-free flours and natural sourdough fermentation.
If you’ve made any of my gluten-free sourdough recipes before, you’ll recognize the method. Instead of trying to imitate wheat dough, I use a technique that works with the unique characteristics of gluten-free ingredients. A psyllium gel creates structure, while an active preferment provides flavor, fermentation, and lift. The dough comes together quickly, requires very little handling, and is shaped gently after proofing, making the process both approachable and reliable.
For these buns, I use a blend of sorghum, millet, and ivory teff flours, balanced with tapioca starch. These are my favorite flours, which I use in a variety of recipes, and my gluten-free sourdough starter is fed with the same three flours, creating a strong, resilient culture that’s easy to maintain and works beautifully in all of my bread recipes.
If you’re new to my gluten-free sourdough method, or you’d like to explore artisan loaves, sandwich bread, bagels, focaccia, pizza, and more, you’ll find everything you need in my Gluten-Free Sourdough Ebook. It includes detailed guidance on creating and maintaining a gluten-free starter, mastering fermentation, troubleshooting common issues, and baking with confidence.
Ingredients
For the Preferment (make it 6-10h before mixing the dough)
- 10 g active gluten-free starter
- 33 g water
- 35 g flour (an equal mix of millet, sorghum, and teff)
Dry Ingredients
- 90 g sorghum flour
- 90 g millet flour
- 50 g teff flour
- 70 g tapioca flour
- 7 g salt
Psyllium Gel
- 17 g whole psyllium husk flakes
- 10 g honey or maple syrup
- 15 g olive oil
- 440 g water
- 75 g active preferment
Additional Ingredients
- Olive oil, for greasing the proofing pan
- About 1/4 cup sesame seeds, for coating
Step-By-Step Instructions
Make the preferment: In a small jar or bowl, combine the gluten-free starter, water, and flour until a smooth, well-hydrated paste forms. Cover loosely and let it ferment at room temperature for 6 to 10 hours, or until active and bubbly. You can prepare the preferment in the morning if you plan to bake in the afternoon, or the evening before if you’ll be baking the following morning.
In a large bowl, whisk together all of the dry ingredients.
In a separate bowl, combine the psyllium husk flakes, honey (or maple syrup), olive oil, and 420 g of the water. Stir well and let the mixture sit for about 5 minutes, until it forms a thick gel.
Add the active preferment. Pour the remaining 20 g water into the preferment jar, swirl it around to loosen any starter clinging to the sides, then add it to the psyllium mixture. Mix until well incorporated.
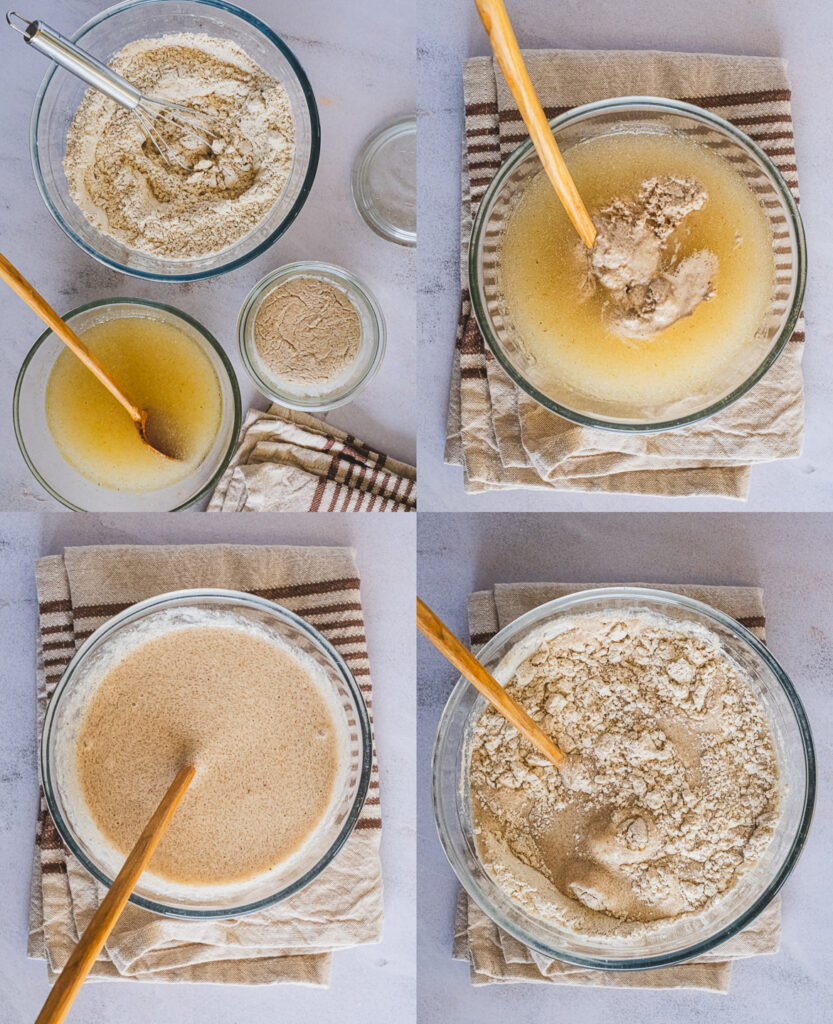
Pour the psyllium mixture into the bowl with the dry ingredients. Mix first with a spoon or spatula, then finish with your hands for a few minutes, until no dry flour remains.
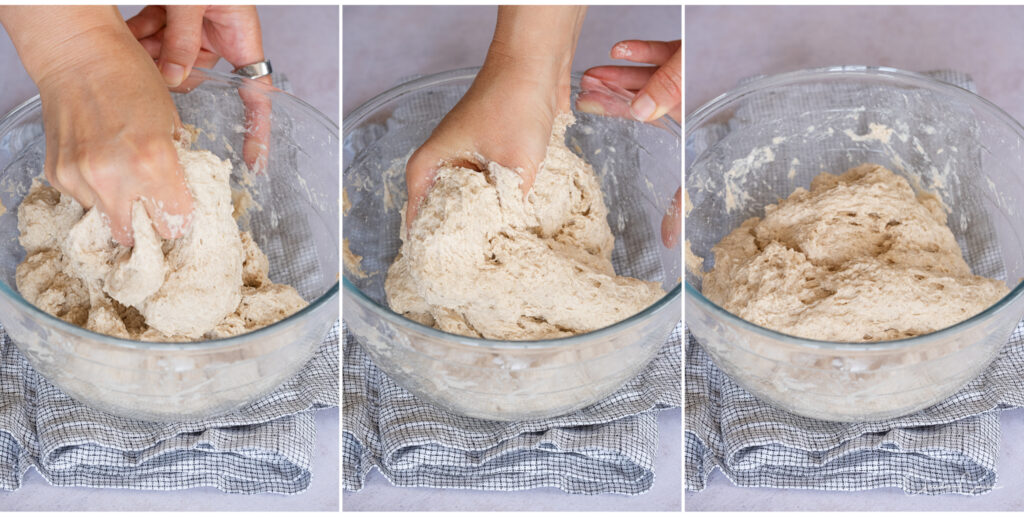
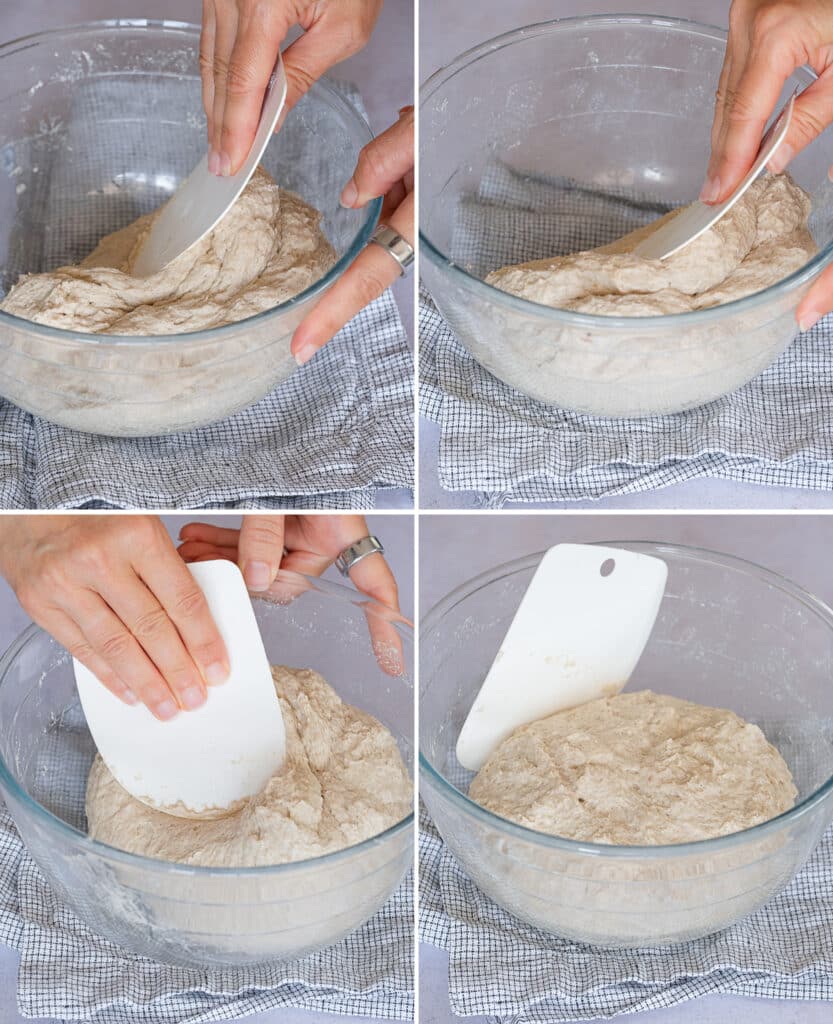
Using a plastic dough scraper, continue developing the dough by scraping it away from the sides of the bowl and folding it toward the center while rotating the bowl. Continue for about 1 minute. If you’ve made other recipes with my method, this dough should feel slightly wetter than my standard loaf dough.
Let the dough rest for 5 minutes.
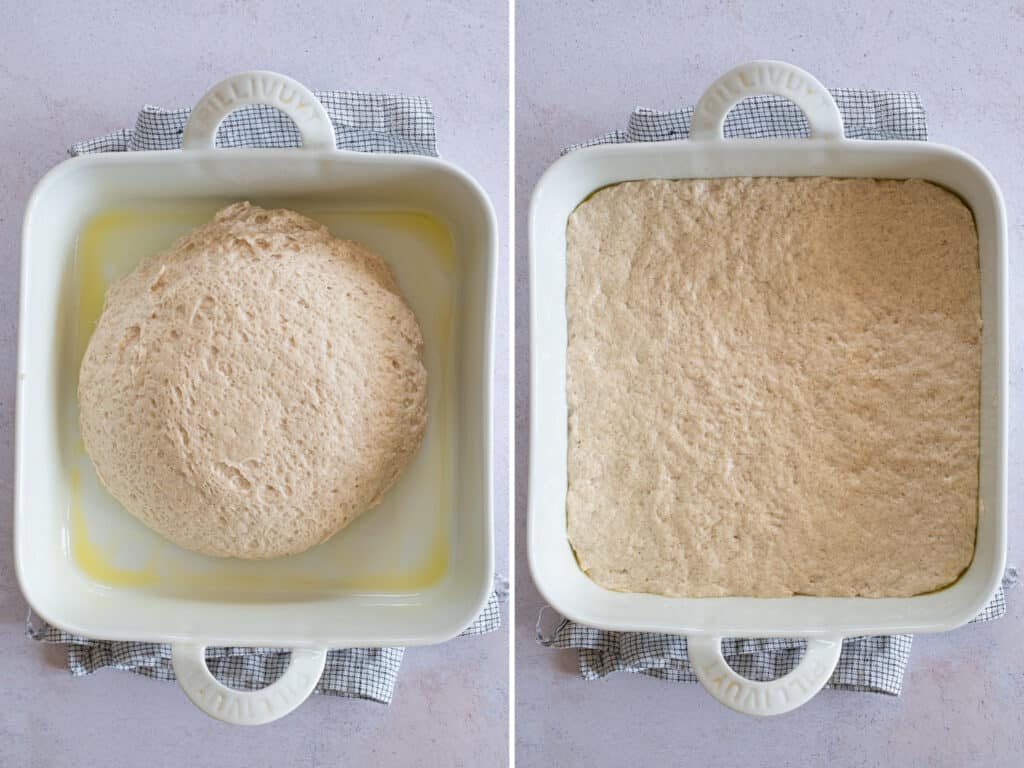
Lightly grease a 9 x 9-inch (23 x 23 cm) ceramic, glass, or plastic square dish with olive oil. (avoid stainless steel). Transfer the dough to the prepared dish (invert it from the bowl to the dish, so not the bottom will be the top), and spread it out evenly with lightly oiled hands so it covers the entire surface. Cover with plastic film, and proof at room temperature (72-74°F / 22-23°C) for about 1 hour and 45 minutes.
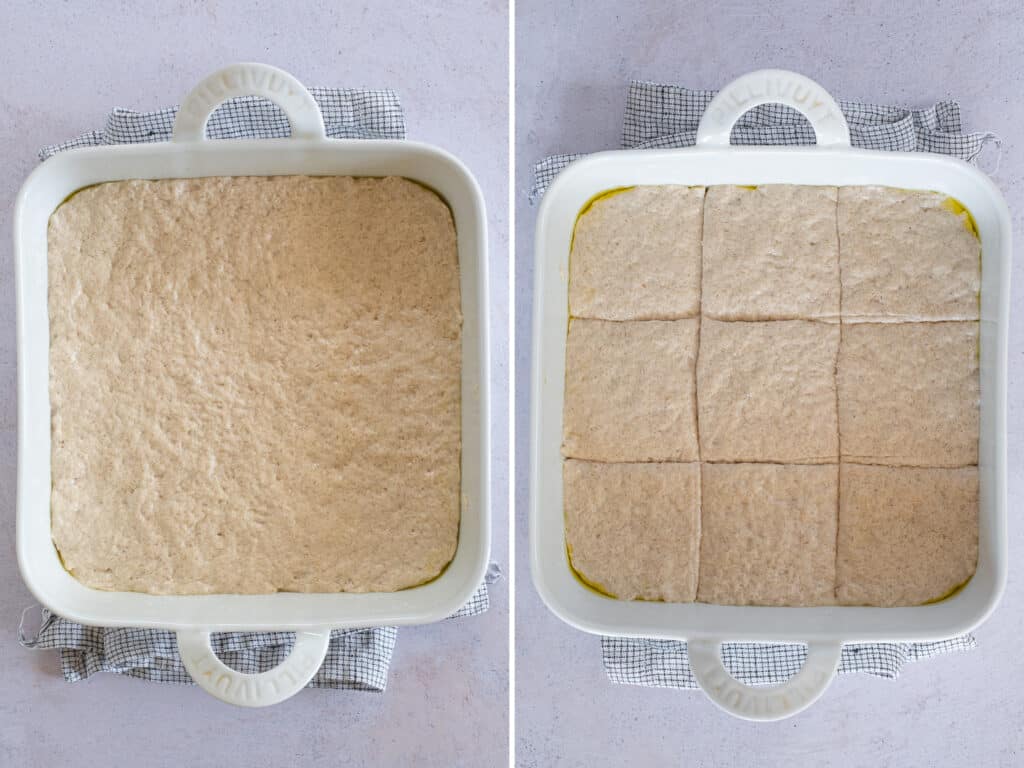
Toward the end of the proofing time, preheat the oven to 250°C (480°F). Place a baking pan filled with boiling water on the bottom rack to create steam. Line a heavy-duty baking sheet with parchment paper.
Using a dough scraper, divide the dough into 9 equal squares.
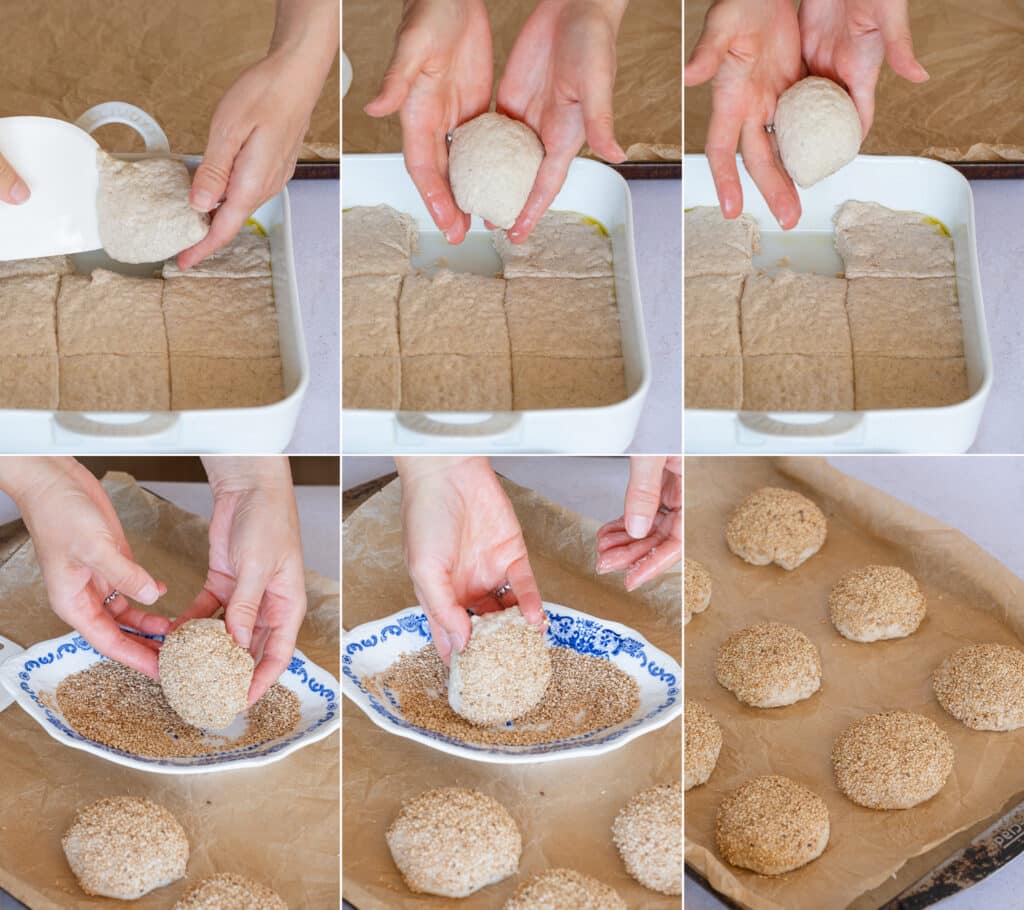
Working with one piece at a time, gently lift it from the proofing dish with both hands and turn it upside down, so the lightly oiled underside is now facing upward. Keeping this smooth side on top, gently round the sides of the dough and tuck them underneath to form a bun, handling the dough as little and as gently as possible.
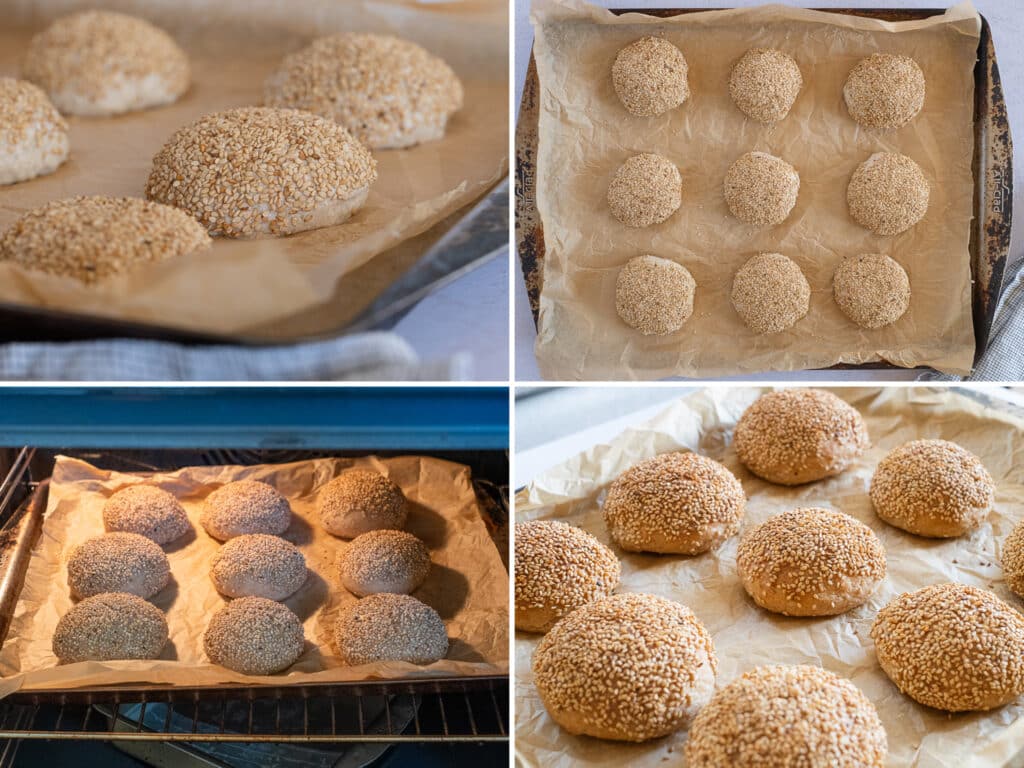
Dip the top of the bun into the sesame seeds, then place it on the prepared baking sheet. Repeat with the remaining pieces. Cover with a towel and let the buns rest for 15 minutes while the oven finishes preheating.
Bake on the middle or lower-middle rack for 20 minutes without opening the oven.
Carefully remove the pan of water, reduce the oven temperature to 230°C (445°F), and continue baking for another 25 minutes.
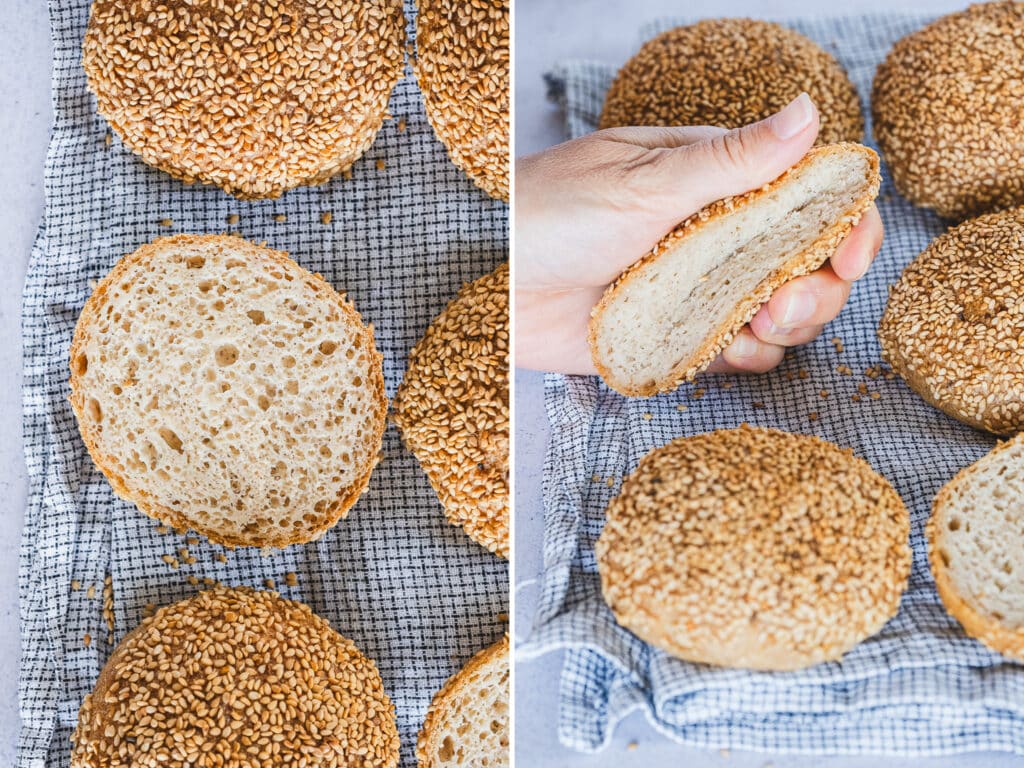
Transfer the buns to a cooling rack immediately after baking and allow them to cool for at least 30-60 minutes before slicing.
Storage and Serving
You can serve these buns fresh, store them at room temperature for up to two days, slice and reheat them in a toaster for a fresh-from-the-oven texture and mouthfeel.
For longer storage, they also freeze beautifully. Freeze them either whole or sliced in half with parchment paper between the halves.
To enjoy them as if freshly baked, place the frozen buns directly on an oven rack in a 200°C (400°F) oven for about 10 minutes. They come out with a wonderfully crisp crust and a soft, fresh interior.
Overnight Cold-Proof Option
Instead of proofing at room temperature, cover the pan immediately after transferring the dough and refrigerate overnight (about 8 hours). Bake the buns the following morning using the same shaping and baking instructions.
I don’t recommend extending the cold proof much beyond 8 hours, as the dough can overproof quite easily.
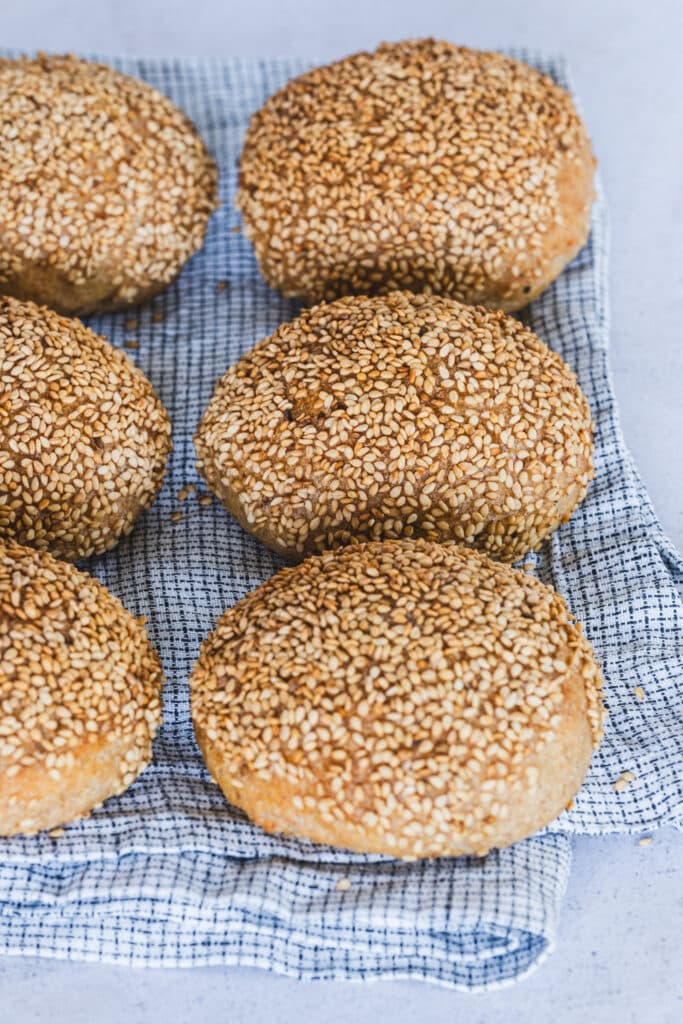
I hope you enjoy these sesame-crusted gluten-free sourdough buns as much as we do!
*This post contains affiliated links, which means I get a small commission if you choose to purchase something via one of my links, at no extra cost to you.
Print
Sesame-Crusted Gluten-Free Sourdough Buns
- Prep Time: 20 minutes
- Fermentation Time: 2 hours
- Cook Time: 45 minutes
- Total Time: 3 hours 5 minutes
- Yield: 9 buns
- Category: Sourdough
- Method: Baking
- Diet: Dairy-Free, Gluten-Free
Description
These sesame-crusted gluten-free sourdough buns are the kind of artisan bread you’d expect to find in a great bakery or café: a thin, lightly crisp crust coated in toasted sesame seeds, a soft, airy crumb, and the naturally nutty flavor of sorghum, millet, and teff. My streamlined shaping method keeps handling to a minimum, making these buns surprisingly easy to prepare while creating the beautiful shape and texture of artisan bakery bread. They bake in under an hour, are ready to enjoy after just 30 to 60 minutes of cooling, and freeze and reheat beautifully. Serve them simply with good butter, aged cheese, homemade jam, or quality cured meats, and you’ll understand why they’re one of the most satisfying recipes I’ve ever created.
Ingredients
For the Preferment (make it 6-10 h before mixing the dough)
- 10 g active gluten-free starter
- 33 g water
- 35 g flour (an equal mix of millet, sorghum, and teff)
Dry Ingredients
- 90 g sorghum flour
- 90 g millet flour
- 50 g teff flour
- 70 g tapioca flour
- 7 g salt
Psyllium Gel
- 17 g whole psyllium husk flakes
- 10 g honey or maple syrup
- 15 g olive oil
- 440 g water
- 75 g active preferment
Additional Ingredients
- Olive oil, for greasing the proofing pan
- About 1/4 cup sesame seeds, for coating
Instructions
- Make the preferment: In a small jar or bowl, combine the gluten-free starter, water, and flour until a smooth, well-hydrated paste forms. Cover loosely and let it ferment at room temperature for 6 to 10 hours, or until active and bubbly. You can prepare the preferment in the morning if you plan to bake in the afternoon, or the evening before if you’ll be baking the following morning.
- In a large bowl, whisk together all of the dry ingredients.
- In a separate bowl, combine the psyllium husk flakes, honey (or maple syrup), olive oil, and 420 g of the water. Stir well and let the mixture sit for about 5 minutes, until it forms a thick gel.
- Add the active preferment. Pour the remaining 20 g water into the preferment jar, swirl it around to loosen any starter clinging to the sides, then add it to the psyllium mixture. Mix until well incorporated.
- Pour the psyllium mixture into the bowl with the dry ingredients. Mix first with a spoon or spatula, then finish with your hands for a few minutes, until no dry flour remains.
- Using a plastic dough scraper, continue developing the dough by scraping it away from the sides of the bowl and folding it toward the center while rotating the bowl. Continue for about 1 minute. If you’ve made other recipes with my method, this dough should feel slightly wetter than my standard loaf dough.
- Let the dough rest for 5 minutes.
- Lightly grease a 9 x 9-inch (23 x 23 cm) ceramic, glass, or plastic square dish with olive oil. (avoid stainless steel). Transfer the dough to the prepared dish (invert it from the bowl to the dish, so not the bottom will be the top), and spread it out evenly with lightly oiled hands so it covers the entire surface. Cover with plastic film, and proof at room temperature (72-74°F / 22-23°C) for about 1 hour and 45 minutes.
- Toward the end of the proofing time, preheat the oven to 250°C (480°F). Place a baking pan filled with boiling water on the bottom rack to create steam. Line a heavy-duty baking sheet with parchment paper.
- Using a dough scraper, divide the dough into 9 equal squares. Working with one piece at a time, gently lift it from the proofing dish with both hands and turn it upside down, so the lightly oiled underside is now facing upward. Keeping this smooth side on top, gently round the sides of the dough and tuck them underneath to form a bun, handling the dough as little and as gently as possible.
- Dip the top of the bun into the sesame seeds, then place it on the prepared baking sheet. Repeat with the remaining pieces. Cover with a towel and let the buns rest for 15 minutes while the oven finishes preheating.
- Bake on the middle or lower-middle rack for 20 minutes without opening the oven.
- Carefully remove the pan of water, reduce the oven temperature to 230°C (445°F), and continue baking for another 25 minutes.
- Transfer the buns to a cooling rack immediately after baking and allow them to cool for at least 30-60 minutes before slicing.
Notes
Overnight cold-proof option: Instead of proofing at room temperature, cover the pan immediately after transferring the dough and refrigerate overnight (about 8 hours). Bake the buns the following morning using the same shaping and baking instructions. I don’t recommend extending the cold proof much beyond this, as the dough can overproof quite easily.
Storage: These buns freeze beautifully and are best stored in the freezer, either whole or sliced in half with parchment paper between the halves. To enjoy them as if freshly baked, place the frozen buns directly on an oven rack in a 200°C (400°F) oven for about 10 minutes. They come out with a wonderfully crisp crust and a soft, fresh interior.
1 Comment
Pernille
July 14, 2026 at 1:04 pmThe best buns ever 🤩