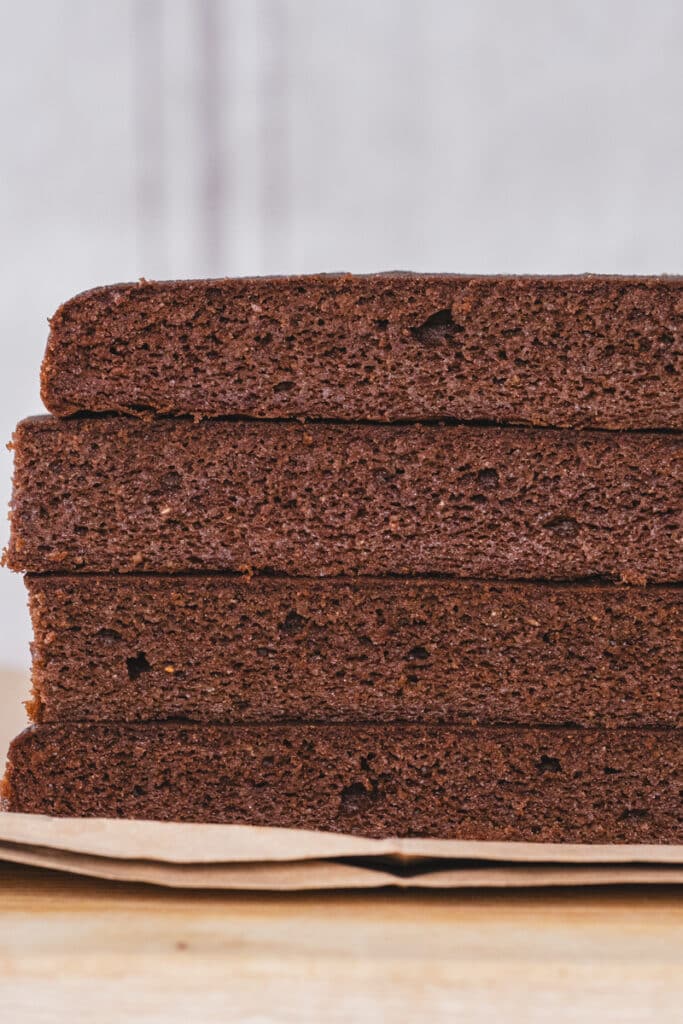
This soft, moist, and naturally sugar-free sheet pan cake has become a staple in my gluten-free, lectin-free kitchen. It’s incredibly versatile, easy to handle, and ready in just 30 minutes—making it a go-to for healthy quick desserts, special occasion layered cakes, and even snack-worthy treats.
The Ultimate Gluten-Free Sheet Cake (Versatile & Easy!)
One of the things I love most about this recipe is how adaptable it is. It works beautifully as a layer cake base, a sheet pan snack cake, or even as a base for truffle cakes.
Here are just a few ways I love to use it:
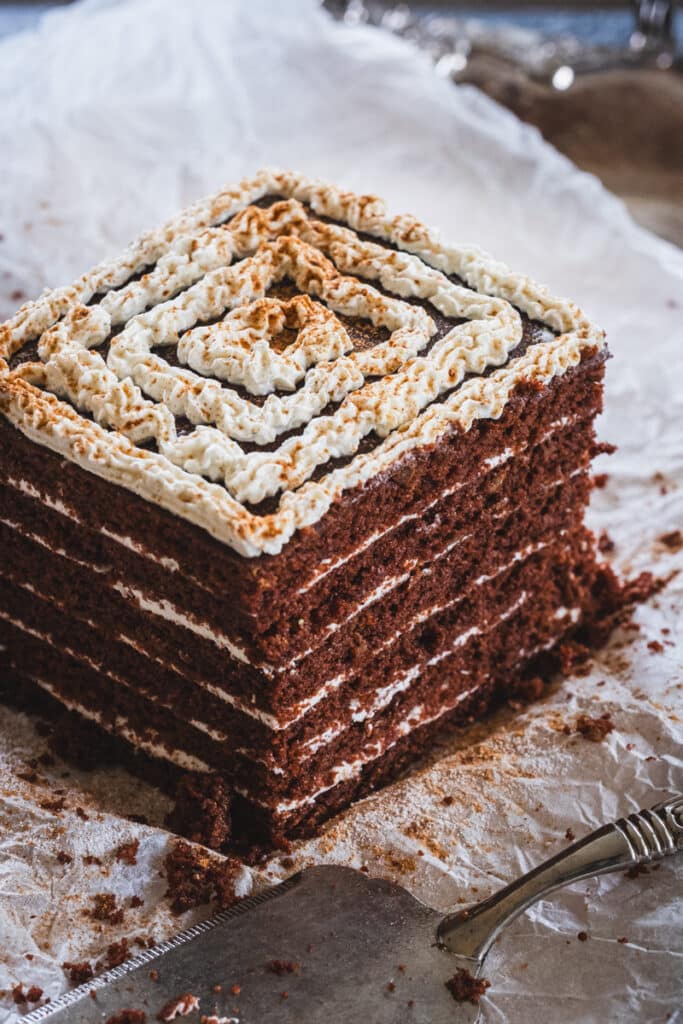
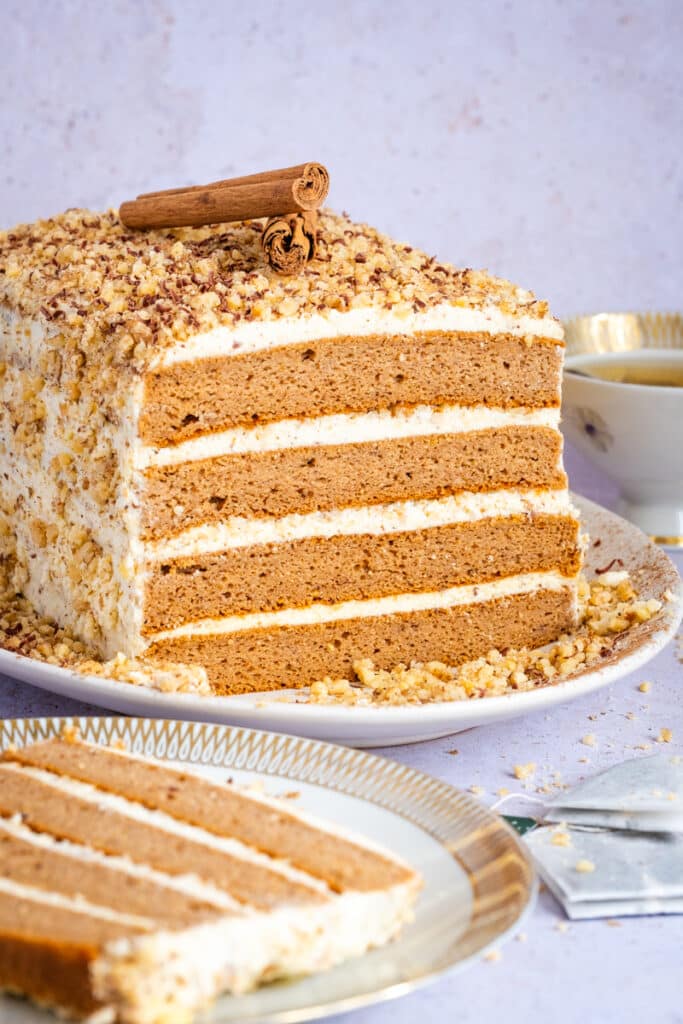
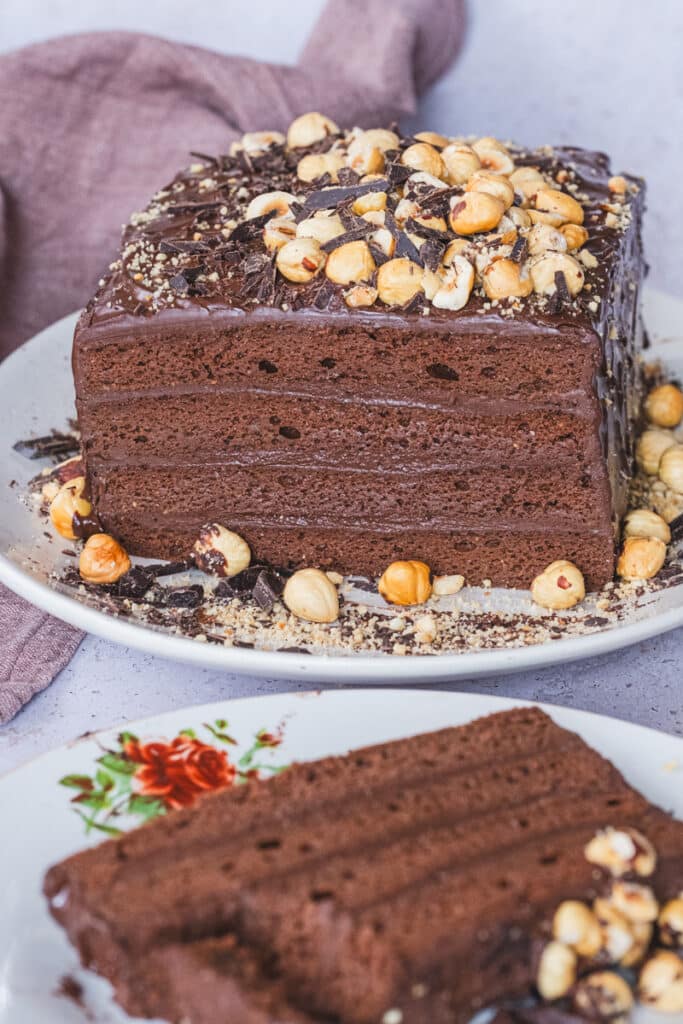
- Festive Layer Cakes – My absolute favorite way to use this cake! While traditional layer cakes are round, I prefer rectangular cakes—I haven’t made a round one in years. This version, with cacao and carob powder, makes an amazing base for my Gluten-Free Chocolate Cake or even a Red Velvet Cake (recipe in my second book, Everyday Low-Lectin Cookbook), with my favorite frosting being made of mascarpone and sour cream. If I want a lighter colored cake (no cacao or chocolate), I simply swap out the cacao and carob for more tapioca or cassava flour, like in my Chai Cake with Brown Butter and Mascarpone Frosting (recipe on my Substack). For a fun twist, you can even substitute tigernut flour with finely ground pistachios and matcha for a gorgeous green cake.
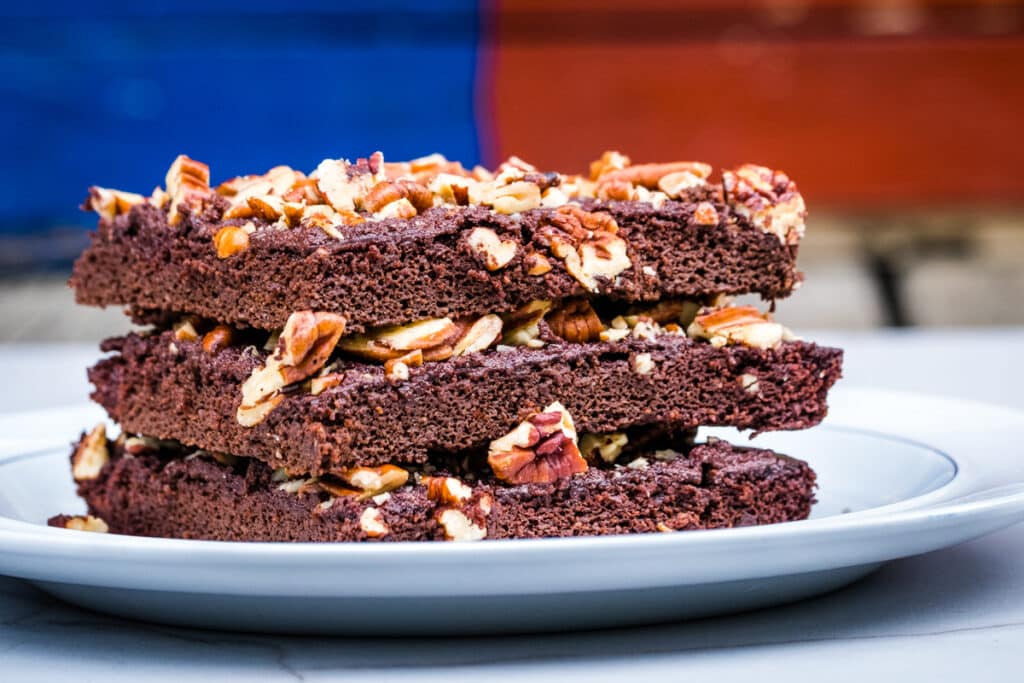
- Sheet Pan Snack Cake – By adjusting the pan size, you can control the thickness of the cake. Top it with frosting, chocolate ganache, nuts, or fresh fruit for a delicious sheet cake. A slight variation of this recipe also makes a fantastic Texas Sheet Cake.
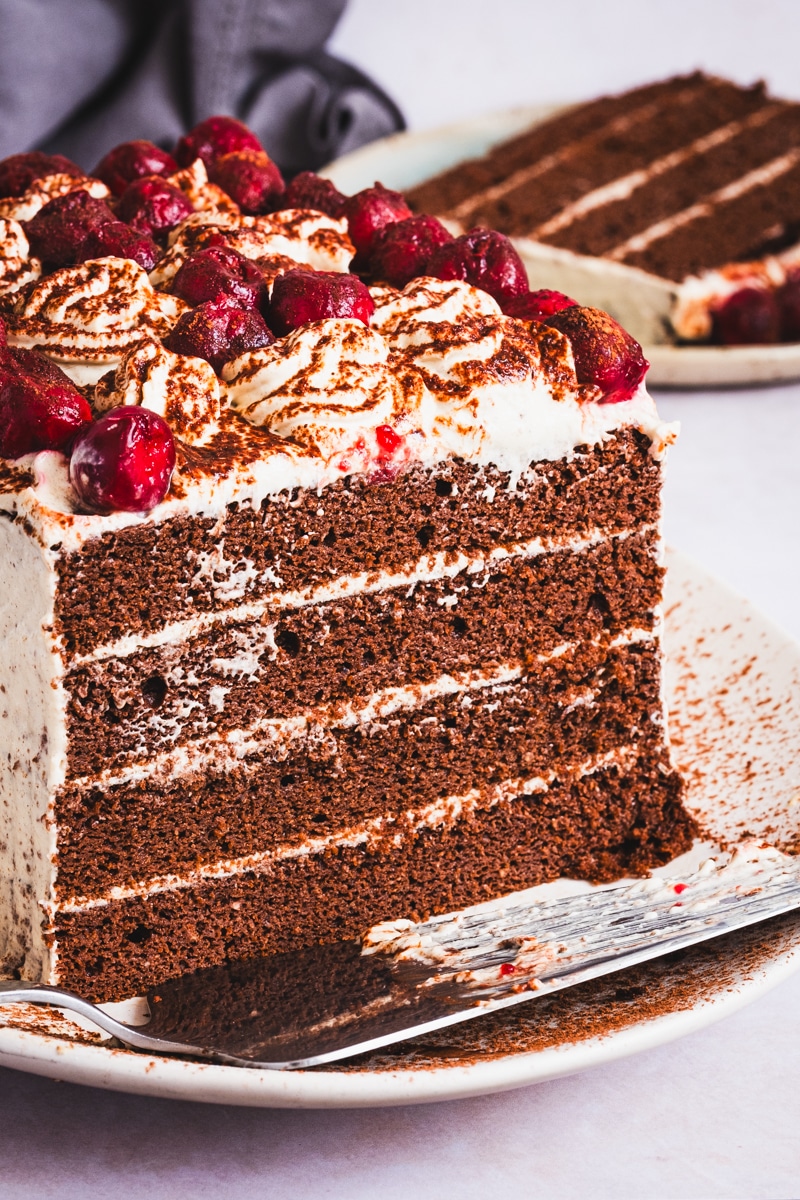
- Truffle Cakes – One of my favorites! I use this as a base for a Black Forest Truffle Cake, layering it with a frosting made of mascarpone, sour cream, and sour cherries for an indulgent, flavor-packed treat (See the link to the frosting recipe at the end of this post).
- Chocolate-Covered Snack Bars – Slice the cake into bars, dip them in melted chocolate, and refrigerate or freeze for a chocolate-coated snack cake that’s perfect for a quick treat.
- Simple Snack Cake – Enjoy a slice on its own! It’s nutrient-dense, lightly sweetened, and pairs perfectly with coffee or tea.
Why You’ll Love This Gluten-Free Sheet Cake
- Gluten-free, lectin-free, and sugar-free
- Relatively low-carb compared to other cakes
- Nutritionally dense & made with whole-food ingredients
- Easy to make, handle, and freeze
- Perfect for layering, frosting, or enjoying as a snack
However you choose to enjoy it, this cake is a blank canvas for creativity—so have fun with flavors, toppings, and presentations! If you try a new variation, I’d love to hear about it.
Here is the full ingredient list and a step-by-step guide with pictures to make this gluten-free sheet cake. At the end of this post, you will find a printable recipe card and nutritional information.
Complete List of Ingredients
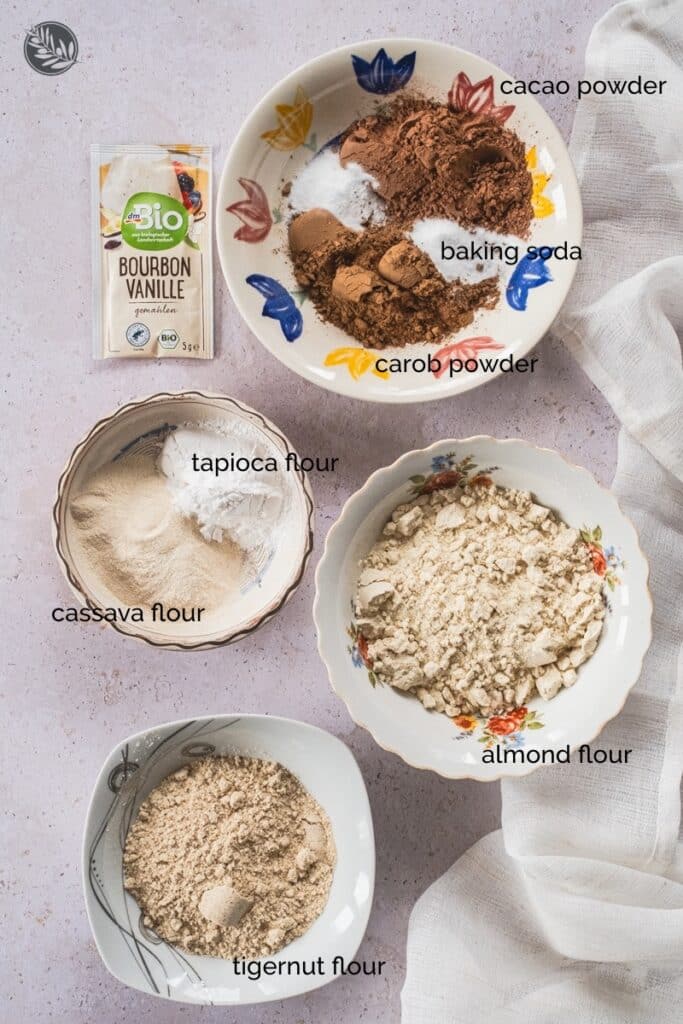
Dry Ingredients
- 1 cup (165g) almond flour
- ½ cup (65g) tigernut flour
- 3 tablespoons (36g) cassava flour
- 3 tablespoons (21g) tapioca starch
- 3 tablespoons raw cacao powder
- 3 tablespoons carob powder
- 2 teaspoons baking soda
- 1 teaspoon vanilla powder (or mix vanilla extract into the wet ingredients)
Note: For a cacao-free cake, you can use only carob powder. For light colored cake layers, you can replace carob and cacao powder with tapioca and/or cassava flour.
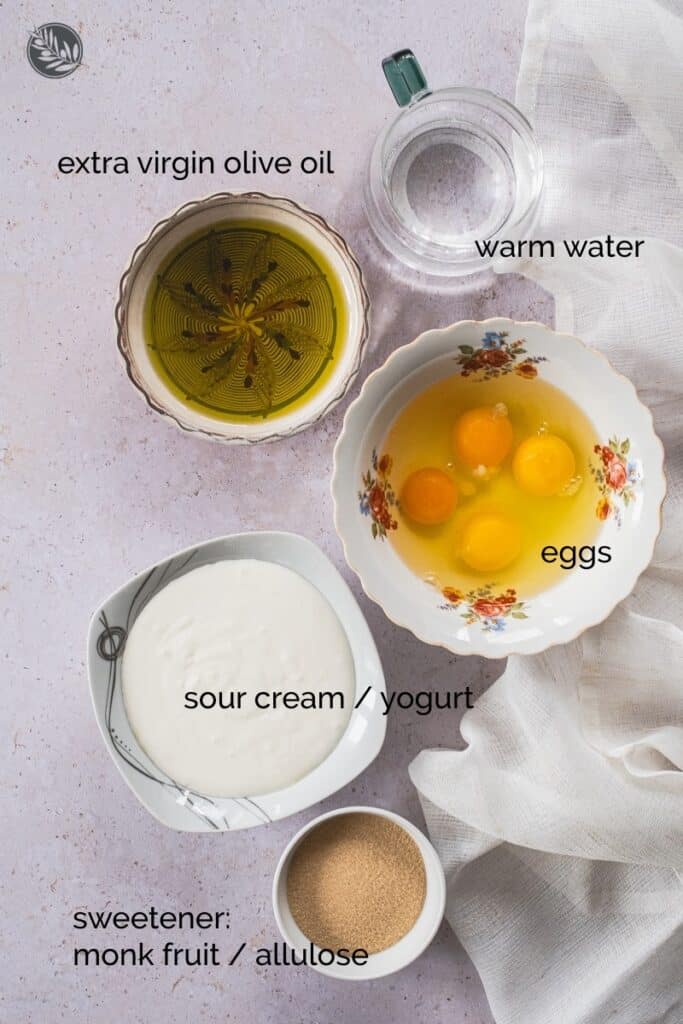
Wet Ingredients
- 4 pastured eggs
- ⅓ cup extra virgin olive oil or avocado oil
- 4 tablespoons granulated allulose or monk fruit sweetener
- ¼ teaspoon salt
- 1 cup high-fat sour cream (or full-fat Greek yogurt, coconut yogurt, sheep/goat yogurt)
- 1 tablespoon apple cider vinegar
- 1½ cups lukewarm water
Step by Step Instructions
Preheat the oven to 350°F (180°C).
Prepare the baking pan:
- The recommended pan size is 35 x 26 cm (13.8 x 10.2 inches), which creates a cake that is thin but sturdy enough for layering.
- For a thicker cake layer, use a quarter sheet pan (33 x 23 cm / 13 x 9 inches).
- For an even thinner layer, use a half sheet pan (46 x 33 cm / 18 x 13 inches). Thinner layers work best for layer cakes.
Line the pan with parchment paper, trimming it so it extends just slightly above the edges.
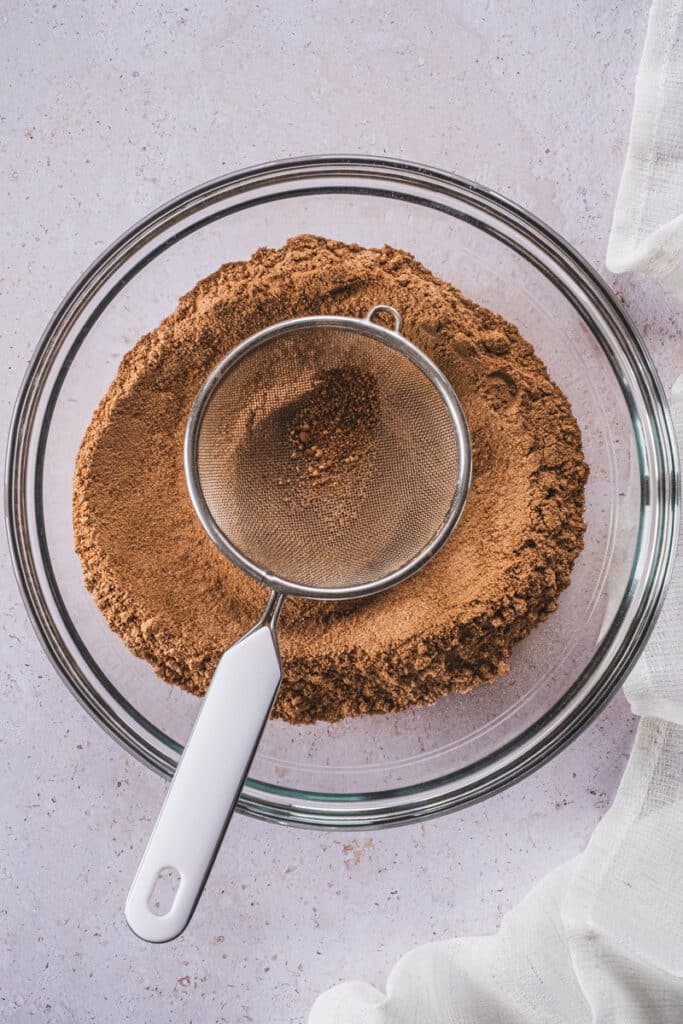
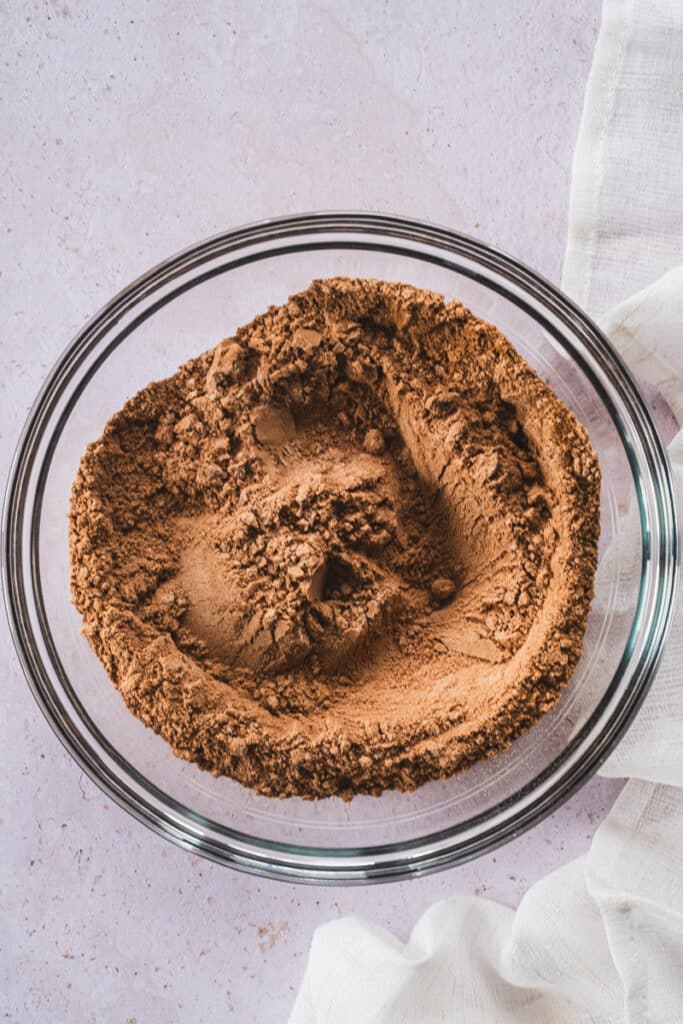
Prepare the dry ingredients: Sift all the dry ingredients into a large mixing bowl. Discard any larger pieces that don’t pass through the sieve.
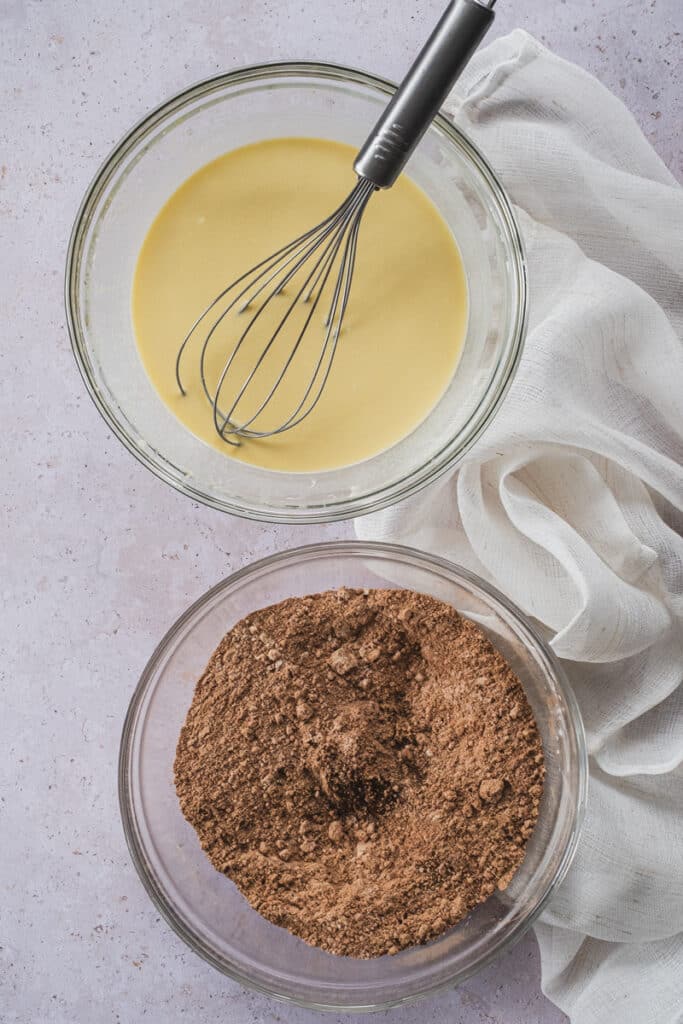
Prepare the wet ingredients: In a separate mixing bowl, whisk together the eggs, sweetener, olive oil, and salt until well emulsified. Add the sour cream (or yogurt) and apple cider vinegar, mixing until just combined. Do not overmix.
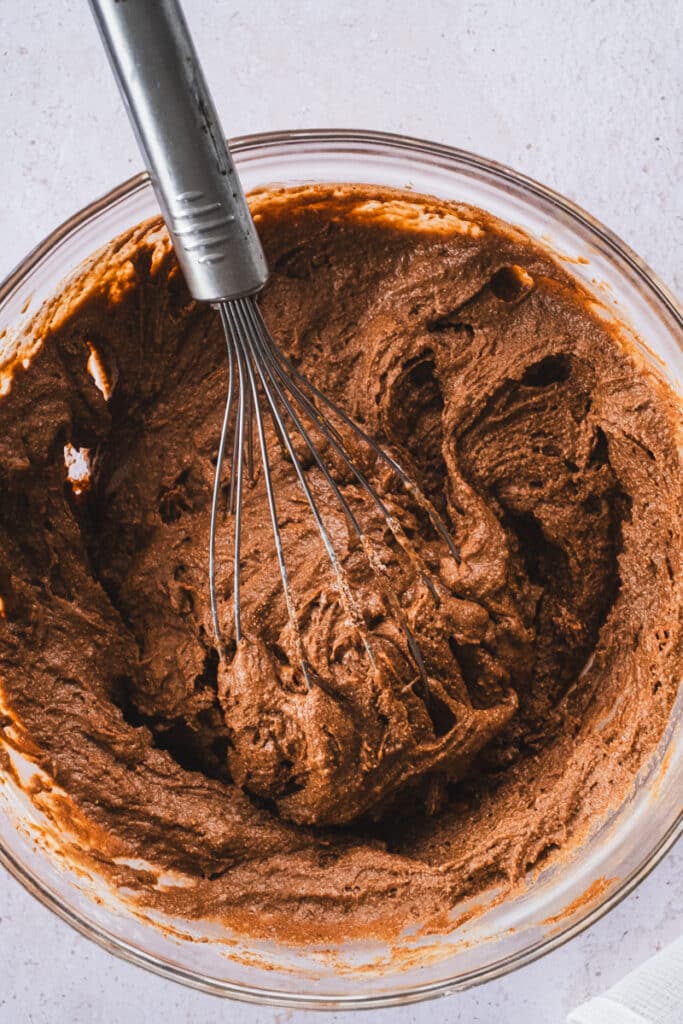
Combine wet and dry ingredients: Pour the wet mixture into the dry ingredients and whisk until a thick batter forms. Gradually add the lukewarm water while whisking, until the batter reaches a thick but pourable consistency, similar to pancake batter. Adjust water if needed.
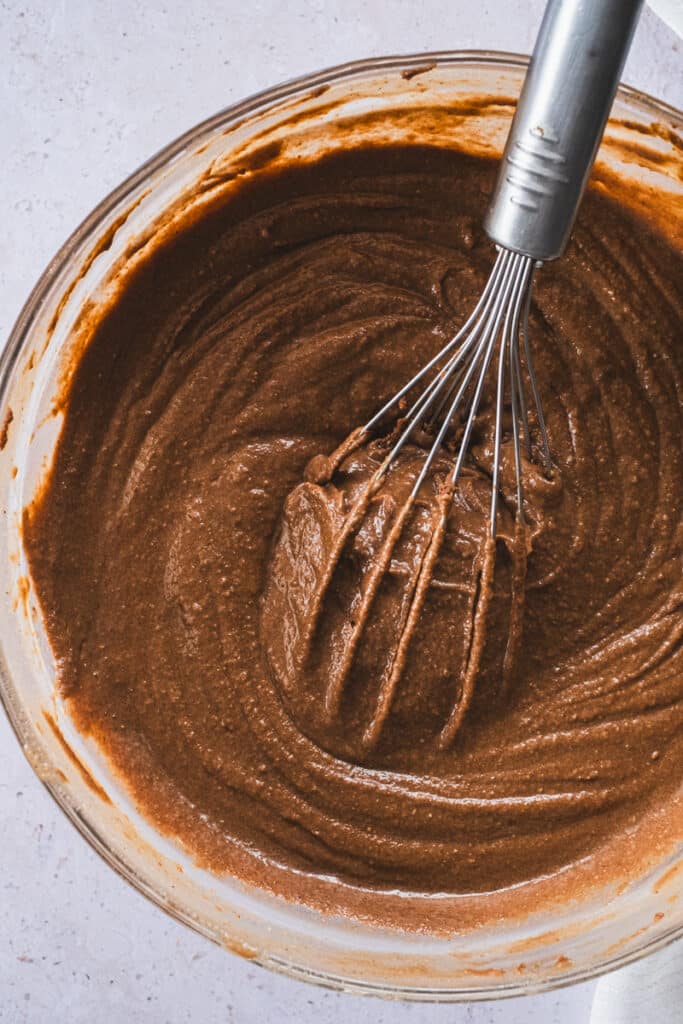
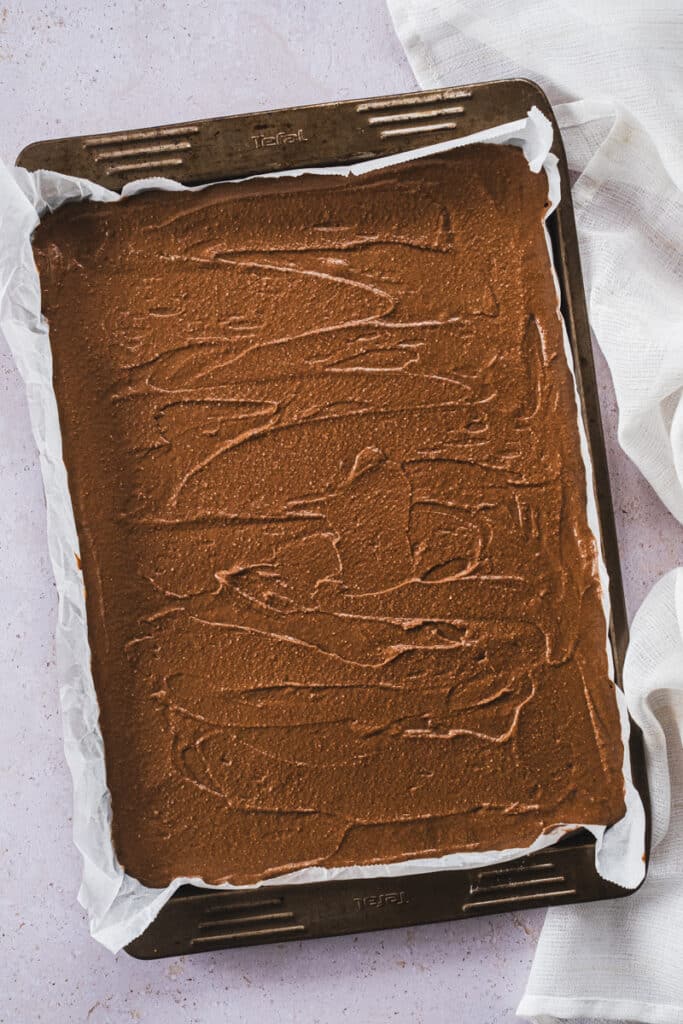
Bake the cake: Pour the batter into the prepared baking sheet and spread it evenly with a spatula. Tap the pan gently on the counter to remove air bubbles.
- For a 35 x 26 cm (13.8 x 10.2 in) pan, bake for 15 minutes.
- For a quarter sheet pan (33 x 23 cm / 13 x 9 in), baking time may be slightly longer.
- For a half sheet pan (46 x 33 cm / 18 x 13 in), the layer will be thinner and may bake faster, so check earlier.
The cake is done when the top is dark brown and firm to the touch.
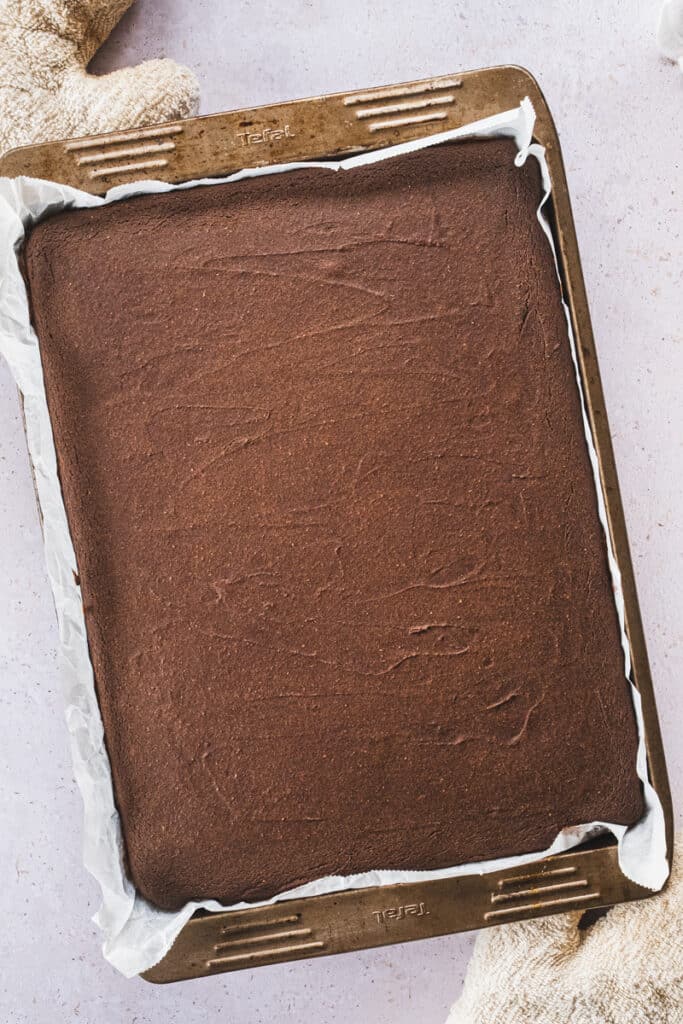
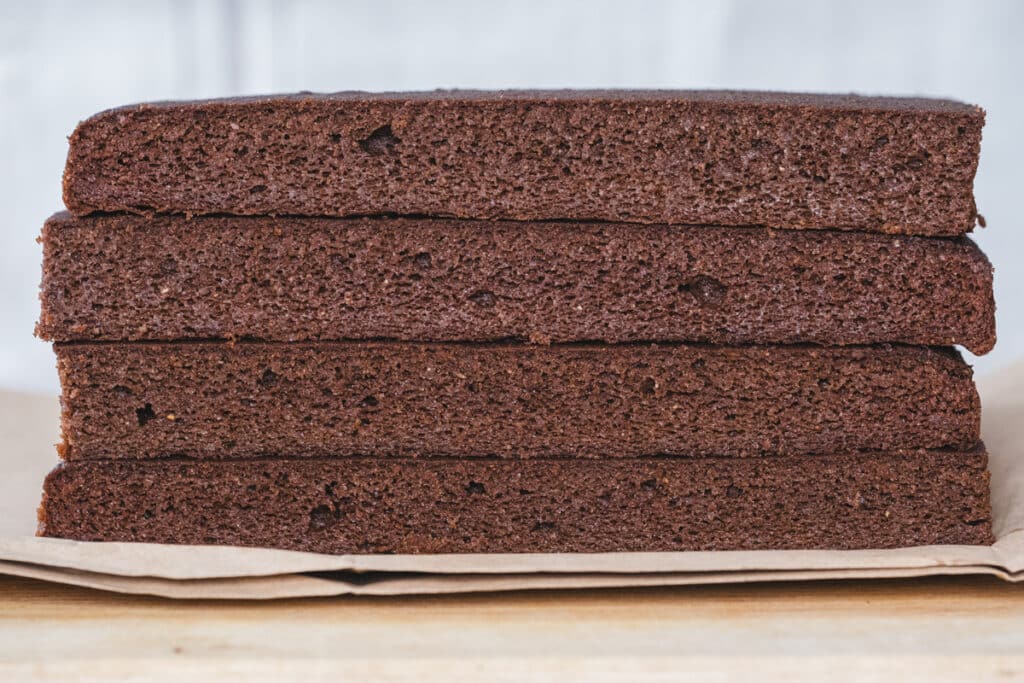
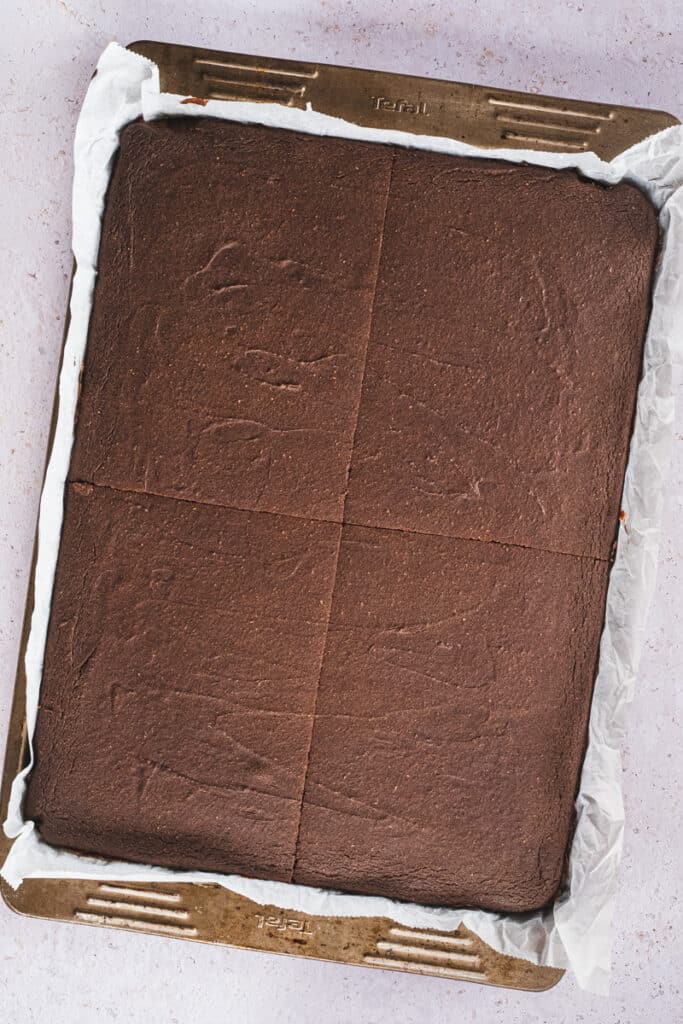
Cool and cut: Let the cake cool completely before cutting.
- For a layer cake, cut it into four equal rectangles.
- For a frosted sheet pan cake, cut it into squares. If piping frosting, cut before frosting; if spreading frosting over the entire cake, cut afterward.
Storage & Freezing: These cake layers freeze beautifully. Stack them with parchment paper between layers and store them in a freezer bag on a flat surface. To thaw, remove from the freezer, open the bag, and let it sit at room temperature for about an hour.
Enjoy it as a base for festive layered cakes or as a simple, satisfying snack!
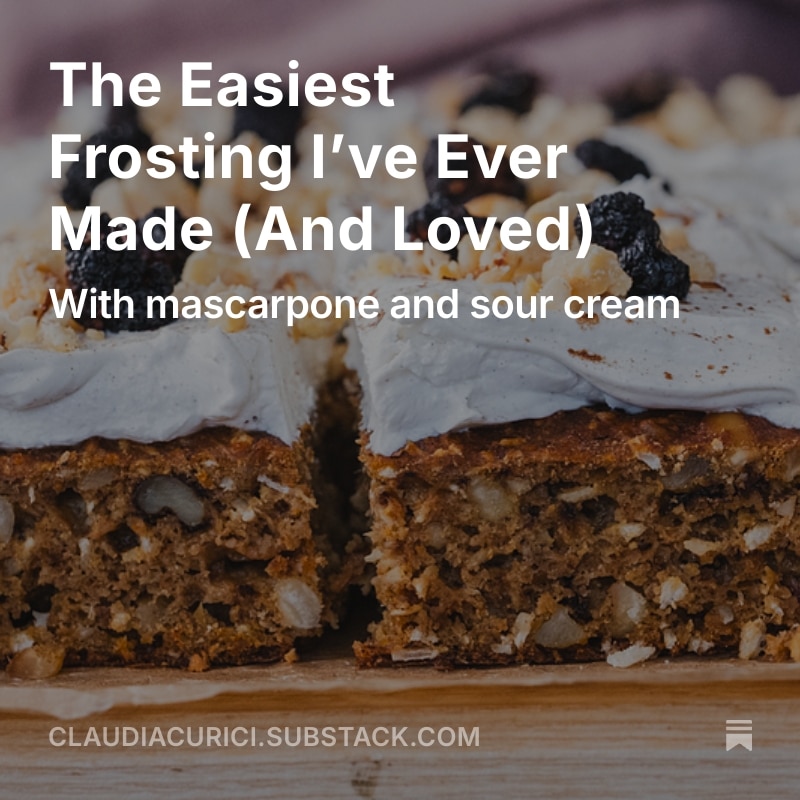
The Perfect Frosting for Your Gluten-Free Layer Cake
My favorite frosting to pair with these gluten-free layer cakes is incredibly simple and delicious—made with just four ingredients: Italian mascarpone, cultured sour cream, pure vanilla, and a touch of natural sweetener (you can choose your favorite). It comes together in under five minutes and is wonderfully versatile, complementing a wide range of flavors and cake styles.
You’ll find the full frosting recipe over on my Substack, where I share ad-free content supported by readers like you. For less than the price of a coffee each month, you’ll gain access to exclusive recipes, nourishing meal plans, and reflections on food and wellness that I hope will inspire and support you in your kitchen and beyond.
More Sugar-Free and Gluten-Free Desserts
Looking for ways to indulge your sweet tooth without sacrificing your health goals? Our collection of over 30 delicious and healthy sugar-free dessert recipes is here to inspire you for any occasion.
*This post contains affiliated links, which means I get a small commission if you choose to purchase something via one of my links, at no extra cost to you.
Print
Easy Gluten-Free Sheet Cake (Perfect for Layered Cakes)
- Prep Time: 15 minutes
- Cook Time: 15 minutes
- Total Time: 30 minutes
- Yield: 10
- Category: Dessert
- Method: Baking
- Diet: Gluten-Free
Description
This versatile sheet pan cake is soft, moist, and naturally gluten-free and sugar-free. It’s perfect for layering in cakes or enjoying as a snack.
Ingredients
Dry Ingredients
- 1 cup (165g) almond flour
- ½ cup (65g) tigernut flour
- 3 tablespoons (36g) cassava flour
- 3 tablespoons (21g) tapioca starch
- 3 tablespoons raw cacao powder
- 3 tablespoons carob powder
- 2 teaspoons baking soda
- 1 teaspoon vanilla powder (or mix vanilla extract into the wet ingredients)
Wet Ingredients
- 4 pastured eggs
- ⅓ cup extra virgin olive oil
- 4 tablespoons granulated allulose or monk fruit sweetener
- ¼ teaspoon salt
- 1 cup high-fat sour cream (or full-fat Greek yogurt, coconut yogurt, sheep/goat yogurt)
- 1 tablespoon apple cider vinegar
- 1½ cups lukewarm water
Instructions
- Preheat the oven to 350°F (180°C).
- Prepare the baking pan: Line the pan with parchment paper, trimming it so it extends just slightly above the edges.
- Prepare the dry ingredients: Sift all the dry ingredients into a large mixing bowl. Discard any larger pieces that don’t pass through the sieve.
- Prepare the wet ingredients: In a separate mixing bowl, whisk together the eggs, sweetener, olive oil, and salt until well emulsified. Add the sour cream (or yogurt) and apple cider vinegar, mixing until just combined. Do not overmix.
- Combine wet and dry ingredients: Pour the wet mixture into the dry ingredients and whisk until a thick batter forms. Gradually add the lukewarm water while whisking, until the batter reaches a thick but pourable consistency, similar to pancake batter. Adjust water as needed.
- Bake the cake: Pour the batter into the prepared baking sheet and spread it evenly with a spatula. Tap the pan gently on the counter to remove air bubbles. The cake is done when the top is dark brown and firm to the touch, about 15 minutes for the recommended pan size. Check notes for more details.
- Cool and cut: Let the cake cool completely before cutting. For a layer cake, cut it into four equal rectangles. For a frosted sheet pan cake, cut it into squares. If piping frosting, cut before frosting; if spreading frosting over the entire cake, cut afterward.
- Storage & Freezing: These cake layers freeze beautifully. Stack them with parchment paper between layers and store them in a freezer bag on a flat surface. To thaw, remove from the freezer, open the bag, and let it sit at room temperature for about an hour.
- Enjoy as a base for layered cakes or as a simple, satisfying snack!
Notes
- The recommended pan size is 35 x 26 cm (13.8 x 10.2 inches), which creates a cake that is thin but sturdy enough for layering. This will take 15 minutes to bake.
- For a thicker cake layer, use a quarter sheet pan (33 x 23 cm / 13 x 9 inches). Bake slightly longer.
- For an even thinner layer, use a half sheet pan (46 x 33 cm / 18 x 13 inches). Thinner layers work best for layer cakes. A thinner layer will bake faster, so keep an eye on it after 10-12 minutes.
- For more details, substitutions, and variations, as well as a visual guide, check out the post above the recipe card.
3 Comments
Veronica Tugui
February 23, 2026 at 8:43 amHi, what can I replace the tiger nut flour with?
But casava flour?
Thank you!
Claudia
February 24, 2026 at 3:07 amHi Veronica! This recipe is created to work with tigernut flour. Yes, theoretically other flour might work, but I can’t say if it’s a 1:1 substitution. One thing is for sure: tigernut flour is naturally sweet and has a good taste, while lets say if you use cassava, it will be bland, no taste in itself, so the final taste of the cake won’t be the same. So if you use cassava, maybe you need to increase sweetener, and add some more flavor and spices? Also, nutritionally, the cake will be different. I hope this helps. -Claudia
Christian
October 14, 2025 at 8:22 amThis simple sheet cake recipe makes it easy to create a delicious, gluten-free layer cake for any occasion.